This month, I saw the Netlify-Hashnode hackathon 🤩 and immediately knew I found the excuse to spend my time bringing my prolonged idea to life.
Have you ever wanted to share a link with a long link with a friend, but it seems way too long to send through a message (maybe it's a base-64 image URI), so you might turn towards URL shorteners, nothing special?
But try to imagine, along with the shortening functionality, what if you could have a lot more. I mean, track all the clicks (or hits) on the URL that you shortened and get very-deep insights about the person who clicked it, like:
- Their 💻 device information, including model, operating system, etc.
- Their 👩💻 browser name and version
- Their 🌎 IP location, along with their ISP name, their city, rough coordinates, etc.
And much more! 🤯

And to add the cherry on the top, you could host it yourself on your custom domain! Infact, it was created to be self-hosted, for people on the self-hosted community
Doesn't that sound like the time to switch from Bitly and stop paying the premium, and stop being limited by 100 links/month?

I will try to keep this article more of a follow-the-right-track or a guide towards the process of creating a good web app, because a lot more goes in than just coding, and I will hopefully inspire someone along the way 😃
I've used the following technologies to create the application:
The following technologies were involved in the making of this project.
- React JS ⚛️ - For the frontend of the app
- Apollo GraphQL Server v3 🕸️ - For querying the backend from the frontend efficiently
- GraphQL Template By Mohit 🧩 - Boilerplate Template used for initializing the backend
- Prisma 💿 - The ORM used for the app
- MySQL(https://www.prisma.io/docs/reference/database-reference/supported-databases) for the database
- Netlify for hosting the app
- Redux 🗺️ w/ Redux Toolkit - For handling states across the application
- React Hook Form - For managing and validating forms and text inputs.
- Styled Components 💅 - For adding CSS to the application
- IP registry API 🌐 - For obtaining 🏛 ISP, geolocation, etc. information for the IP address
(This is going to be a long one, and this part isn't important, but if you want to enjoy the blog, I suggest reading)
So now that you decided to read this, here starts the back-story. The story starts by me being in 11th standard, getting interested into hosting my discord bot without heroku-imposed, cpu-hour-based restrictions, which frustrated everyone when they ran out.

While my friends were busy implementing rate-limits on each server the bot was in, I was finding for an alternate hosting solution, one where there was complete freedom over how much server members could enjoy my discord bot, and listen to music sourced through YouTube, all while being in any voice channel.
But downloading the music in mp3, convert to a stream through FFmpeg, and then broadcasting it to the bot for everyone to listen, was way too much for even a generous free-hosting services like Heroku (for those wondering, the bot was written with dicord.py and Vercel wasn't a thing back then).

So I got to YouTube and heard something about VPSs and web-servers, then fearing I would have to learn terminal commands and bash scripting, I started to slowly reject the idea, since it was way too nightmarish because of the stigma that movies have made around people using literally any terminal - THEY ARE HACKERS.
But after trying it on DigitalOcean with my GitHub education pack, it turns out it's not that hard, and after learning a few basic commands, you're set free for years to come. We're getting too off-topic here, so will discuss in later blogs.
Now, after a few months of diving deeper and learning about self-hosted software, I wanted to shorten links filled with gibberish random texts, and wanted to have some extra power apart from what Bitly or any paid alternatives provide. So, I decided to get my own URL shortener to host on my under-used server.
And here comes the revelation. After searching and browsing through many open-source URL shorteners, I wasn't able to find one that was good-enough for me to install, and that was written in JavaScript based technologies (so that I could tinker it to make it record even the IP address).

After much resentment and laziness, I slowly started to consider creating my own URL shortener a real decision. The pros being, that I would have infinite design choices that I can make, host it anywhere I wanted, and the best part, learn some new things and get some open-source attention along the way. After being this inspired, I got to the usual cycle.
[The process gets typical from this point]
I started out by planning the structure and the requirements of the app. Alright, I needed to track all the clicks with their IPs, wanted to know more about their devices from the headers that the browser sent, and... that's it!
All I wanted to achieve was laid out, and I had to bring the idea to life.
But I still had to jot down my ideas so that I don't forget the little details. Started out by writing everything in broad detail in Notion.
"Along with the IPs, I also need the time that the person clicked the link, their ISPs, anything useful I can get from the IP, ..." and the list goes on. This is what the final notion file looked like:

After this, I had a clear path to follow and thankfully did not forget about any detail, such as implementing total click count, adding hover effects, etc. So I took references while doing the design
Now, I just needed to think of a name for the app, and this is where I screwed. The thing is, I wanted the name of the app to represent a certain action the user would do in the app, like packing the
Then I got to the interesting part, designing.

Usually when I create a pet project, I just use the designing from the previous projects I was working on, since they won't get noticed anyway. But with this one, I wanted it to reach to the top of the list of open source URL shorteners. I had self-doubts about whether I would be able to reach the goal with my experience, but you are free to judge.
So, I started by looking for inspiration. The best place for this was dribbble. I went to the inspiration tab. Many people would create the best design they could without any inspiration, but as Pablo Picasso (may have) said:
Good artists create, great artists steal
That's one way to put it, but the point is: with the amount of design experience and the height of the goals I had, I just wasn't going to be able to create a good-enough design overninght if I started from scratch. Hence, the searching.
After endless scrolling, similiar-sounding keywords and hard-to-make choices, I decided to go with this design, because it just looked great for the purpose I was looking for. There were many fancy ones too, but they just weren't practical, or too flashy for the typical programmer that was going to host it (if Pckd was even going to be successful).
The original design was good, but it wanted something more, like the colour customization, planning out exactly where everything would go, and creating an exact mock-up of how the app would look. I find this approach very useful, because you don't have to scratch your head over minor details that would otherwise go unnoticed while planning, and you have to go to the sketch board all over again.
So the inspiration design for the dashboard looked like this:

And here's what the final design looked like:

(I know they look totally different, or at least barely-related, but the inspiration image really helped with the design aspects, and most of the compliments I received are a result of that)
As for the other pages, I created the homepage out of just my imagination. Here's how it looked:

And the signup pages:
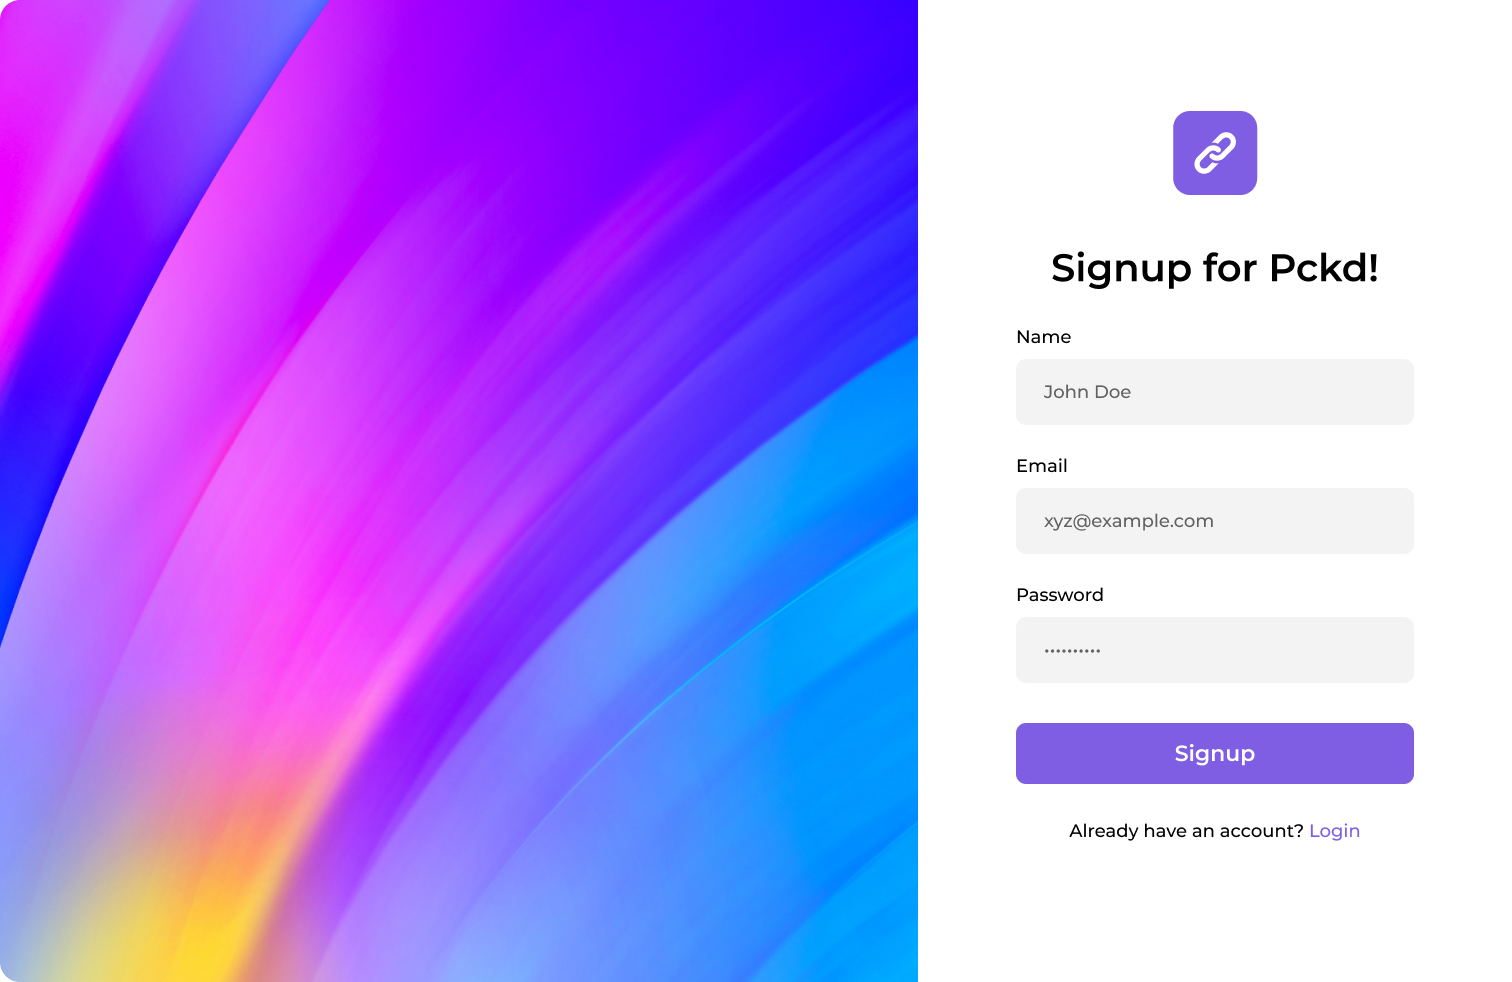
The designs looked good in my opinion, and I was dead-set to implement the most design-accurate version of this with react and try to not mess up the margins or paddings somewhere. This marked the end of the designing and planning part of the app. Not bad, right?
For the backend, I started out by forking a backend template repo (made by me ;), because it contains a file-based structure, just like next-js, but with backend. It also has authentication baked in, so we don't have to do the hassle of setting everything up.
Ok, I want to have a hits table, a user table, and that's it. Oh! Forgot the pckd table, the main one! After all these conversations in my mind, I was ready with the following database schema
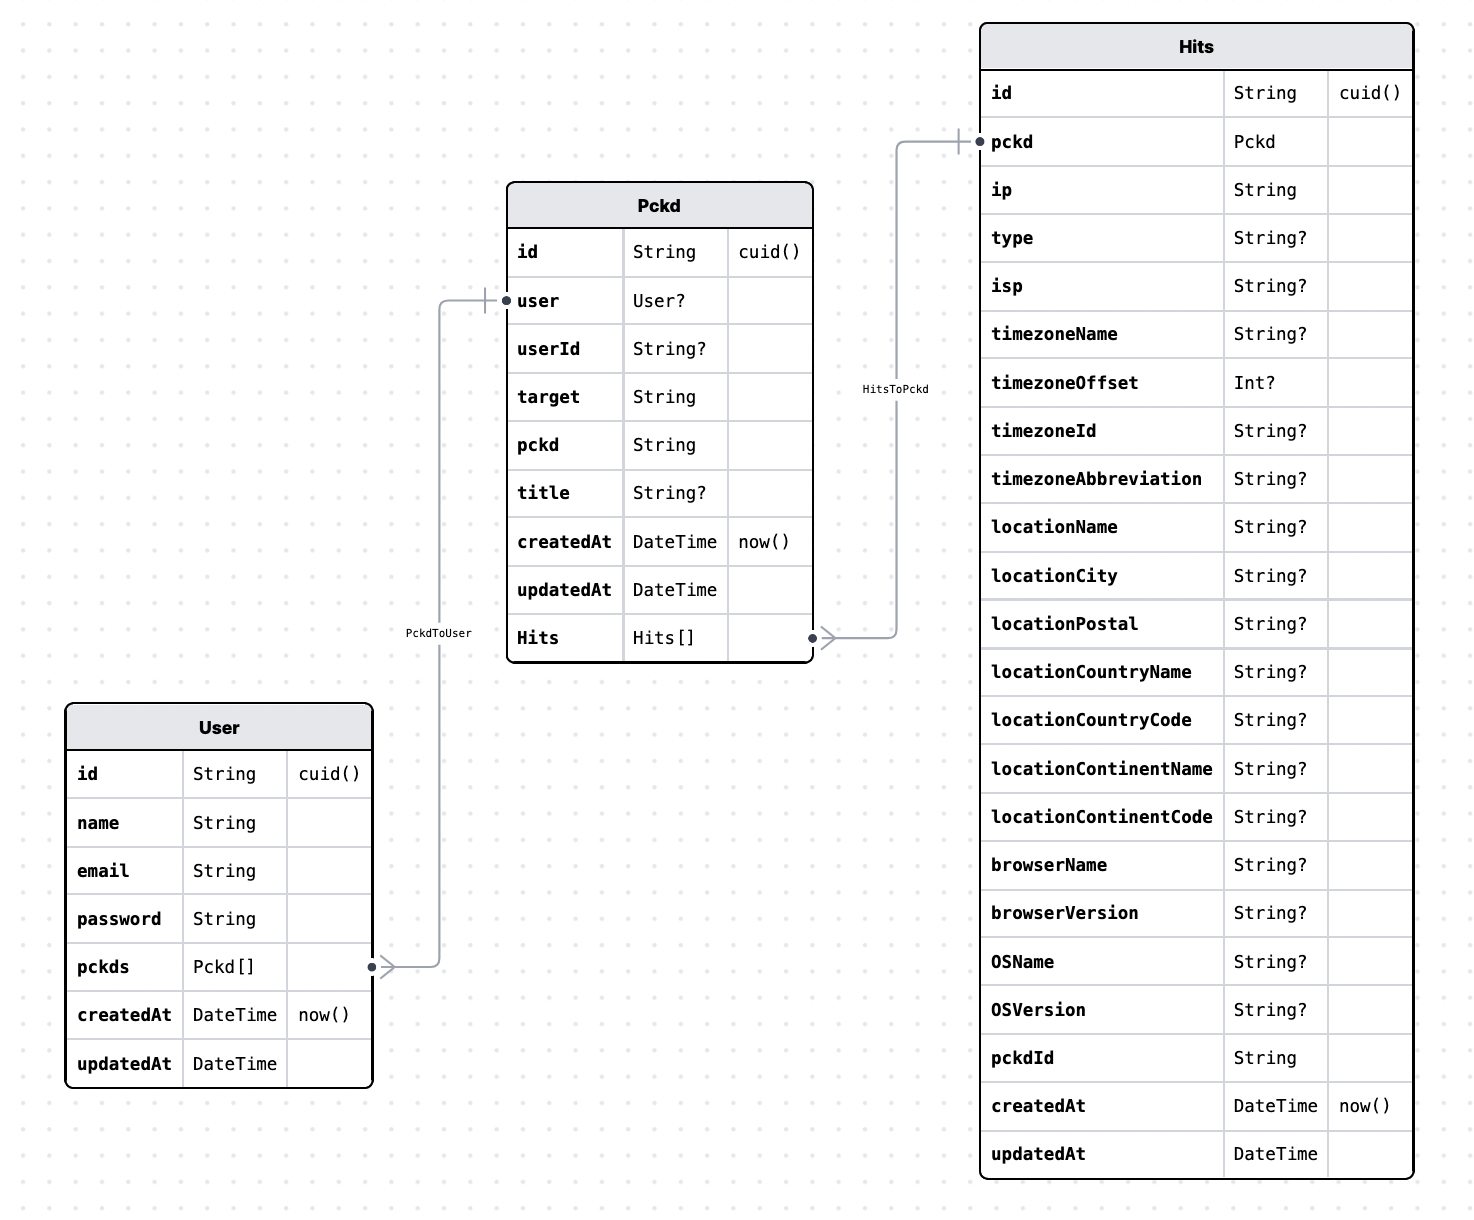
I created the database through the Prisma schema, and it ended up working great.
This is how the finished file structure looked like:
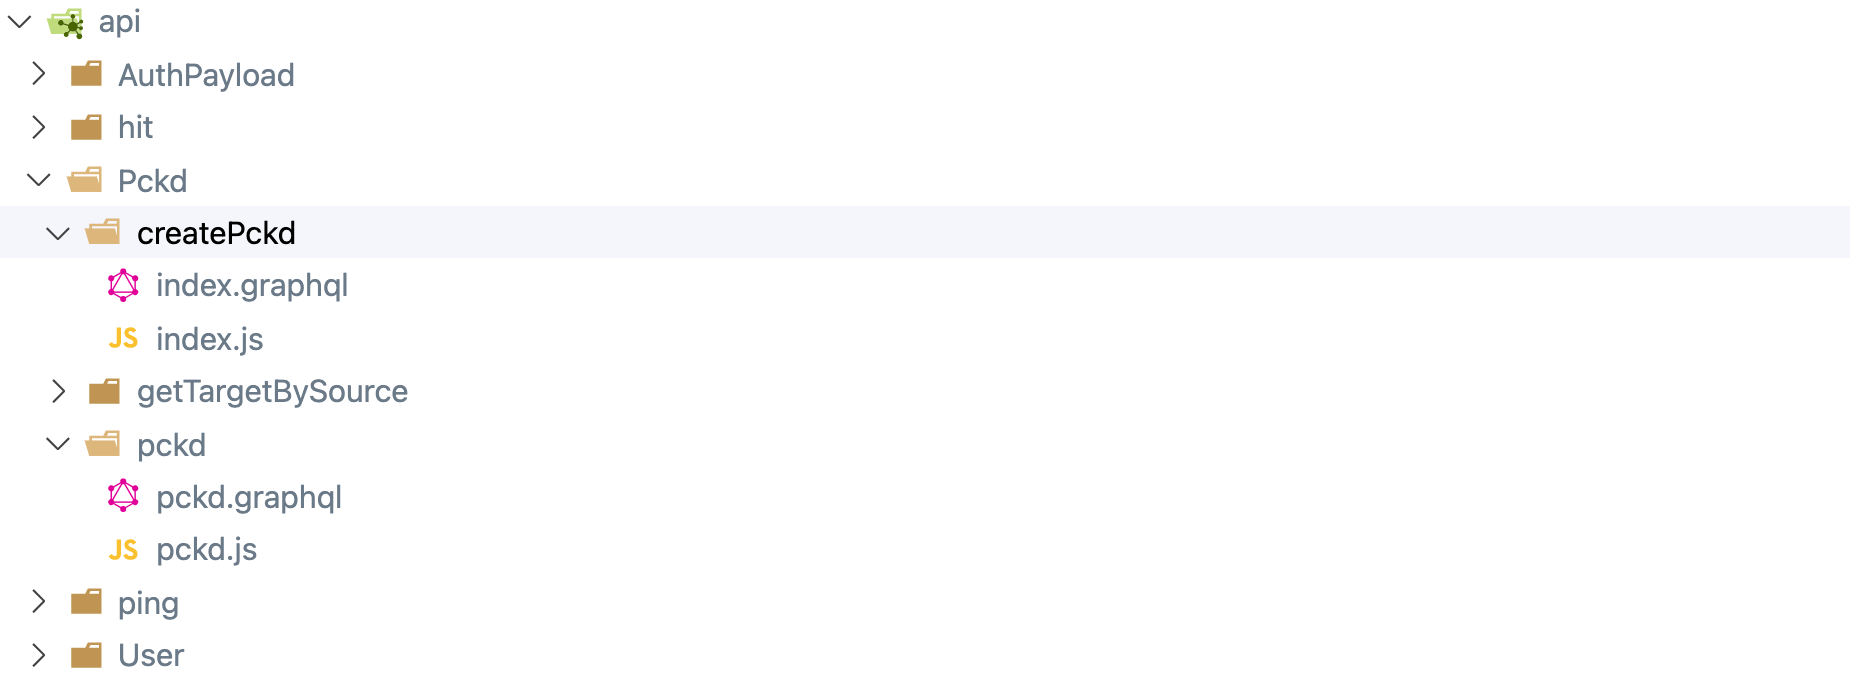
Adding a new route is just as easy as creating a new file in the directory, like for the user type, api/ping/user.graphql file needed to be created. This is how it looked like:
type User {
  id: ID!
  pckds: [pckd!]
  name: String!
  email: String!
  createdAt: String!
  updatedAt: String!
}
And For the resolving the users' pckd logic:
module.exports = {
  User: {
    pckds: async (parent, args, { prisma }) => {
      const pckds = await prisma.pckd.findMany({
        where: {
          userId: parent.id,
        },
      });
      return pckds;
    },
  },
};
As simple as creating an export file. You should definitely try this method of creating backends out. Little boilerplate, powerful APIs. 😃💪
For combining the files to create a single instance of typeDef and resolvers, I used the following code
const path = require("path");
const { loadFilesSync } = require("@graphql-tools/load-files");
const { mergeTypeDefs, mergeResolvers } = require("@graphql-tools/merge");
const { makeExecutableSchema } = require('@graphql-tools/schema');

const typeDefs = loadFilesSync(path.join(__dirname, "/api/**/*.graphql"));
const resolvers = loadFilesSync(path.join(__dirname, "/api/**/*.js"));

const schemaWithResolvers = makeExecutableSchema({
  typeDefs: mergeTypeDefs(typeDefs),
  resolvers: mergeResolvers(resolvers),
});

module.exports = schemaWithResolvers;
This would combine all the files ending with the .js and .graphql extension from the api and it's sub-folder into a single typedef and resolvers variable.
For those who are new to graphql or haven't used apollo graphql before, Apollo provides a great interface for testing and creating queries, just like postman, but for Graphs, and much more powerful.
%[https://www.loom.com/share/9425d5fa3f724bf4aeed45b503d4b259]
And creating APIs with GraphQL never gets easier

For the frontend, I used React with the Create-react-app template, because it was easiest to work with and I didn't use NextJS because the app didn't have much about SEO.
Along with react, I used Redux, and Apollo-graphql-client to query the backend, because the global state was shared accross multiple components. Also, I wanted to learn redux and what other way to learn than to implement it yourself. (But it turned out to be an overkill 😅).

The typical react development pattern continues... At the end, we have a polished URL-shortener application that's fully customizable and ready to be delpyed.
After creating the app, I wanted people to be able to use it and it could be easily self hosted. Since the frontend was created with plain react (no SSR like NextJS), it could be easily built o static files and then served using the NodeJS backend server itself.

So I deployed the API on the graphql route, and the static react files on the / route using ExpressJS. This combination turned out to be pretty awesome, since there'd be no need to setup anything else to serve the files (like nginx on linux), and everything could run on a single process.

The best part about this project is, even though I did not get any good impressions at first, but was slowly able to unknowingly learn a lot through this journey. Some of the things that are remarkable enough to make this 'already-long' article, any-more longer are:
The thing is simple: stuff take too long to implement. Creating prototypes and designing everything in figma or on paper before touching any code will save a lot of time and will power, and there would be no reason to go back to the drawing board after spending a day on a feature. I learned it the hard way 😅
When adding minor changes to the UI or the backend, certain things could go wrong. In such a case, the user is the one who gets frustrated and the creator suffers the loses. After deploying my app to the server, I forgot to check if it was running (poor me). I then proceeded to post about it on forums, only to be
While approaching to get first-impressions on certain communities, to get the app tested, I added way too much emojis and graphics in the description, that maybe I lost some credibility.
Creating an app that requires some level of file-permissions, and doing it without credibility is like executing a .exe file downloaded from someone on discord.
This journey of creating the app had been very challenging and fun at the same time. I got to learn a lot of stuff that I didn't know and that helped me grow in major ways. Mastering these skills and making Pckd a leader in self-hosted URL shorteners is my goal with this project.
I hope you liked the article. If you did, you know the drill, if you found this post helpful, please share it with your friends and followers. And if you have any questions or comments, please feel free to leave them below.
Until then, happy coding!
