Windows Driver Setup (10:48)
|
Mac Driver Setup (5:57)
|
ADB Over Network (1:27)
|
Check Controller Version (1:01)
|
Check Your Safe Area (3:36)
|
Install Games Remotely (0:55)
|
Video Editing in MS Movie (3:45)
|
Adding Video Screenshots (3:09)
|
ElGato Capture Setup (4:03)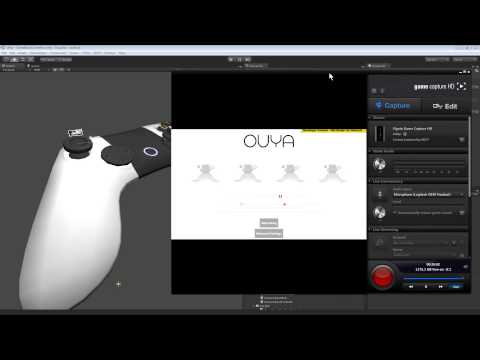
|
Mac Overscan Setup (1:07)
|
To fully complete the setup, you will need:
- an OUYA
- a computer running Mac OS X or Windows
- a Micro USB to USB cable (or Wifi/Ethernet Connection)
Java JDK6 is used in the signing process and the Java runtime is necessary to run the Android SDK. JDK6 includes useful tools like jarsigner which is necessary to sign your Android apps before publishing in the OUYA store.
Java for OS X 2014-001 includes JDK6 which is no longer installed by default.
JDK6 for Windows is found in an archive section on the Oracle website. Both 32-bit and 64-bit versions of JDK6 will work.
The Android SDK is necessary for building applications and games on the Android platform.
The Android SDK includes useful tools and platform-tools. The Android debugger adb has many uses including deploying applications to the OUYA.
zipalign is used by engines to package Android apps and games.
SDK Manager handles installation and updating the Android SDK build tools, packages and platforms.
- Install the
Build Toolswith the SDK platforms for API 16: Android 4.1 (Jelly Bean) and API 21: Android 5.0 (Lollipop).

- Install the
Extras\Android Support LibraryandGoogle USB Driver.

The marqueed items in red are suggested installs.
On Mac/Linux, you can skip installing the usb driver.
-
You have the option of connecting with ADB using a micro USB cable.
-
You have the option fo connecting with ADB using tcpip.
- Note: Developer settings allow switching between connection methods in Manage->System->Development->ADB Over Network.
- If connected over the network, you can connect adb with the following command. Where IP:Port come from the settings page.
adb connect IP:port
Before continuing, make sure your OUYA is powered and not connected to your computer.
-
Download and install the Android SDK and tools to your Mac following the included instructions.
-
You will need to add some paths to PATH. Assuming you have put the SDK folder in the location
~/Development/adt-bundle-mac-x86_64, open a terminal and add the following three lines to your~/.bash_profile:export PATH=$PATH:~/Development/adt-bundle-mac-x86_64/sdk/tools export PATH=$PATH:~/Development/adt-bundle-mac-x86_64/sdk/platform-tools export ANDROID_HOME=~/Development/adt-bundle-mac-x86_64/sdkYou will need to adjust the above paths to match the name of your bundle directory.
Make sure to
source ~/.bash_profileonce you've made these changes. -
Launch the Android SDK Manager by running (detailed instructions):
android sdkInstall the following packages:
Note: Some of these packages may be pre-installed with the Android SDK and tools bundle.
Tools: Android SDK and Android SDK Platform tools
API 16: Android 4.1 (Jelly Bean): SDK Platform (without Google APIs)
API 21: Android 5.0 (Lollipop): SDK Platform (without Google APIs)
Extras: Android Support Library
Install the Java runtime if prompted.
-
Important: There should be no carriage return after the hex value. Any blank lines in this file will result in an error. Add the following line to
~/.android/adb_usb.ini(create it if it doesn't exist) for your OUYA console to be recognized:0x2836 -
Connect your OUYA to your Mac (Micro USB to USB) then run the following commands:
 adb kill-server
 adb devices
Your console should be shown in the list of available devices.
- To add the Android SDK to your path go to the
Systemin theControl Panel.ClickonAdvanced System Settings.

Clickon theAdvanced TabandClickonEnvironment Variables.

- Select
PathinSystem VariablesandClickonEdit.

Pathsare separated with semi-colons and add the full path to thesdk\platform tools(the path will depend on where you installed the Android SDK).

Pathsare separated with semi-colons and add the full path to thesdk\tools(the path will depend on where you installed the Android SDK).ClickonOK.RelaunchtheCommand-Promptto use the newpath.

Windows 8 users: You will need to disable driver signature verification to install the unsigned Android driver. This involves restarting your PC so do this before you start. See here for step-by-step instructions.
-
Download and install the Android SDK and tools to your PC following the included instructions.
-
Launch SDK Manager.exe in the ADT Bundle directory. (detailed instructions):
Install the following packages:
Note: Some of these packages may be pre-installed with the Android SDK and tools bundle.
Tools: Android SDK and Android SDK Platform tools
API 16: Android 4.1 (Jelly Bean): SDK Platform (without Google APIs)
API 21: Android 5.0 (Lollipop): SDK Platform (without Google APIs)
Extras: Android Support Library
Install the Java runtime if prompted.
-
You will need to add some paths to PATH. Assuming you put the ADT bundle at
C:/Development/adt-bundle-windows-x86_64,Open My Computer.
In the left panel, right-click on Computer and choose Properties.
In the left panel of the new window, choose Advanced system settings.
Click the button Environment Variables... in the new window. In the first table (User variables), highlight the row for the Path variable.
Click the Edit... button immediately below the User Variables table.
Append the following to the end of the Variable value field:;C:/Development/adt-bundle-windows-x86_64/sdk/tools;C:/Development/adt-bundle-windows-x86_64/sdk/platform-toolsNote #1: If the Path variable didn't already exist, remove the semi-colon at the beginning.
Note #2: You will need to adjust the above paths to match the name of your bundle directory.Press OK to save your changes.
Press OK to exit the Environment Variables window.
Press OK to exit the Advanced System Settings window. -
Open the
ADT Bundle\sdk\extras\google\usb_driver\android_winusb.inffile. -
Add the following lines to the
[Google.NTx86]and[Google.NTamd64]sections:;OUYA Console %SingleAdbInterface% = USB_Install, USB\VID_2836&PID_0010 %CompositeAdbInterface% = USB_Install, USB\VID_2836&PID_0010&MI_01 -
Important: There should be no carriage return after the hex value. Any blank lines in this file will result in an error. Connect your OUYA to your PC (Micro USB to USB), open Command Prompt (Win+R then type cmd), and run the following commands
adb kill-server echo 0x2836 >> "%USERPROFILE%\.android\adb_usb.ini" adb start-server -
Open the Device Manager (Right-click My Computer->Properties->Device Manager)
-
In Device Manager, find Portable Devices\OUYA Console.
-
Right-click and choose Update Driver Software...
-
Choose Browse my computer for driver software
-
Choose Let me pick from a list of device drivers on my computer
-
On Windows 8, select All devices and click Next
-
Click Have Disk and browse to Android Bundle\sdk\extras\google\usb_driver
-
Choose ADB Composite Device The Google device driver is not signed which prevents automatic from finding it.
-
Accept the unsigned driver
Your console should be shown in the list of available devices.
- Be sure to install the ADT Plugin for Eclipse.
First step, turn on line numbers:
Window -> Preferences -> General -> Editors -> Text Editors -> Show line numbers.
If you're using Eclipse as your development environment, you can create Eclipse projects from the samples included in the ODK to get a working example running quickly.
- Open Eclipse
- From the menu, select File > New > Project
- In the new project dialog, select Android > Android Project from Existing Code. Click the Next button.
- In the Import Projects dialog, click the Browse button.
- From the file browser that appears, navigate to the root directory of the sample app you want to use. For example,
OUYA-ODK/Samples/game-sample. Then click the Open button. - In the Import Projects dialog, click the Finish button.
This will create a working Eclipse project. If your OUYA console is connected, you can run the sample application from the Eclipse menu Run > Run.
Use the min platform with API 16: Android 4.1 (Jelly Bean) and the target platform with API 21: Android 5.0 (Lollipop) when developing for the Forge TV Console.
In order to use the OUYA API you will need to include ouya-sdk.jar in your project libraries. This can be found in the libs directory.
For information on the API commands available, please consult the OUYA API reference documentation.
To run the sample code, open up the project in iap-sample-app and follow the instructions in the README.txt file.
For your application or game to be recognized as made for OUYA, you will need to include an OUYA intent category on the manifest entry of your main activity. Use “tv.ouya.intent.category.GAME” or “tv.ouya.intent.category.APP”.
<activity android:name=".GameActivity" android:label="@string/app_name">
  <intent-filter>
    <action android:name="android.intent.action.MAIN"/>
    <category android:name="android.intent.category.LAUNCHER"/>
    <category android:name="tv.ouya.intent.category.GAME"/>
  </intent-filter>
</activity>
The application image that is shown in the launcher is embedded inside of the APK itself. The expected file is in res/drawable-xhdpi/ouya_icon.png and the image size must be 732x412.
When you exit the app and/or open the system menu, any ongoing game audio should be paused or stopped. Your app is responsible for managing its own audio. Failing to do so may be grounds for review process failure.
When the system overlay menu opens (e.g. when the system button is held or double tapped) the framework broadcasts a sticky intent with the action tv.ouya.intent.action.OUYA_MENU_APPEARING (also defined in OuyaIntent).
You can set up a BroadcastReceiver for this either dynamically or statically.
Statically:
<application>
    ...
    <receiver android:name=".MyBroadcastReceiver">
        <intent-filter>
            <action android:name="tv.ouya.intent.action.OUYA_MENU_APPEARING" />
        </intent-filter>
    </receiver>
    ...
</application>
public class MyBroadcastReceiver extends BroadcastReceiver {
@Override
public void onReceive(Context context, Intent intent) {
if(intent.getAction().equals(OuyaIntent.ACTION_MENUAPPEARING)) {
//pause music, free up resources, etc.
}
}
}Or dynamically:
mContext.registerReceiver(new BroadcastReceiver{
    @Override
    public void onReceive(Context context, Intent intent) {
        //pause music, free up resources, etc.
    }
}, new IntentFilter(OuyaIntent.ACTION_MENUAPPEARING));Developing for OUYA requires having an OUYA-supported device: an OUYA console, or a M.O.J.O.
You can develop your game on another device, but you will be unable to use the extra functionality included int he ODK without a supported device. If you need to, you can buy one here!
All applications are provided with a 1080p virtual display for their output. This virtual display is then rendered to the screen in an appropriate manner. This may include downscaling the 1080p display to 720p where the screen does not support 1080p, or to 480p if a screen does not report it supports 720p or 1080p via an HDMI connection.
For OpenGL-based games, we recommend creating a render buffer of 1920x1080 (i.e. 1080p) or 1280x720 (720p). If this does not match the display resolution of your device it will be up or downscaled accordingly by the OUYA.
Other Android devices may handle resolutions differently, but our store QA process will always test on an OUYA, so it is advisable to test any applications on an OUYA before submitting them to the OUYA store.
For games using the Android UI Framework, the Android documentation from Google at developer.android.com provides some useful tips when working with 1080p displays.
For capturing video of your game, we recommend using Elgato and the capture software. Here is a setup and tutorial video.
Documentation is a key part of the software development process for apps and games. Markup is a common format for documentation and is also used heavily in the OUYA documentation. MacDown is a free markup editor for the Mac.