You can get all of the components on AliExpress or any similar site.
- Geiger counter kit. Search for "diy geiger counter" ( ~30 EUR )
- Ethernet module W5500. ( ~3 EUR )
- Arduino Nano ( ~2 EUR )
- Jumper wires
- Stable 5V power supply.
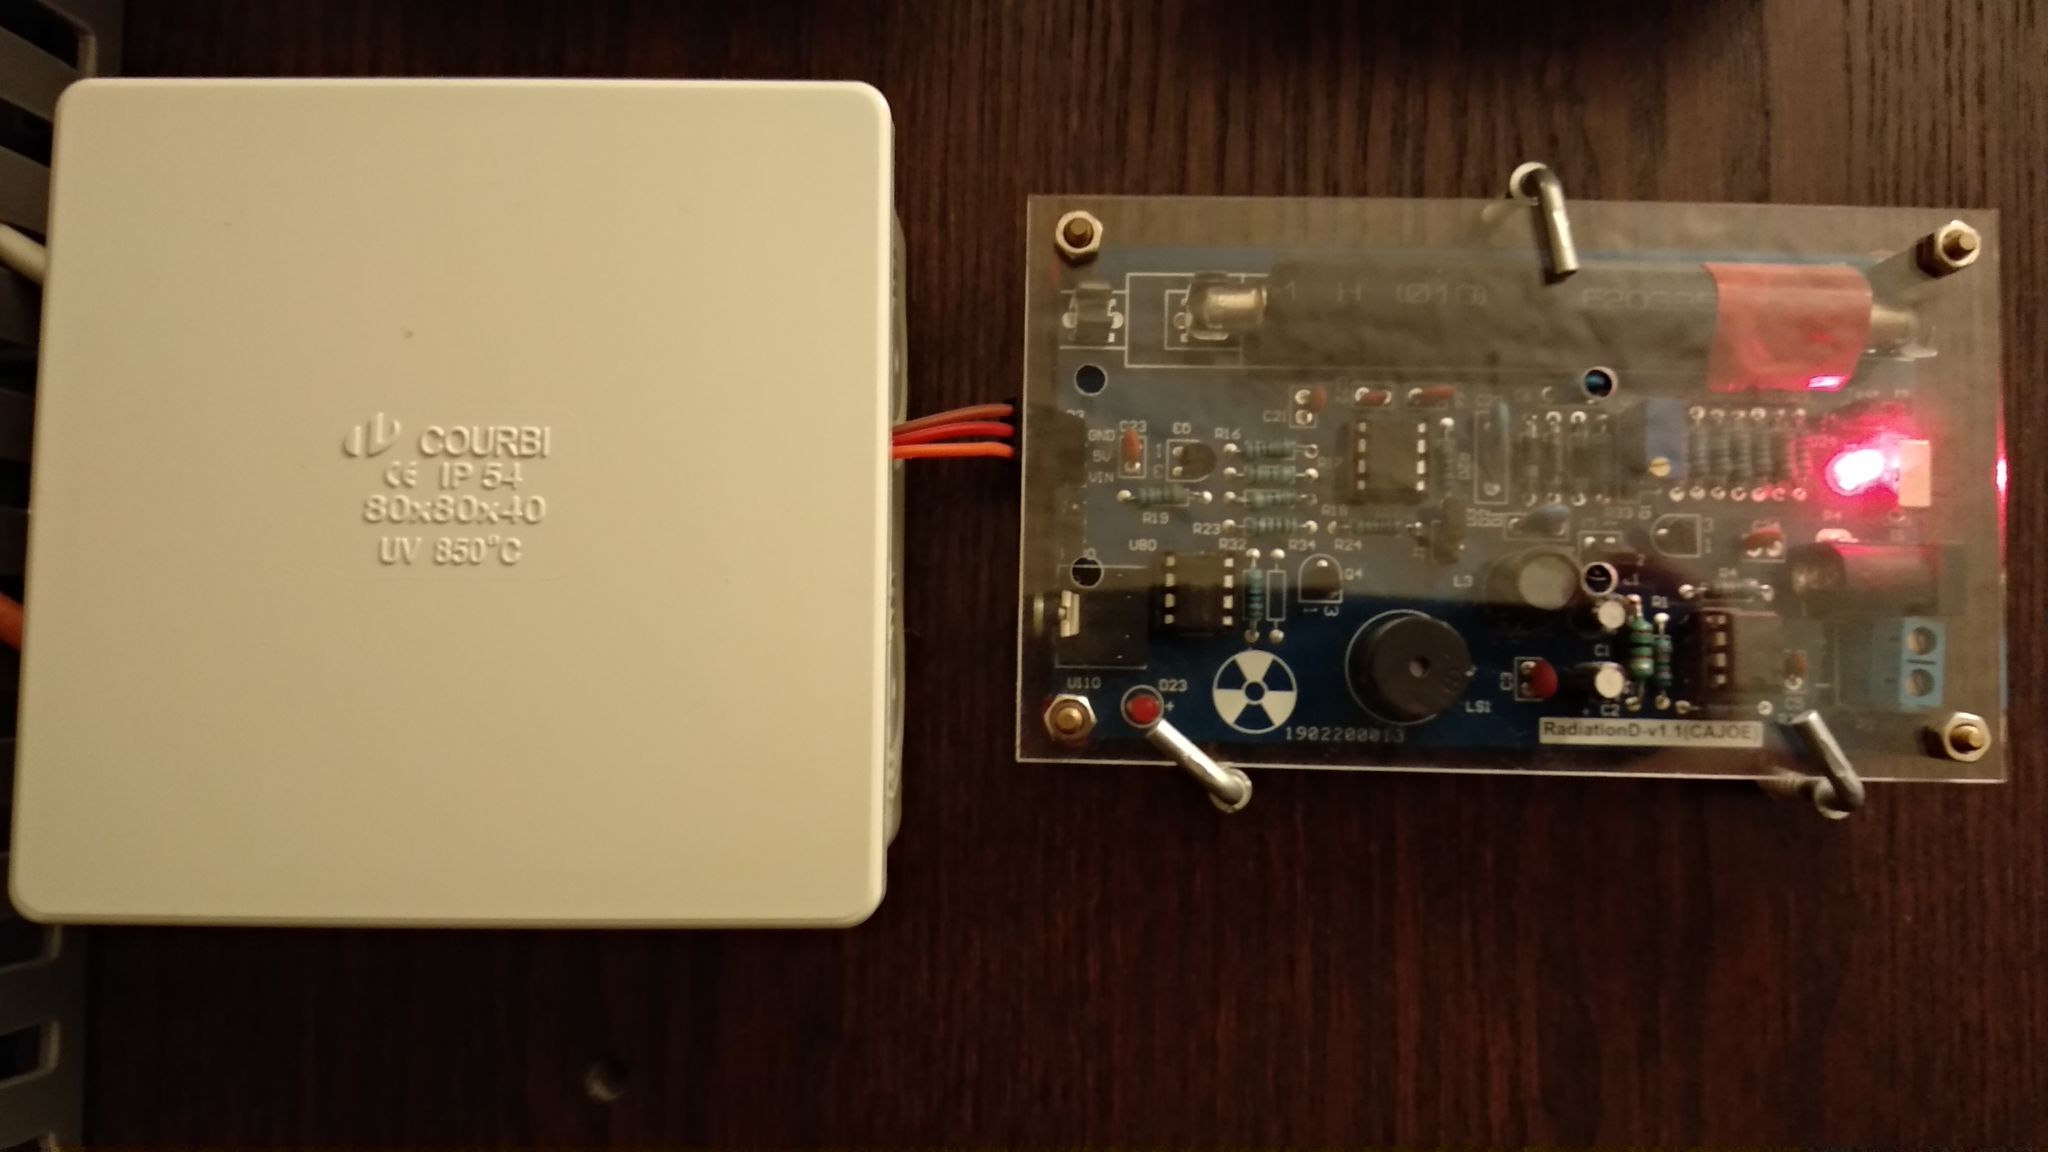
On the photo you can see the geiger counter (right) and a plastic box for the Arduino and the LAN module (left). Power and LAN cable enter from the left side of the box. All is wall mounted (on a wooden board). The 3 wires are 5V, GND and DATA.
Be sure to use a good power supply as the measurments will be different with sligtlhy different/variable voltage input. I also added heat shrink tube over the glass tube. That should eliminate/reduce beta radiation and the red tape just mark the positive side.
Calibration
The geiger coutner kit should be calibrated. From the online specification it should be calibrated in factory already but it is good to know the procedure and double check. There is a potentiometer that should be adjusted with a small screwdriver. You will need a multimeter to measure the volage on the test point.
Different tubes need different voltage. Calibration is done WITHOUT the tube. Watch out on the polarity when you insert it again.
- Trim R100 potentiometer to approximately 50 ohms when kit power is off.
- Short J4 with a jumper. This will expose the high voltage on J2 point
- Set your multimeter on 200V DC range.
- Connect 5V
- Measure voltage between GND and J2 point
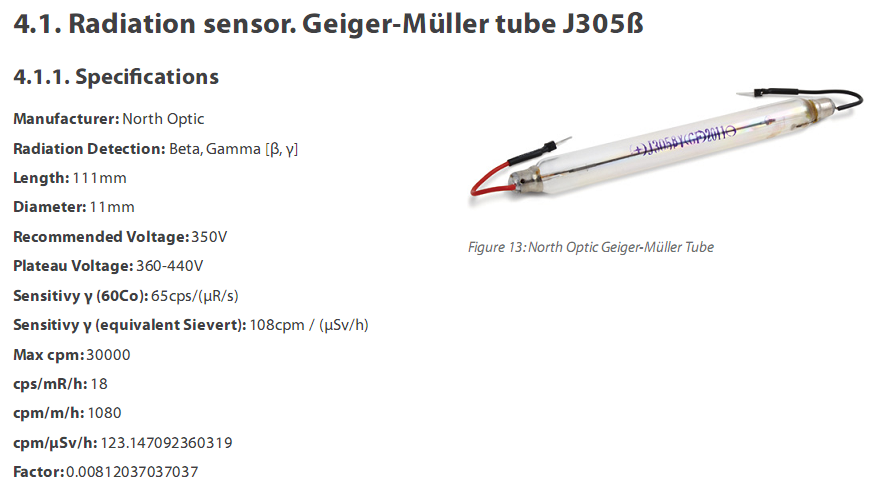
Most likely you will get a kit with a J305β tube
The recommended voltage for it is 350V
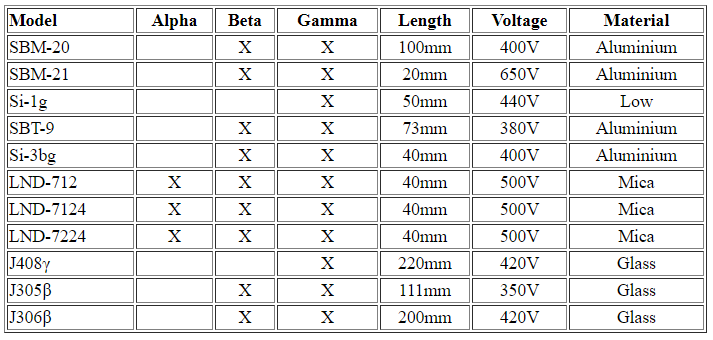
For example, adjust voltage with R100 to 6.5V if you use 1M multimeter (internal resistance) or adjust the voltage to 57V if you use 10M multimeter. This will get you 400V on the tube. Refer to tubes.png for the value that you need
Use formula: Vout=Vread*((60M+Rvoltmeter)/Rvoltmeter)
Do NOT measure the high voltage directly on the tube
Processing data
The kit is providing pulses that should be counted
The formula is:
Radiation[uSv/h] = CPM * index
or
Radiation[nSv/h] = CPM * index * 1000 (I prefer nano)
CPM is the pulses per minute value and index is specific constant for each tube. For J305β the index is 0.00812037
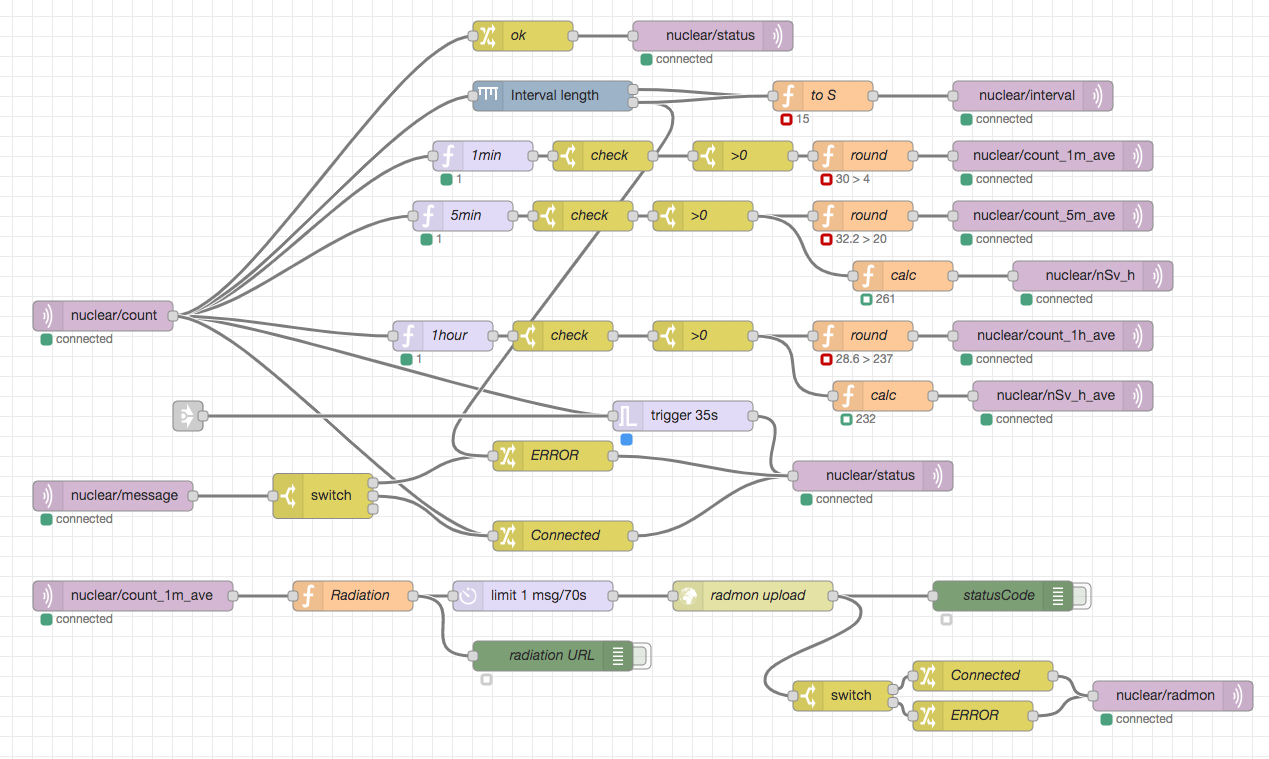
MQTT data can be processed with Node-Red. I calculate hourly average and check if there is some problem with the measurments (no new data available)
TBD Post Node-Red flow..
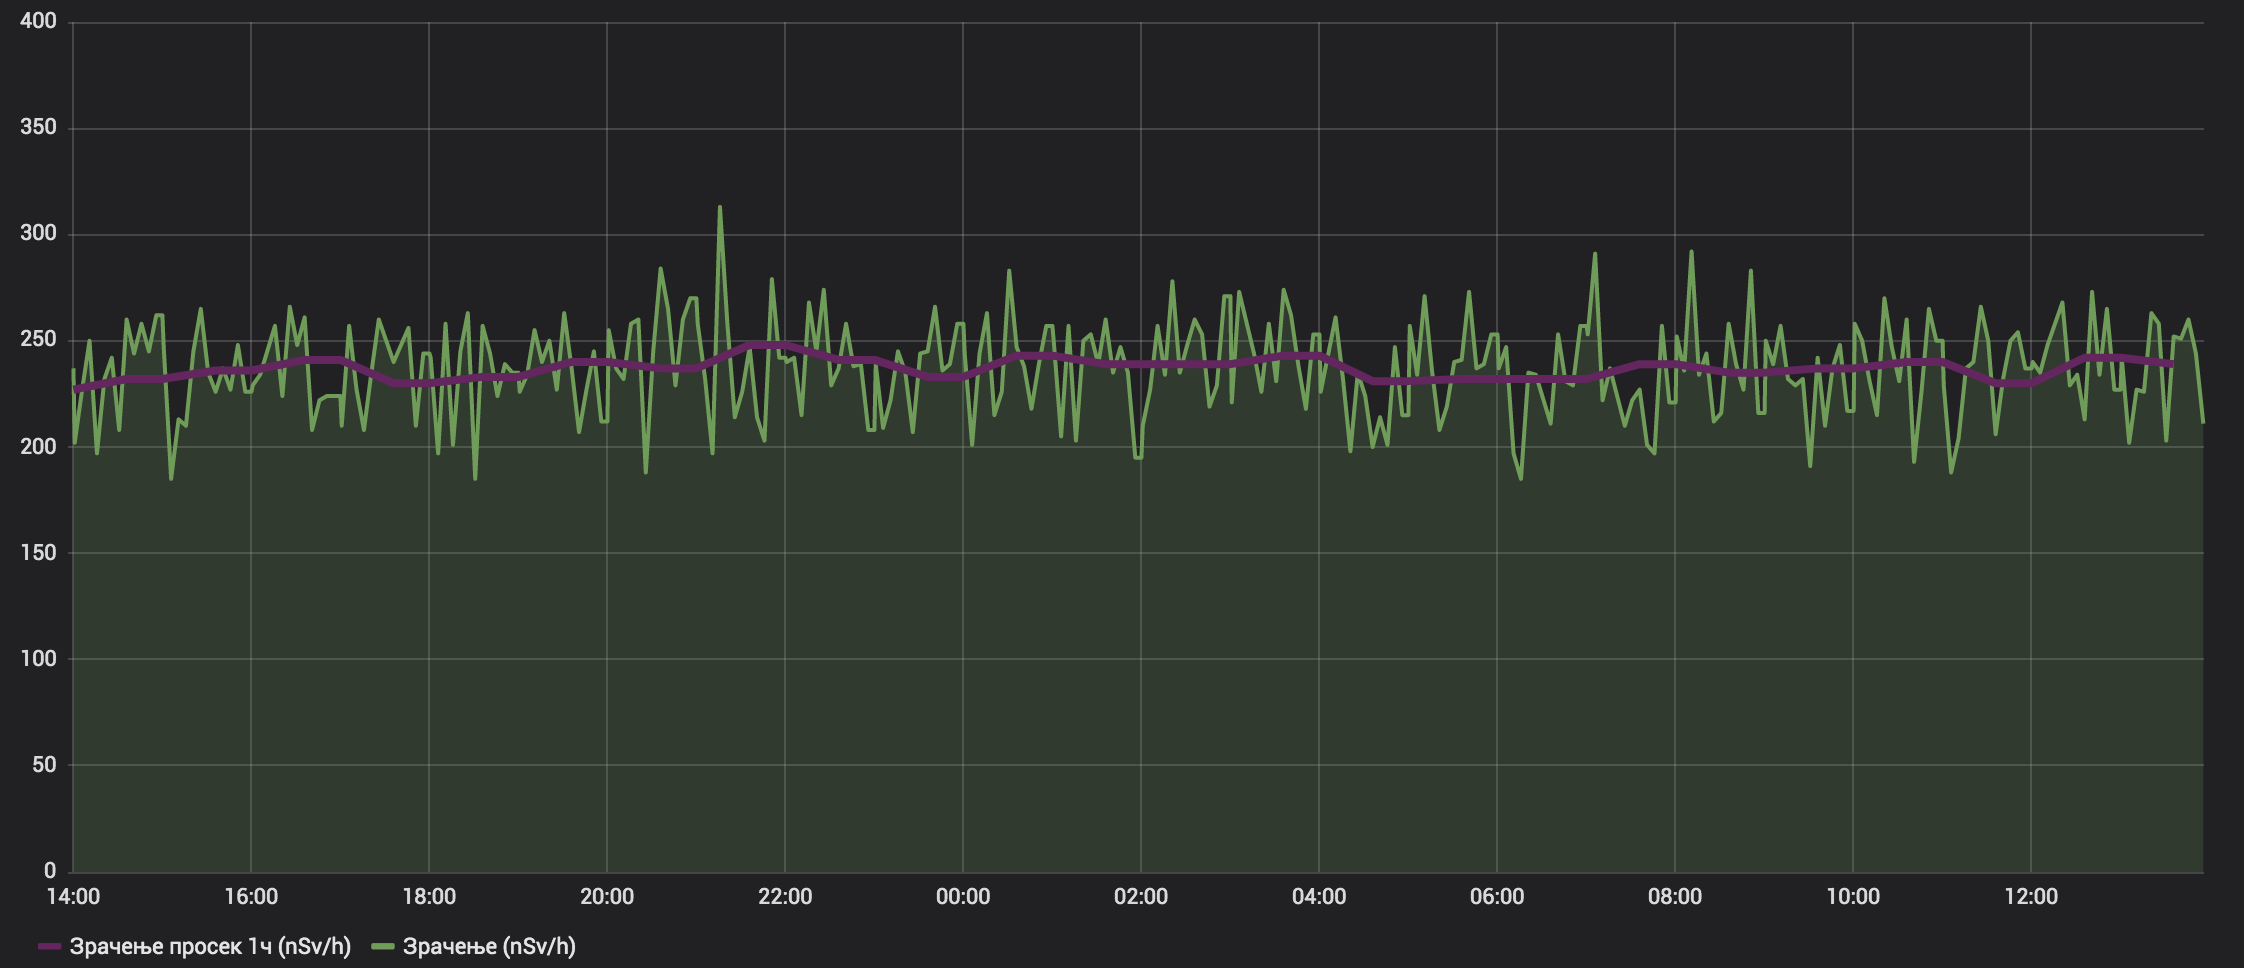
I use Grafana to produce charts so I have something like this (Green line is 5min average, purple line is hour average)
Publishing the data
I use https://radmon.org/index.php to publish the data. Looks like the only platform of this kind.
Just join for free and then you will be able to upload your data.
The webhook looks like this:
http://radmon.org/radmon.php?function=submit&user=USERNAME&password=PASSWORD&unit=CPM&value=MEASURED
Comparing the data with other people is almost impossible. Different tubes produce different measurments but after a month you will have a good picture about the average background radiation.
Testing
WARNING: Radioactive materials are dangerous goods. Proper handling is needed. Do not attempt to do anything before doing a research.
You can test the tube by putting some radiactive metrial next to the kit. Most common source is an old fire/smoke detector that contains ionization chamber. It produces a tiny ammount of gamma radiation. You will notice increased number of flashes on the LED.
