
In today’s interconnected digital landscape, Application Programming Interfaces (APIs) have become the backbone of modern software development. APIs enable different software systems to communicate and interact with each other, facilitating the exchange of data and functionalities. Whether it’s accessing a social media platform, integrating payment gateways, or connecting with third-party services, APIs play a crucial role in enabling seamless interactions between applications.
API testing is the process of validating the functionality, reliability, performance, and security of APIs. It involves sending requests to API endpoints and analyzing the responses to ensure they meet the expected specifications. API testing is a critical component of the product development lifecycle, ensuring that APIs perform as intended and seamlessly integrate with other systems.
- Functionality and Integration:
API testing verifies that APIs function as intended and seamlessly integrate with other systems. By thoroughly testing the API endpoints and data payloads, developers can identify and resolve issues early in the development cycle, preventing downstream integration problems.
- Reliability and Stability:
API testing helps uncover potential vulnerabilities, performance bottlenecks, and stability issues. By subjecting APIs to rigorous testing, developers can uncover bugs, address scalability concerns, and ensure that APIs perform reliably under different loads and conditions.
- Compatibility and Interoperability:
API testing verifies the compatibility and interoperability of APIs with various client applications. By thoroughly testing the API contracts, data formats, and response structures, developers can ensure that their APIs can be easily integrated and used by external developers, fostering a developer-friendly ecosystem.
- Security and Data Integrity:
API testing helps identify security vulnerabilities, such as injection attacks, data breaches, or unauthorized access. By conducting security assessments, developers can implement appropriate measures, such as authentication, authorization, and encryption, to safeguard the API and protect the data it handles.
- Performance Optimization:
API testing measures and optimizes response times, throughput, and resource consumption. By conducting performance testing and analyzing key metrics, developers can identify bottlenecks, optimize API performance, and ensure that APIs meet the performance requirements of their intended applications.
In the following tutorial, we will explore how to simplify API testing using Postman, a powerful tool that streamlines the process of creating, sending, and analyzing API requests. By following the step-by-step instructions, you will gain a solid understanding of how to effectively test APIs, validate responses, and uncover potential issues. Let’s dive in and unlock the full potential of API testing with Postman.
NB: Here we are going to be using Spotify APIs for our testing.
Here we are assuming that you have already installed Postman on your system. If you haven’t done so, please visit https://www.postman.com/ to download the latest version of Postman and follow the installation instructions.
Now, let’s begin by heading over to https://developer.spotify.com/. If you don’t have a Spotify account, you can create a free account. After logging in, navigate to the “Documentation” tab and select “Web API” to access the Spotify API documentation.
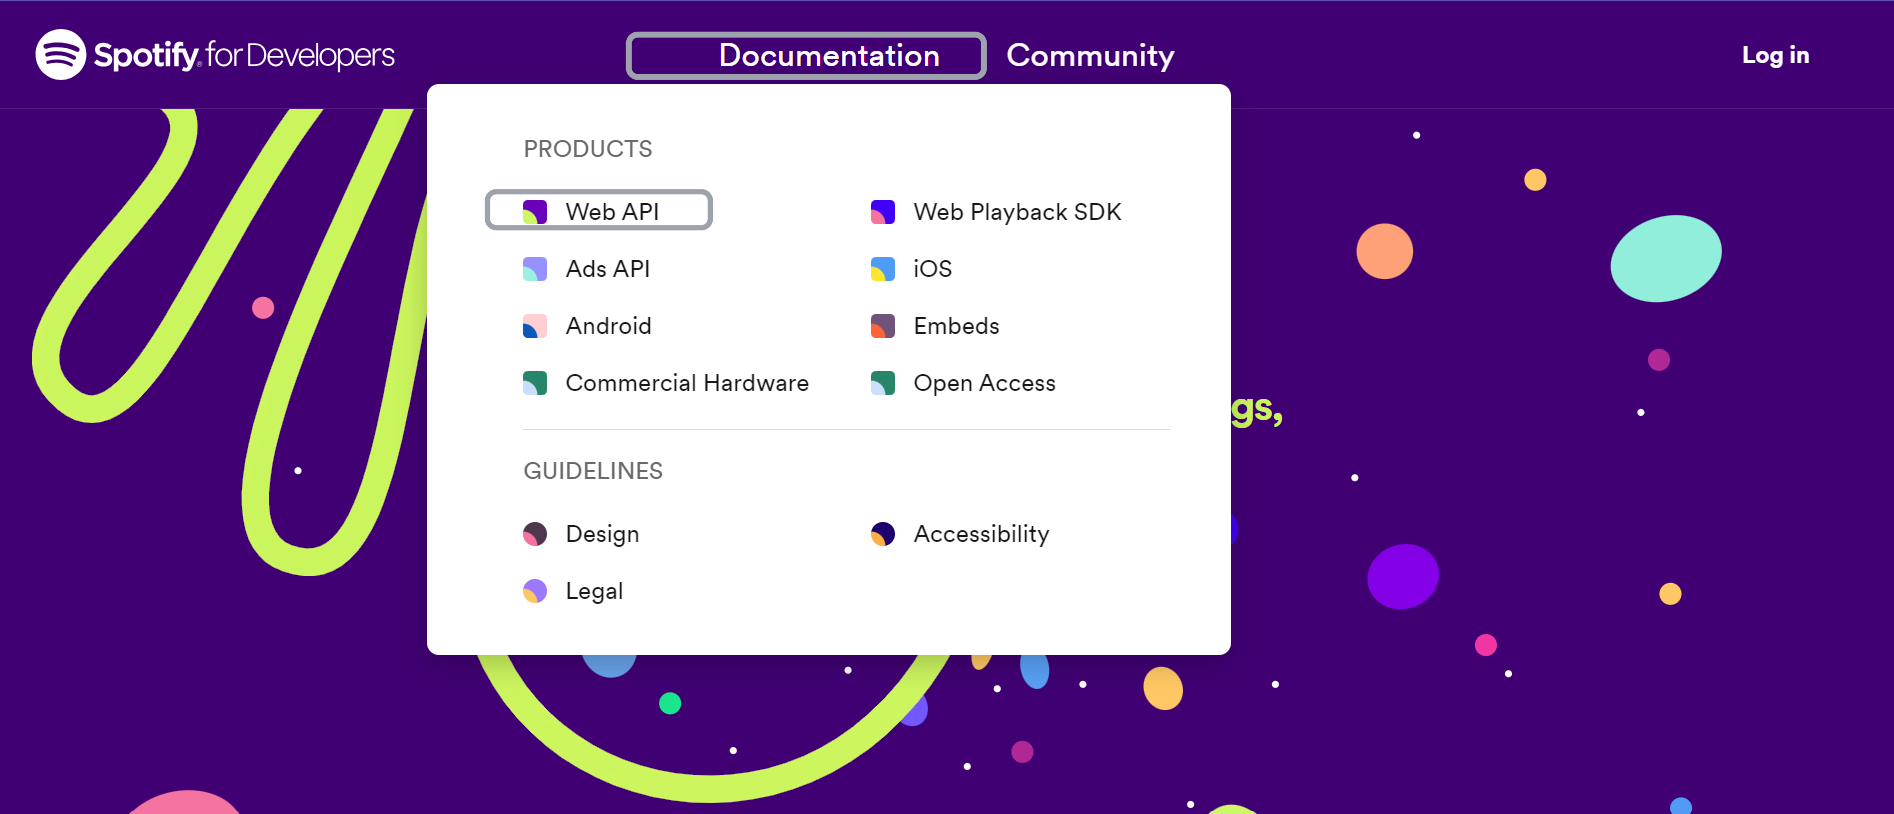
Now let's first go ahead and create a simple Spotify app.
Steps :
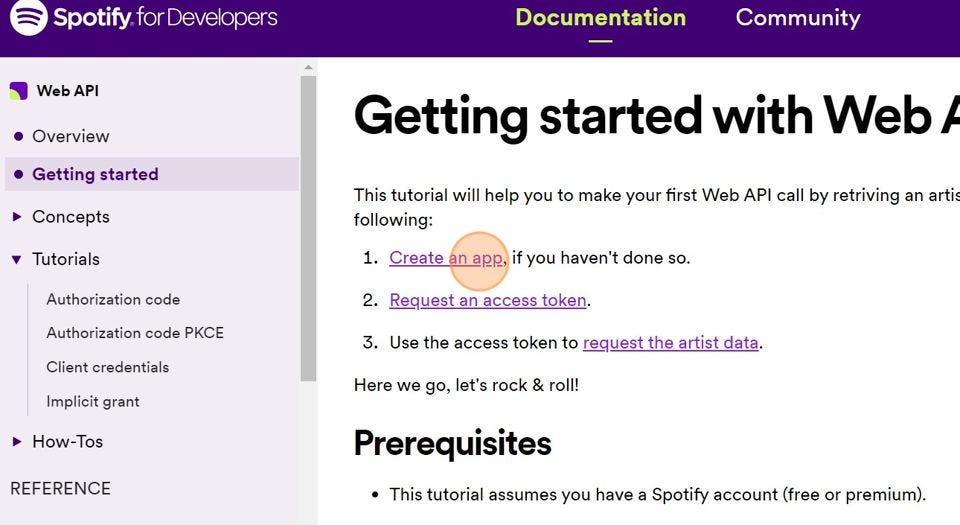
- On the Spotify API documentation page, click on “Getting started.”

- Next, click on “Create App.”
- You will be redirected to the app dashboard URL.

- Once the dashboard opens, click on “Create app.”

- Now, provide the required information for the app. You can fill in the details as follows: For the redirect URL, you can use a placeholder URL. Finally, click on “Save,” and a new Spotify app will be created for you.

You will now be directed to your app dashboard. Click on “Settings” to access all your app configurations, including client ID, app status, client secret, and more.

Something like this

To access Spotify’s APIs, you need to utilize bearer tokens for authentication. Bearer tokens are a type of access token that provides authorization for accessing protected resources.
When making requests to Spotify’s APIs, you will need to include an authorization header in your API requests. This header should contain the bearer token, which serves as proof of your authentication and authorization to access the desired resources.
To obtain a bearer token for Spotify’s APIs, you typically need to follow an authentication process, such as OAuth 2.0. This involves obtaining authorization from the user, exchanging it for an access token, and then utilizing that access token as a bearer token in subsequent API requests.
Now, let’s proceed with creating a request to Spotify in order to obtain our bearer token.
Open Postman and create a new workspace, let's name it Test Spotify and click on create workspace.

Once the workspace is created, let's import a new request by clicking on import as shown below :

Paste the following curl request in the dialog box below :
curl -X POST "https://accounts.spotify.com/api/token" \
     -H "Content-Type: application/x-www-form-urlencoded" \
     -d "grant_type=client_credentials&client_id=your-client-id&client_secret=your-client-secret"

Now once it's imported let's go to the body section of the imported post request and change the client_id and client_secret , For this lets go back to the Spotify dashboard of our app and copy it from there.

NB: By the time this article is published, I will have deleted this. Don't try to use this.
Now your POST request will look something like this :
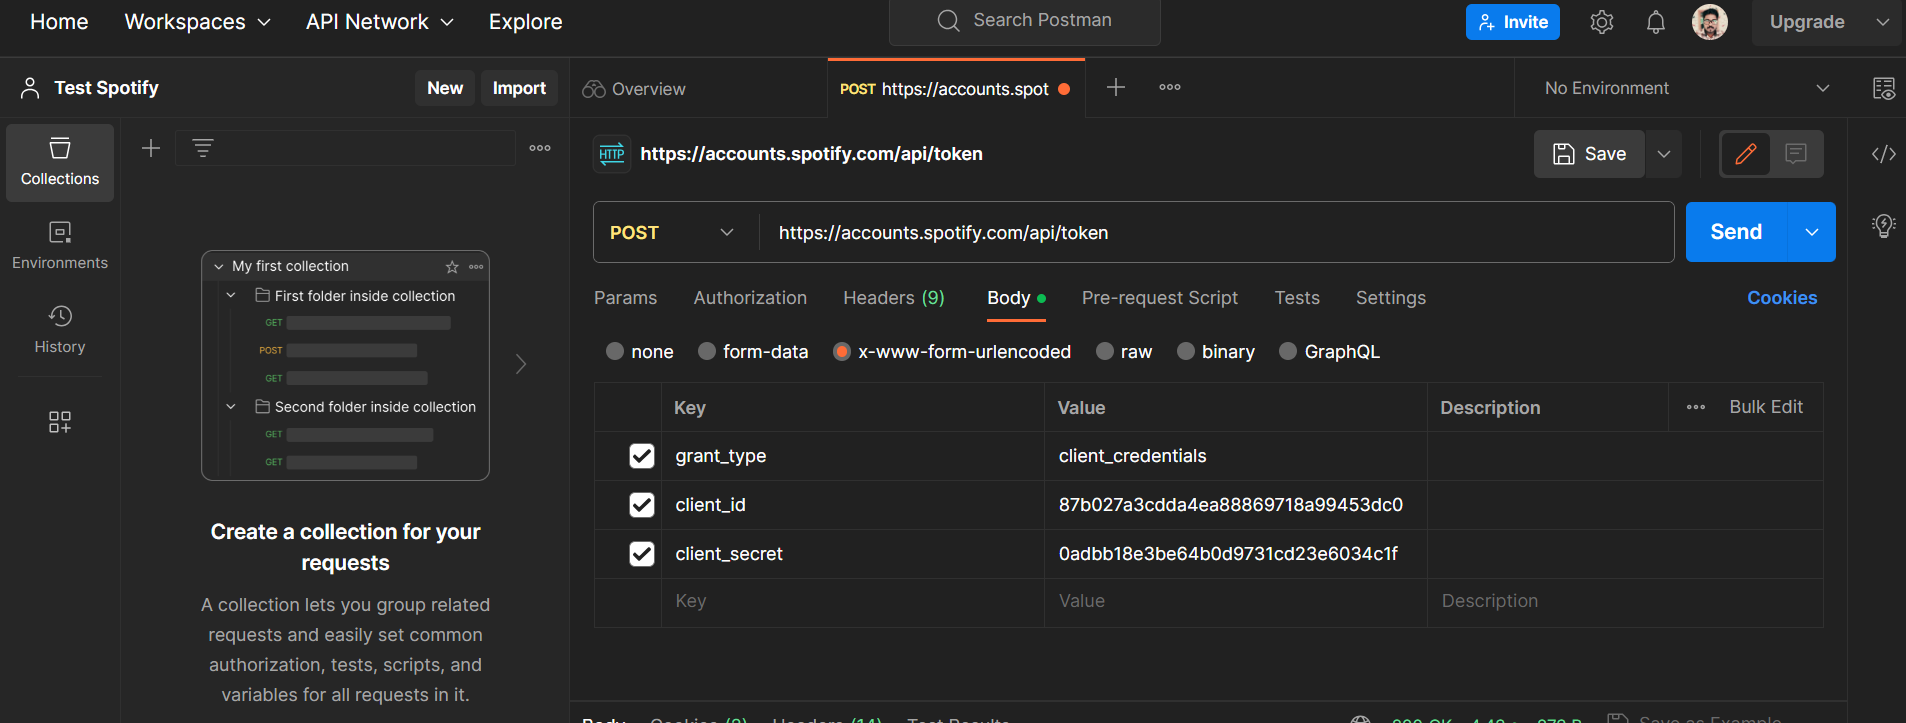
Add the client_id and client_secret that you have copied from your Spotify app here and click on Send. This API will return in its response the bearer token that we are going to be using for the authentication of all our remaining requests and will look something like this :
{
    "access_token": "BQC0GyCsiIDoOqV74CJ23eiFjF5I-yRQHfhFtWS7k9PngS2hGscfMhEa3-ExXBcdH-LzZTofKDmG3OEMi_2XsC7FUvhPLLpERcWuMzqP946W8raSa3c",
    "token_type": "Bearer",
    "expires_in": 3600
}
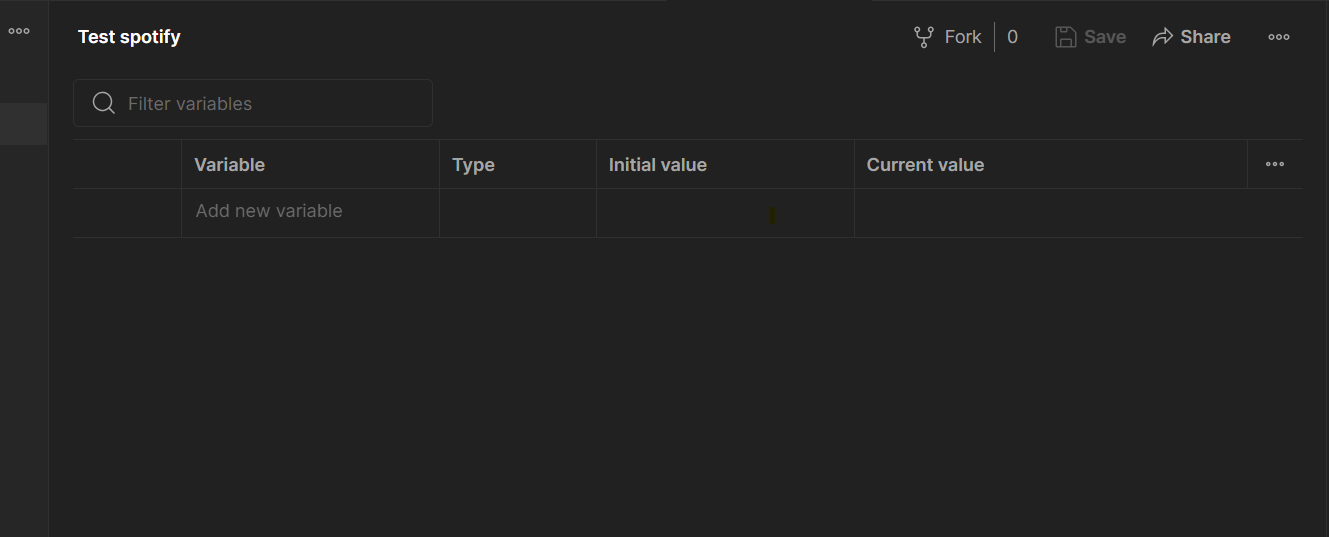
This token is valid for 1 hr. Now we need to store this token in an environment variable so that it can be used by other requests. Let's configure that by first creating a new environment. Click on this icon

Click on ADD.

Assign a name to the environment, for example, “Test spotify” and press the enter key.
Now we have the environment to store the variable ready let's add the JS code to actually capture and store the bearer token in the “Test spotify” environment
// Extract the desired value from the response
//const response = pm.response.json();
const desiredValue = pm.response.json().access_token;

// Set the value as an environment variable
pm.environment.set("bearer-token", desiredValue);
Add the above code to the Tests tab of Postman as shown below :

Now let’s re-send the request, Make sure that you have selected Test spotify as environment as shown above. Now if we open the environment variable tab again we can see our bearer token there.

Ok now we have the token, we are ready to start testing other APIs
Let's hit the search API of Spotify to get info about an artist say Ludacris. Like we did before let’s first import the curl request first :
curl --request GET \
  --url 'https://api.spotify.com/v1/search?q=Ludacris&type=album' \
  --header 'Authorization: Bearer 1POdFZRZbvb...qqillRxMr2z'
Once imported it will look something like this :

Here q is the search query and type is a comma-separated list of item types to search across. Search results include hits from all the specified item types. For example: q=abacab&type=album,track returns both albums and tracks matching "abacab".
For more info Refer to Spotify documentation here: Search
Now if you go to the header tab we can see that there is a bearer token, but we need to replace this with our token, which we have stored in the environment variables like below.

Now send the request and it will return all the data from Spotify in the below given JSON format :

Now from this let‘s get the artist's id and use it to search the artist's albums. For this let's get the artist's id and then store it in the environment variable. use the JS script to do the same (Follow the same step as we did for storing the bearer token )
const desiredValue = pm.response.json().albums.items[0].artists[0].id;

// Set the value as an environment variable
pm.environment.set("artist", desiredValue);
Now that we have the artist id let's use it to find his/her albums. for this let's use this curl request.
curl --request GET \
  --url https://api.spotify.com/v1/artists/0TnOYISbd1XYRBk9myaseg/albums \
  --header 'Authorization: Bearer 1POdFZRZbvb...qqillRxMr2z'
Once the request is imported modify it as shown below ie, and replace the artist in the URL and bearer token in the header :

Now send the request and it will return you the Spotify catalog information about an artist’s albums.
If you want to try other APIS you can check out the official documentation from Spotify here.
Now that we have a few APIs, let’s proceed to write tests for them. We will start with a basic check to verify if the API response returns a success code (200 OK) and whether the required data is present or not.
To perform this test, follow these steps:
-
Open Postman and select the API you want to test.
-
Navigate to the “Tests” tab for that particular request.
-
Write the following test script:
// Check if response status code is 200 OK pm.test("Response status code is 200", function () { pm.response.to.have.status(200); });
// Check if required data is present in the response body pm.test("Required data is present", function () { var jsonData = pm.response.json(); // Add assertions to check for the required data in the response // Example: pm.expect(jsonData).to.have.property("key"); });
In the case of our first API , ie the API that fetches us the bearer token , we can use a test like this :
pm.test("Status code is 200", function () {
    pm.response.to.have.status(200);
});

pm.test("Response body contains expected data", function () {
     var jsonData = pm.response.json();
    pm.expect(jsonData).to.have.property("access_token");
});
Now when you hit the API, it will execute these test cases defined in the test tab. Let's send the request and see if our test cases are getting executed. If the request is successfully executed we will get the output below :

By employing this method, we can run tests on any API and execute test cases to validate the API even before proceeding with integration testing. This approach offers several advantages, particularly in bug identification prior to integration testing.
Running tests on APIs individually allows us to isolate and examine their functionality independently. By crafting specific test cases, we can assess the API’s behavior, responses, and data accuracy. This early testing phase aids in the detection of potential issues and bugs in the API itself, without the complexities and dependencies associated with integration testing.
Through API testing, we can identify and address bugs early in the development cycle, minimizing the impact on downstream systems and improving overall efficiency. It enables us to focus on the individual components of the API and validate their functionality, reliability, performance, and security.
Happy coding!