- Nothing! Just you and a bit of time
- Java 11
- NodeJS 16+ (20 is used in this demo)
- Git
- Docker
- Some experience with command-line tools.
See how far we can get with SmartBears Open Source tools, from an OpenAPI definition.
You can try this out in an interactive coding session in your browser or run it on your own machine.
--
The SmartBear Developer Relations Team.
An API description, adhering to the OpenAPI specification, can provide inputs for multiple aspects of the SDLC.

SmartBear provides a range of Open Source tools that leverage the OpenAPI specification in order to provide different capabilities.
In this tutorial, we will take a look at some of them.
We will need our tutorial repository from GitHub.
You can clone it to your machine by using the following command, or you can use the integrated terminal and editor in your browser to run the steps.
👉🏼 git clone https://github.com/SmartBear-DevRel/openstack.git
You can check the contents of the repo with the following command
👉🏼 ls -1 openstack
Let's change directory to the openstack repository
👉🏼 cd ~/openstack
There is a Makefile in the openstack repository that contains various commands in order to pull down and run the various tools in our demo. You can see all the available commands
👉🏼 make help
Before moving to the next step, check the following:
- There is a directory called
openstackin your workspace. - There is a
Makefilein theopenstackfolder
We will use a demonstration OpenAPI description, for our example.
Running the following command
👉🏼 make setup
Will perform the following actions:-
- Create a directory called
openapi - Retrieve an example OpenAPI description from GitHub
- Setup a
.gitgnorefile used to exclude some files from being commited to source control.
You can check the contents of the OpenAPI description with the following command
👉🏼 cat openapi/openapi.yaml
It isn't so easy to read from a terminal, but that will lead us onto our first tool. Swagger Editor.
Before moving to the next step, check the following:
- There is a directory called
openapi/openapi.yamlin your workspace.
In our last step, we pulled in an API Description, that was previously created. This document is stored in openapi/openapi.yaml.
We mentioned that consuming it from the command line wasn't the nicest experience. What if we had a nicer way to view and edit our API description? Even better still, what if we could get feedback to ensure that the description we are creating adheres to an OpenAPI specification.
Swagger Editor allows you to describe, and document your API in a free open source editor which supports multiple API specifications and serialization formats.
It offers an easy way to get started with the OpenAPI Specification (formerly known as Swagger) as well as the AsyncAPI specification, with support for Swagger 2.0, OpenAPI 3., and AsyncAPI 2. versions.
There are two flavours of Swagger Editor. We will introduce both.
- Runs Anywhere
- The Editor works in any development environment, be it locally or in the web
- Smart Feedback
- Validate your syntax for OAS-compliance as you write it with concise feedback and error handling
- Instant Visualization
- Render your API specification visually and interact with your API while still defining it
- Intelligent Auto-completion
- Write syntax faster with a smart and intelligent auto-completion
- Fully Customizable
- Easy to configure and customize anything, from line-spacing to themes
- All About Your Build
- Generate server stubs and client libraries for your API in every popular language

The next Swagger Editor, which we will refer to throughout this tutorial as swagger editor next, bring all the features from the original Swagger Editor plus support for AsyncAPI and JSON Schema.
This ground-up rewrite builds upon our multi-specification core, Swagger ApiDOM, which provides a single, unifying structure for describing APIs across API description language and serialization formats. We'll share more information and context on Swagger ApiDOM soon, so stay tuned!
You can read more about the next Swagger Editor here in a blog post by fellow SmartBear Developer Relations member Frank Kilcommins, who is our resident API technical evangelist.

The Swagger Editor is just one open source project in the thousands that exist in the Swagger ecosystem.
The source code is publicly hosted on GitHub, and you can start contributing to the open source Swagger Editor project.
Swagger Editor is hosted by SmartBear and served for free at https://editor.swagger.io.
- Load our sample OpenAPI document from
openapi/openapi.yaml- File -> Import URL
- Paste the url 👉🏼
https://raw.githubusercontent.com/smartbear-devrel/swaggerhub-pactflow/main/oas/swagger.yaml
- If you are running locally, you can import from File
- File -> Import File
- Select the file 👉🏼
openapi/openapi.yaml
👉🏼 https://editor-next.swagger.io.
By default, Swagger Editor Next loads an AsyncAPI definition.
- Load our sample OpenAPI document from
openapi/openapi.yaml,- File -> Import URL
- Paste the url 👉🏼
https://raw.githubusercontent.com/smartbear-devrel/swaggerhub-pactflow/main/oas/swagger.yaml
- If you are running locally, you can import from File
- File -> Import File
- Select the file 👉🏼
openapi/openapi.yaml
We will run Swagger Editor locally with Docker, pulling the image from Dockerhub.
We will then mount a volume containing our OpenAPI description into the Docker container.
Finally we will pass an environment variable, telling the editor, to load our sample OpenAPI description by default.
- 👉🏼
make do_swagger_editor - If running in the Killercoda tutorial, click here
- If running on your local machine, visit
http://localhost:8081- 👉🏼
make view_swagger_editor
- 👉🏼
We will run Swagger Editor locally with Docker, pulling the image from Dockerhub.
We don't have the ability to pass in environment variables, with the Docker image, so once we have our running container, we will load the file manually.
- 👉🏼
make do_swagger_editor_next - If running in the Killercoda tutorial, click here
- If running on your local machine, visit
http://localhost:8082- 👉🏼
make view_swagger_editor_next
- 👉🏼
- Import our sample OpenAPI Description
- File -> Import File
- Select the file 👉🏼
openapi/openapi.yaml
Before moving to the next step, check the following:
- You have been able to run
swagger-editorlocally - You have been able to run
swagger-editor-nextlocally
It would be prudent of us to design API's that are secure, consistent and useful.
Stoplight Spectral provides an open-source API style guide enforcer and linter which can be used as a generic ruleset engine on any JSON or YAML data, but was built with OpenAPI, AsyncAPI, and JSON Schema in mind.
You can use Spectral rules to target API descriptions for quality improvement or enforce API Style Guide rules, such as naming conventions for OpenAPI models or prohibiting integers in URLs.
API description formats like OpenAPI can be permissive and vague. Beginner API designers can struggle to know what to do, and experienced API designers can easily forget.
It's easy to create valid description documents that are not very useful, and end up looking broken in documentation tools, or not providing enough validation keywords to be useful for contract testing. Spectral helps you follow best practices in order to create high-quality API descriptions.
Spectral can be downloaded as a CLI binary for macOS, Linux or Windows, or installed as an NPM/Yarn package with a CLI and a JavaScript API.
You can bake it into your existing tooling, run it in Continuous Integration, use it in any workflow you like. Let's take a look at one of them.
Spectral, being a generic YAML/JSON linter, needs a ruleset to lint files. A ruleset is a JSON, YAML, or JavaScript/TypeScript file (often the file is called .spectral.yaml for a YAML ruleset) that contains a collection of rules, which can be used to lint other JSON or YAML files such as an API description.
First we define our local ruleset.
We then run Stoplight Spectral locally with Docker, pulling the image from Dockerhub.
We tell spectral where to locate the OpenAPI description and the location of the ruleset
- 👉🏼
make create_spectral_default_ruleset - 👉🏼
make openapi_lint_spectral
Any violations are shown here, allowing us to rectify the changes, and re-validate. This ability to provide fast-feedback can be used at authoring time, as well as being integrated into Continuous Integration, meaning that its caught early on rather than causing issues to consumers and users of the API description.
Before moving to the next step, check the following:
- You have been able to run
spectrallocally - You noted some OpenAPI validation errors
Now that we have design our OpenAPI file, describing our API, we want to share it with others, there are a couple of tools within SmartBears open-source toolset that can provide this.
We saw one in use in the Swagger Editor, on the right-hand side, and we will introduce a second into the mix. Which one you choose may depend on a variety of reasons, so I would advise reading the documentation to find out more.
Swagger UI allows anyone — be it your development team or your end consumers — to visualize and interact with the API’s resources without having any of the implementation logic in place. It’s automatically generated from your OpenAPI (formerly known as Swagger) Specification, with the visual documentation making it easy for back end implementation and client side consumption.
- Dependency Free
- The UI works in any development environment, be it locally or in the web
- Human Friendly
- Allow end developers to effortlessly interact and try out every single operation your API exposes for easy consumption
- Easy to Navigate
- Quickly find and work with resources and endpoints with neatly categorized documentation
- All Browser Support
- Cater to every possible scenario with Swagger UI working in all major browsers
- Fully Customizable
- Style and tweak your Swagger UI the way you want with full source code access
- Complete OAS Support
- Visualize APIs defined in Swagger 2.0 or OAS 3.*
Stoplight Elements provides Open-source API documentation building blocks which can be used to build highly customized, interactive API Docs with embeddable web components generated from OpenAPI documents
Whether you have an existing developer portal, or are working locally, you can use these components to add automatically-generated API reference documentation that fits in seamlessly.
- Delightful developer experience.
- Help developers find and consume APIs faster with a customizable left navigation and three-column layout.
- Powered by standards.
- Leverage OpenAPI and JSON Schema to create beautiful, templated documents for even the most dynamic payloads, and encourage reuse with $ref.
- Interactive API console.
- Accelerate developer onboarding by letting them test requests and responses within the documentation.
- Code samples.
- Streamline Integration by providing code samples in popular languages like Curl, Python, Ruby, Java, and many more.
- Enhanced markdown support.
- Provide engaging guides and descriptions with Stoplight-flavored Markdown that gives the ability to add tabs, callouts, embed JSON examples, and much more.
- Easy to set up.
- No build steps. Get started in minutes. Built on web components, it's as easy as adding a tag within your project, and can be used with any framework.
We will run Swagger UI locally with Docker, pulling the image from Dockerhub.
We will then mount a volume containing our OpenAPI description into the Docker container.
Finally we will pass an environment variable, telling the editor, to load our sample OpenAPI description by default.
- Swagger UI
make do_swagger_ui
- If running in the Killercoda tutorial, click here
- If running on your local machine, visit
http://localhost:8083- 👉🏼
make view_swagger_ui
- 👉🏼
There are multiple ways to run Stoplight elements, in our example, we have a component in a html page, and we load in the Elements library via a script tag.
We are passing in a URL to a hosted OpenAPI description, to save having to serve the file locally.
- If running in the Killercoda tutorial, find the file 👉🏼
openstack/elements.html- Right click on the file in the editor explorer view
- Select 👉🏼
Download - Open the downloaded file, it should open in your preferred browser.
- If running on your local machine
- 👉🏼
make openapi_docs_elements
- 👉🏼
Before moving to the next step, check the following:
- You have been able to run
swagger-uilocally - You have been able to run
stoplight-elementslocally
Prototype your API without writing any code.

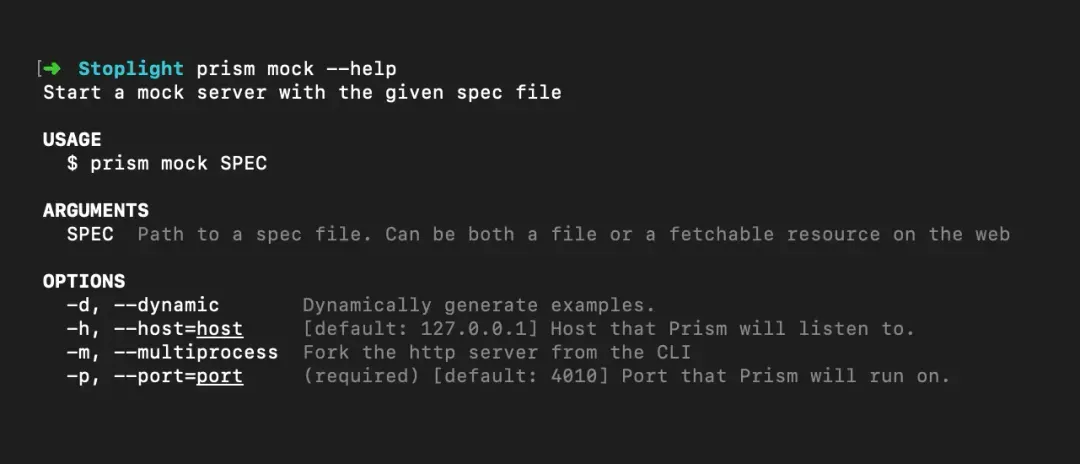
Prism is an open-source HTTP mock server that can emulate your API's behavior as if you already built it. Mock HTTP servers are generated from your OpenAPI v2/v3 documents.
-
Iterate faster with early feedback.
- Embrace the power of early feedback by incorporating user input during the design phase of your API, rather than waiting until after the code is written. This proactive approach significantly reduces the cost of change, allowing you to quickly iterate and refine your API based on real-world insights and requirements.
-
Develop in parallel.
- Maximize efficiency by enabling frontend and backend teams to work simultaneously. With Prism's mock server, frontend developers can start building against the API without waiting for the backend to be completed. This parallel development approach significantly accelerates API development and streamlines team collaboration.
-
Generate dynamic examples.
- Static examples in mock APIs can bias the way you write the code and test the API. Prism generates dynamic, random examples based on your API description, ensuring validity and versatility.
-
Validate input and output.
- Prism validates both request and response data. If your specification contains an invalid example or your request isn't compliant with your API description, Prism can flag it for you, without yelling, we promise.
-
Mocking callbacks.
- Go beyond standard API interactions with Prism. OpenAPI v3.0 allows API designers to define callbacks and construct URLs for payload delivery. Prism supports this functionality, enabling you to integrate callbacks even before the API is built.
-
Validation proxy.
- Identify discrepancies between the OpenAPI document and target API to help frontend developers integrating with your API. Enable the proxy in pre-prod environments to ensure that OpenAPI documents and code stay in sync.


We will run Stoplight Spectral locally with Docker, pulling the image from Dockerhub.
We will then mount a volume containing our OpenAPI description into the Docker container.
Finally we will tell Prism the location of our API file and tell it to start a mock which will be available on http://localhost:3001 and will automatically have our API routes exposed alongside our test data.
You'll note some validation errors here, which align with those seen in Spectral, allowing you to ensure that the mocks you provide, are consistent with your codebase.
- 👉🏼
make provider_mock_prism - 👉🏼
curl localhost:3001/productsin terminal 2 - Press
ctrl + cto close the mock running in terminal 1
This mock provider can now be hosted, and linked up to your Swagger Editor / UI, allowing consumers to utilise the try-it-now functionality, where they can make requests from their browser.
Before moving to the next step, check the following:
- You have been able to run
stoplight prismlocally serving a mock provider generated from our API description. - You have been able to make a HTTP request to
http://localhost:3001/productsresulting in a response from the mock provider
Create functional tests for SoapUI, driven from the OpenAPI Specification.
Test these against our mock provider (provided by Prism), in order to verify the test suite / mock implementation, and prepare for verifying our provider codebase once implemented.
- SoapUI
- OpenApi2SoapUI
- Stoplight Prism
We will first leverage another open-source project OpenAPI2SoapUI built by the ApiAddicts team.
This will allow us to quickly bootstrap a SoapUI project, from our API description in the OpenAPI format, generating the requests for each resource operation and a test suite. This test suite won't contain assertions, we can add these later, but it will give us some cursory coverage of a provider implementation.
We will utilise SoapUI using it's test runner, which is available on DockerHub.
We will leverage Prism to serve as our provider mock, as it hasn't yet been developed yet, it will be available on http://localhost:3001.
We will load in our project file, generated with openapi2soapui, into the soapui test runner, and tell the runner which endpoint our provider will be running on.
The tests will run, and should report 0 failures. You can stop the provider mock, and run the tests again. You should see three errors.
- SoapUI
- 👉🏼
make openapi2soapui_fetch - 👉🏼
make openapi2soapui_build - 👉🏼
make openapi2soapui_generate_project - 👉🏼
make provider_mock_prism- Run our Mock Provider - In a second terminal 👉🏼
make soapui_runin terminal 2- Don't forget to change directory into the 👉🏼
cd openstackbeforehand in the new terminal
- Don't forget to change directory into the 👉🏼
- Press 👉🏼
ctrl + cto close the mock running in terminal 1
- 👉🏼
Before moving to the next step, check the following:
- You have been able to generate a SoapUI project from an OpenAPI description using
openapi2soapui - You have been able to execute the SoapUI functional tests with it's test runner, against the provider mock.
A benefit of design-first based from an API description, is that it allows teams to work in parallel. Our provider codebase has not been developed, however we can make strides on the consumer side, leveraging our agreed API description at each step, to ensure that when we do integrate, our systems can talk correctly.
- Swagger CodeGen
- Pact
- Swagger-Mock-Validator
The Swagger Codegen project, allows generation of API client libraries (SDK generation), server stubs and documentation automatically given an OpenAPI Spec, and is available in a multitude of different languages.
We are going to leverage it to create a client SDK, from our API description.
One of the great features in the ability to customise the existing templates, or create your own.
We've consistently seen high-performing organisations leverage some kind of base-repo setup for teams creating new API's and this can allow for standard and consistent tooling across multiple projects, down to linters, unit testing tools and more.
In our case, we will introduce Pact, a contract-testing tool designed to work alongside your code-base at a unit testing level. It will allow us to utilise a powerful mock server during our consumers unit tests, ensuring that the requests our consumer makes to external collaborates are captured and correct as per the developers expectations. These contracts can then be shared with a provider, which once they have implemented their service, can verify that their service can fulfill the consumers requirements.
In the case of a client SDK, generated from an API description, the chance for drift is relatively low. Pact additionally provides a Pact Broker which allows the recording of these interactions between services, allow for a clear view at any one time, of the true nature of the interactions with a system, and which consumers may rely on any API, and granularity down to a field level, as to what consumers need.
The Pact project is embedded in a template called typescript-fetch-pact. It will generate a Pact test file, using the pact-js project, with a test covering each endpoint in the OpenAPI description.
When the unit test in ran, a set of Pact contracts are created, called pact files. These are a json document conforming to the Pact-specification, which defines the interactions, as tested, between a consumer and provider. The benefits of running at this layer, is quick feedback and high alignment with the consumer codebase, ensuring that as the consumer codebase changes, the contracts are regenerated.
We mentioned at the start of this step, that our provider is not yet available, however we can leverage another open-source tool, Swagger-Mock-Validator, developed by the Atlassian team, in order to ensure the Pact contracts generated by the consumer, are a valid subset of the OpenAPI specification. This would provide greater benefit where the consumer codebase was not generated by the OpenAPI file, however it can provide value in ensuring your contracts generated do not place undue burden on a provider to deliver functionality not described in the API description.
You can read more about why it came to be, for Atlassian in their blog post Using spec-first API development for speed and sanity. The PactFlow team forked the project, available on GitHub - https://github.com/pactflow/swagger-mock-validator, to higher align the project with some of the safety guarantees the Pact project offers. If you'd like some background as to why we think it's incompatible for more generic workflows, you can read this issue
For our purposes we will be using the @pactflow/swagger-mock-validator npm project.
If discrepancies are identified but a consumer deems these to be due to required functionality in the providing API, they can edit the API description, utilising previous tools used (Swagger Editor -> Spectral), providing a discussion point with the provider team.
- Fetch and build the Swagger CodeGen Project
- 👉🏼
make swagger_codegen_cli_fetch - 👉🏼
make swagger_codegen_generators_fetch - 👉🏼
make swagger_codegen_generators_build
- 👉🏼
- Generate the consumer template
- 👉🏼
make swagger_codegen_generators_generate - 👉🏼
make consumer_project_install
- 👉🏼
- Test the consumer project utilising Pact
- 👉🏼
make consumer_project_test
- 👉🏼
- Verify Pact's generated Consumer contracts against the OpenAPI
- 👉🏼
make consumer_project_verify_pact_openapi
- 👉🏼
Before moving to the next step, check the following:
- You have been able to build the
Swagger-codegen-generatorsproject - You have generated a consumer
typescript-fetch-pactproject from the consumertypescript-fetch-pacttemplate - You have been able to install the consumer project dependencies with
npm install - You have been able to run the consumer contract tests with
npm test - You have been able to verify the generated Pact contract against the API description with
make consumer_project_verify_pact_openapi
In the previous step, we generated a client SDK using the Swagger Codegen project. Whilst it can also be used to generated a Provider implementation, it may be the case that you the Provider team have built their own codebase. In this example we will utilise a pre-built provider codebase, and run our SoapUI functional test suite, previously created and executed against our Provider mock supplied by Prism, it is now time to try it out against the real thing.
We will first start out provider codebase manually, and make some requests with our favourite HTTP client from the command line. We can see that the data returned differs from those in our mock, which was driven by the example data in our OpenAPI document.
We can then run our SoapUI tests, which will issue our requests for this provider implementation. For convenience, in continuous integration, a command is provided that will start our provider, then run our SoapUI tests, finally shutting down the server at the end.
- SoapUI
- Download a pre-prepared Provider implementation and try it out
- 👉🏼
make provider_project_fetch - 👉🏼
make provider_project_install - 👉🏼
make provider_project_runin terminal 1 - 👉🏼
curl localhost:3001/productsin terminal 2
- 👉🏼
- With the provider still running, run our SoapUI tests
- 👉🏼
make provider_project_runin terminal 1 - 👉🏼
make soapui_runin terminal 2- Don't forget to change directory into the 👉🏼
cd openstackbeforehand in the new terminal
- Don't forget to change directory into the 👉🏼
- Press 👉🏼
ctrl + cto close the server running in terminal 1
- 👉🏼
- Start the server and test, all in one, omitting the need for two terminals
- 👉🏼
make provider_start_test_stop
- 👉🏼
Before moving to the next step, check the following:
- You have been able to run the provider implementation locally
- You have been able to run the SoapUI project, against the provider implementation
In a previous step, our Consumer utilised the Pact framework to generate consumer contracts called pact files, containing the interactions between the consumer, and this particular provider. Traditionally users of the Pact framework would leverage a Pact Broker as a central store for contracts, which consumers and providers can query to determine the status of integrations between applications, however when starting out, we advise that teams just share contracts manually whilst proving out the value for their teams.
In our case, we will leverage Pacts Provider verifier functionality, which will read in interactions from a pact file, and replay these against the Provider. The provider will issue its response to the Pact framework, which compares it against the consumers expectations. Errors and mis-matches are shown to the Provider team, and if using a Pact-Broker, can be reported back for collaboration and discussion between both consumer and provider teams.
Running the tests out the box, will result in a failure on two endpoints.
- The first test shows a failure, due to the data returned in the Providers response. The shape on the response schema is correct, but the values are not those explicitly defined in the consumer contract. Pact provides a feature called Matchers, which allows for flexibility on the matching on the provider side.
- You can update the api.test.ts in the consumer codebase to have a
likematcher wrapped around the expectedresponseobject in the Provider mock.
- You can update the api.test.ts in the consumer codebase to have a
- The second test shows a failure due to it requesting the product
id_example. This product does not exist in our product repository.- Pact provides a feature called Provider states which allows a consumer to define a particular state for the test data, prior to a verification being performed. We can update our state to
a product with ID 10 existsand update our test to use the more realistic id10rather thanid_example - Alternatively, we could update our state to
a product with ID id_example existsand then our provider would need to map that state, and create theid_example. - You can see the provider states defined in
example-bi-directional-provider-soapui/src/product/pact.setup.js. It is worth considering that provider states do introduce some cross-boundary dependency and synchronization. This is a suitable trade-off in our opinion as the benefits of doing so, allow the consumer/provider to exercise more scenarioes (a product exists, a product doesn't exist, a product returns an error), without a huge speed penalty versus integration tests, and without the inherit difficulty of creating different response types in integration environments where test data may not be as tightly controlled versus as a unit testing level.
- Pact provides a feature called Provider states which allows a consumer to define a particular state for the test data, prior to a verification being performed. We can update our state to
- Pact
- Use Pact to replay the consumers contract expectations, against the provider implementation.
- 👉🏼
make docker_stop_all- Stop our docker containers, as one of the ports conflicts with the below test - 👉🏼
make provider_project_pact_verification
- 👉🏼
Before moving to the next step, check the following:
- You have stopped the Docker containers to avoid port conflicts
- You have been able to run the Pact provider verification tests, and see the output of the test results in your console.
Congratulations!
That is it for now! Well done for making it this far, hopefully you've learned practically how you can leverage an API description from design through to development, ensuring standardisation, governance and quality throughout with SmartBears Open Source tool-set.
If you use any of these tools, why not let us know?
If you want to checkout the repository on your local machine visit https://github.com/SmartBear-DevRel/openstack
Otherwise you can checkout our main SmartBear Dev-Rel GitHub Org, for some other content
exit