THIS REPOSITORY IS UNDER DEVELOPMENT - NOT FOR EXTERNAL USE NOW! THIS MESSAGE WILL BE REMOVED ONCE THE REPOSITORY IS READY FOR USE.
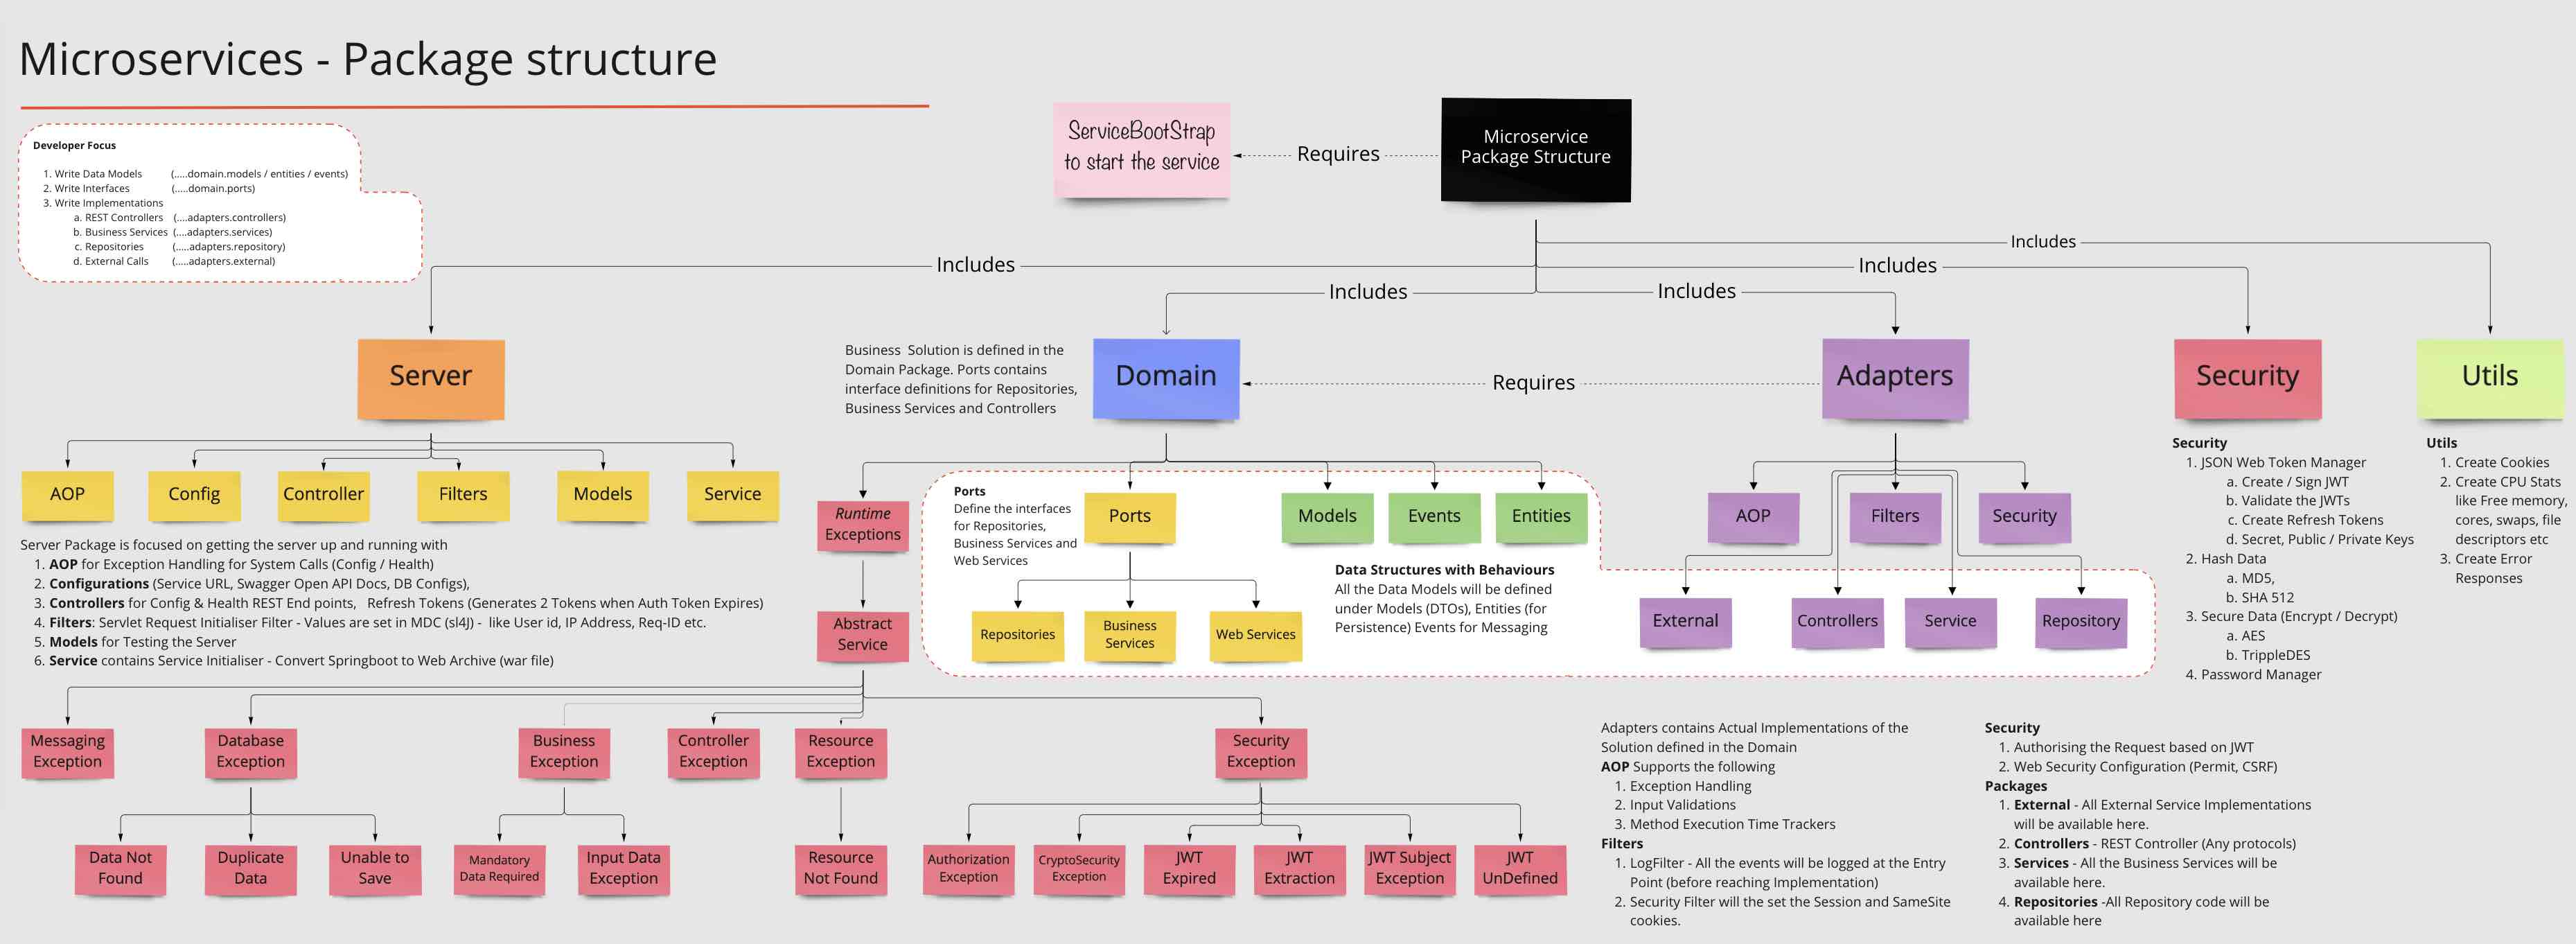
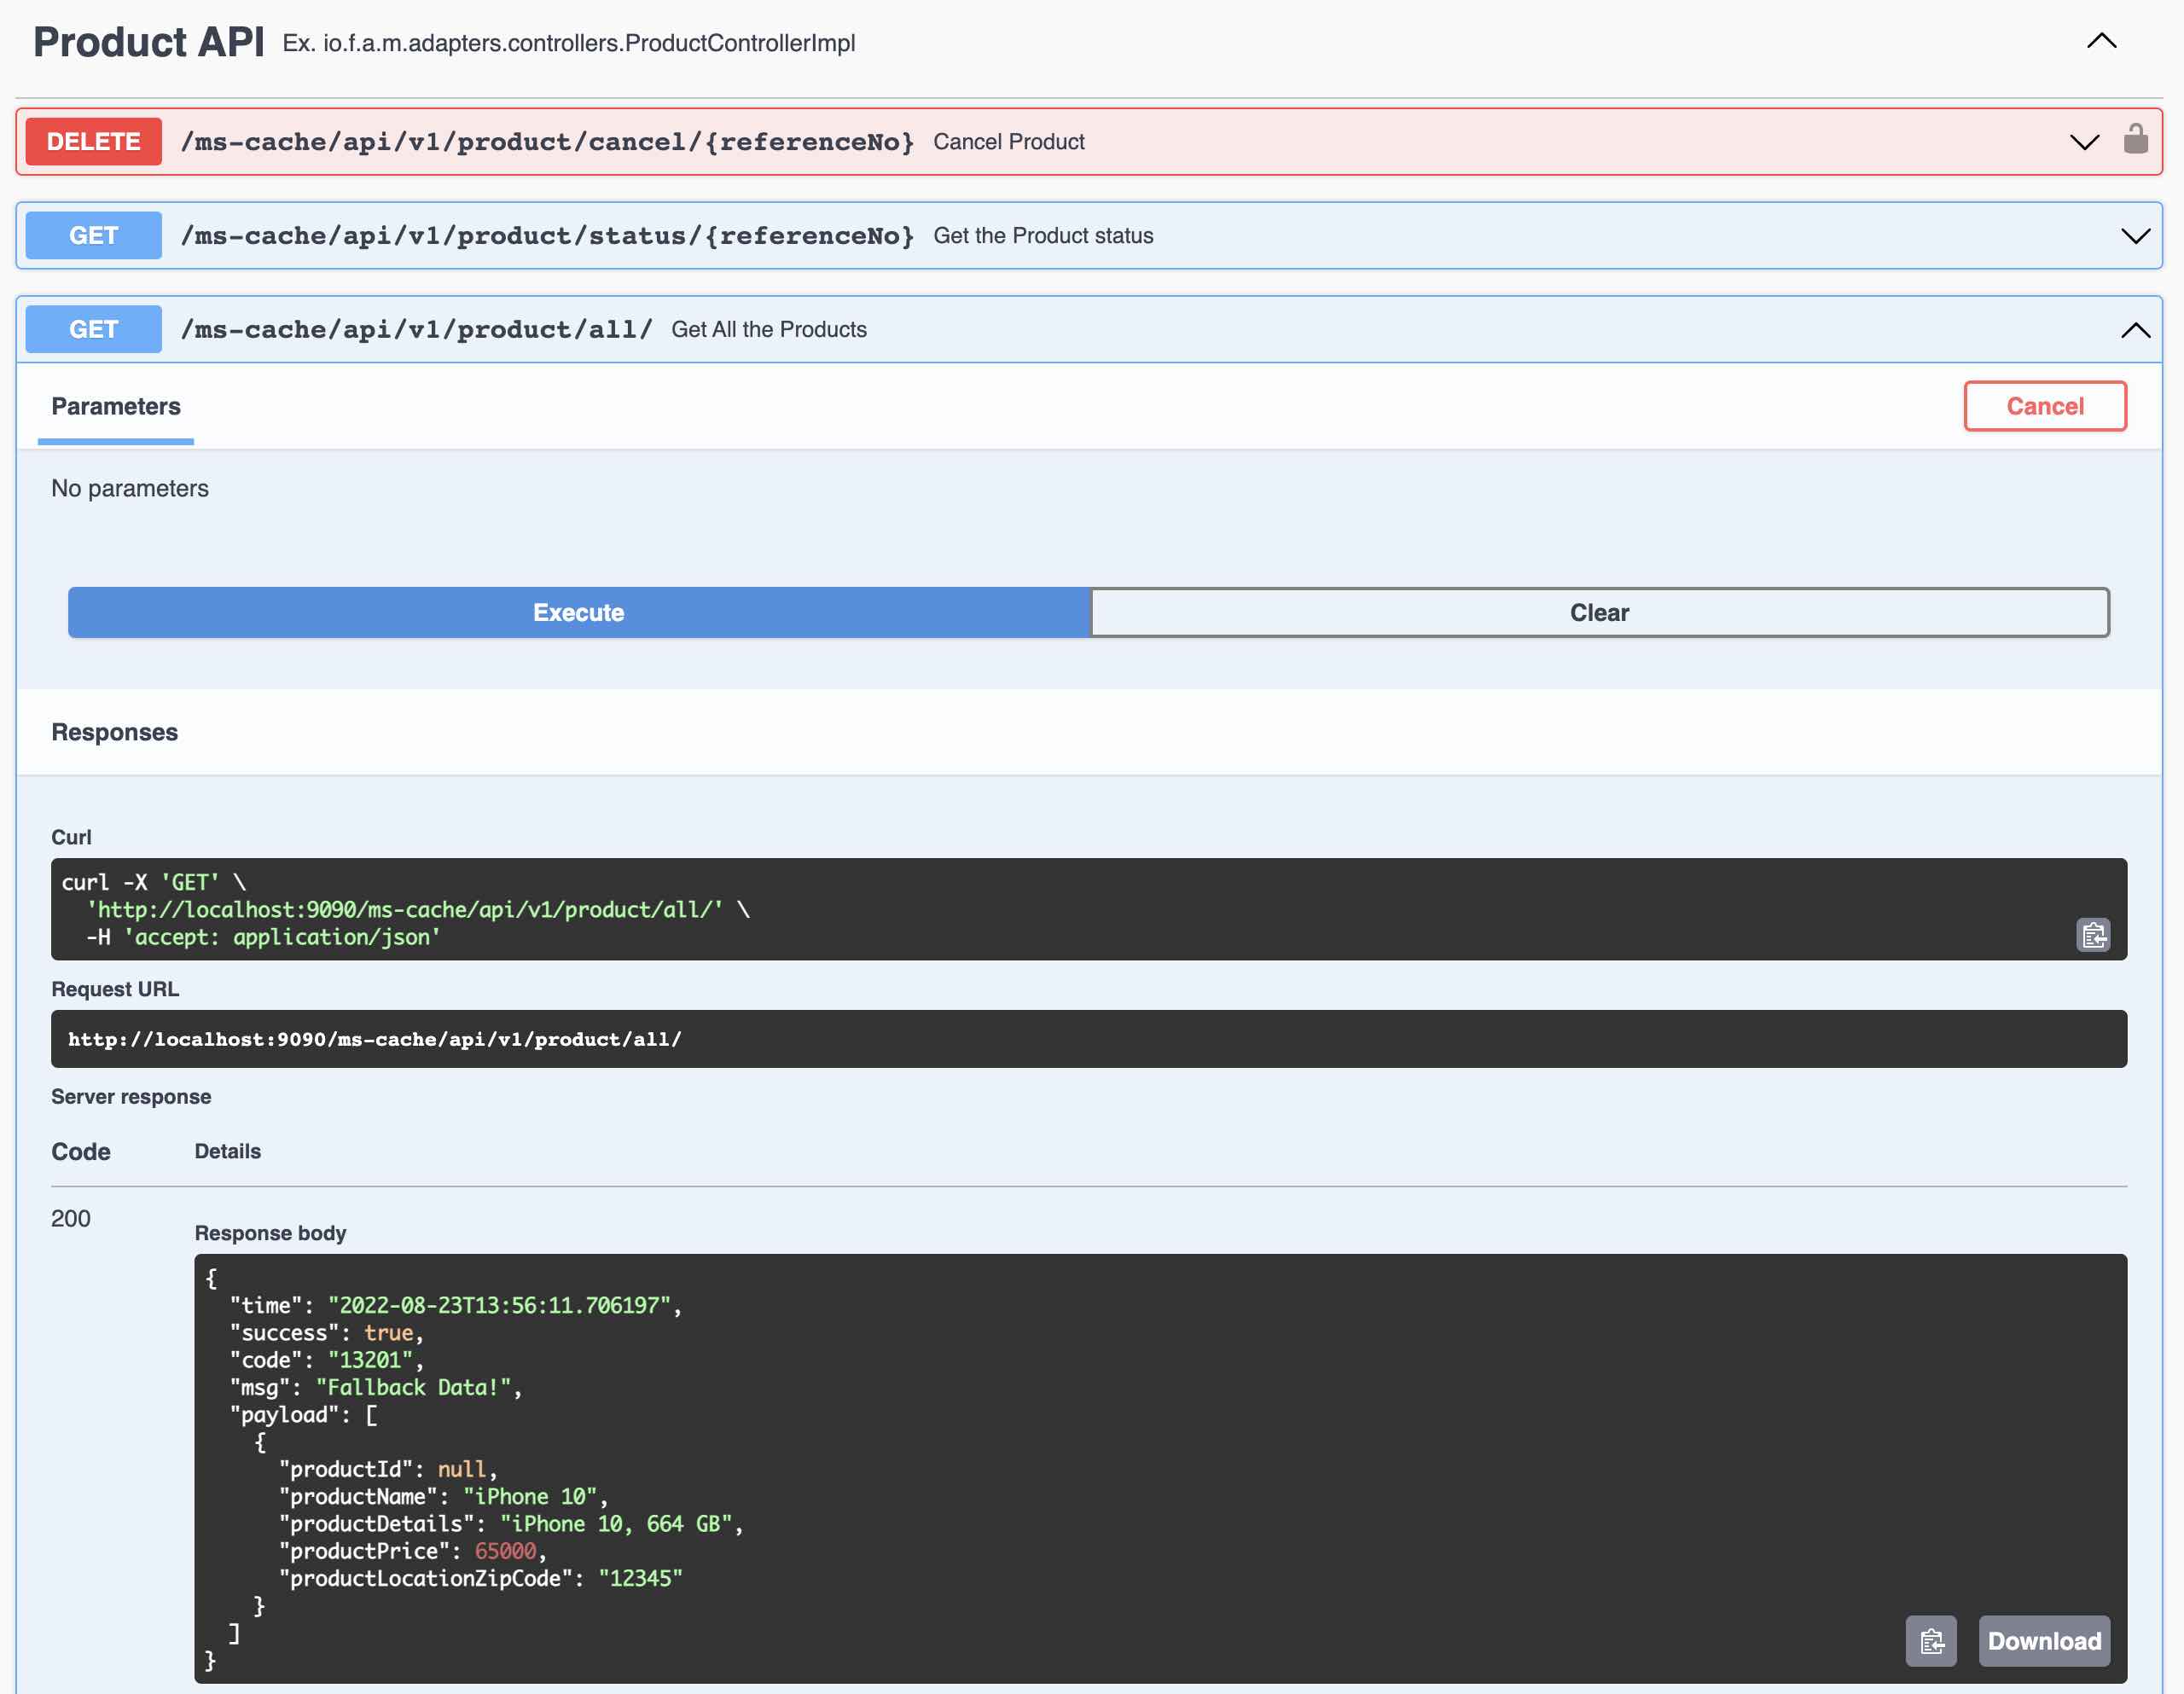
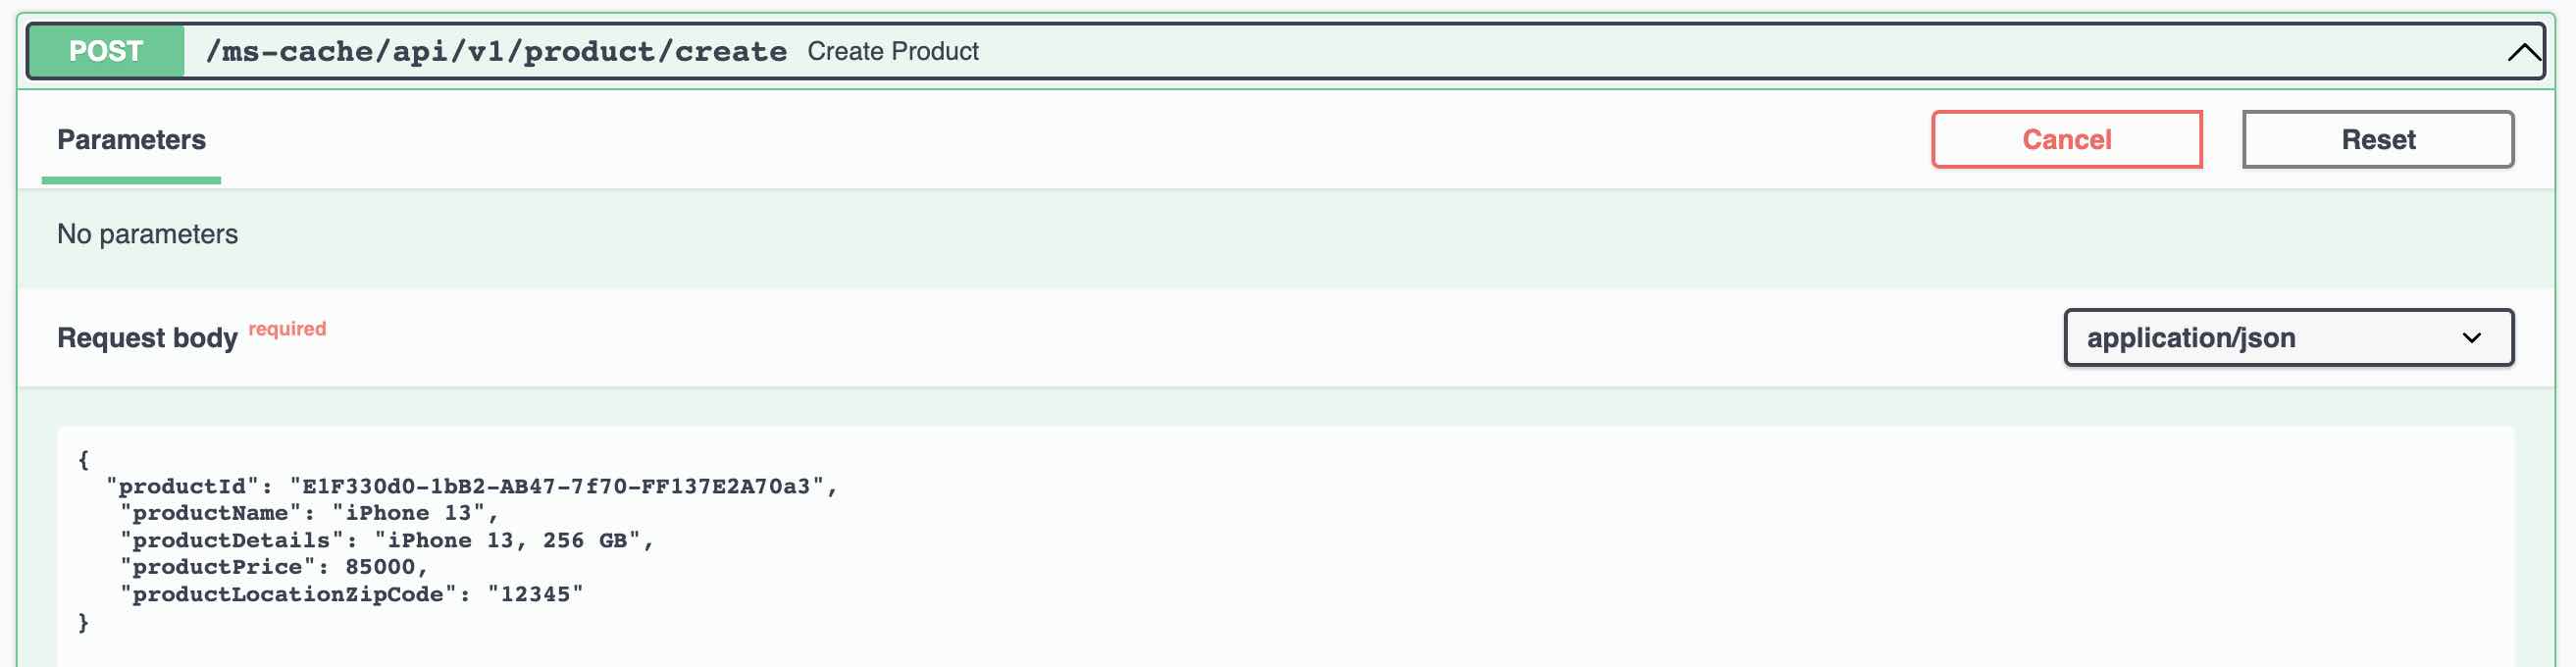
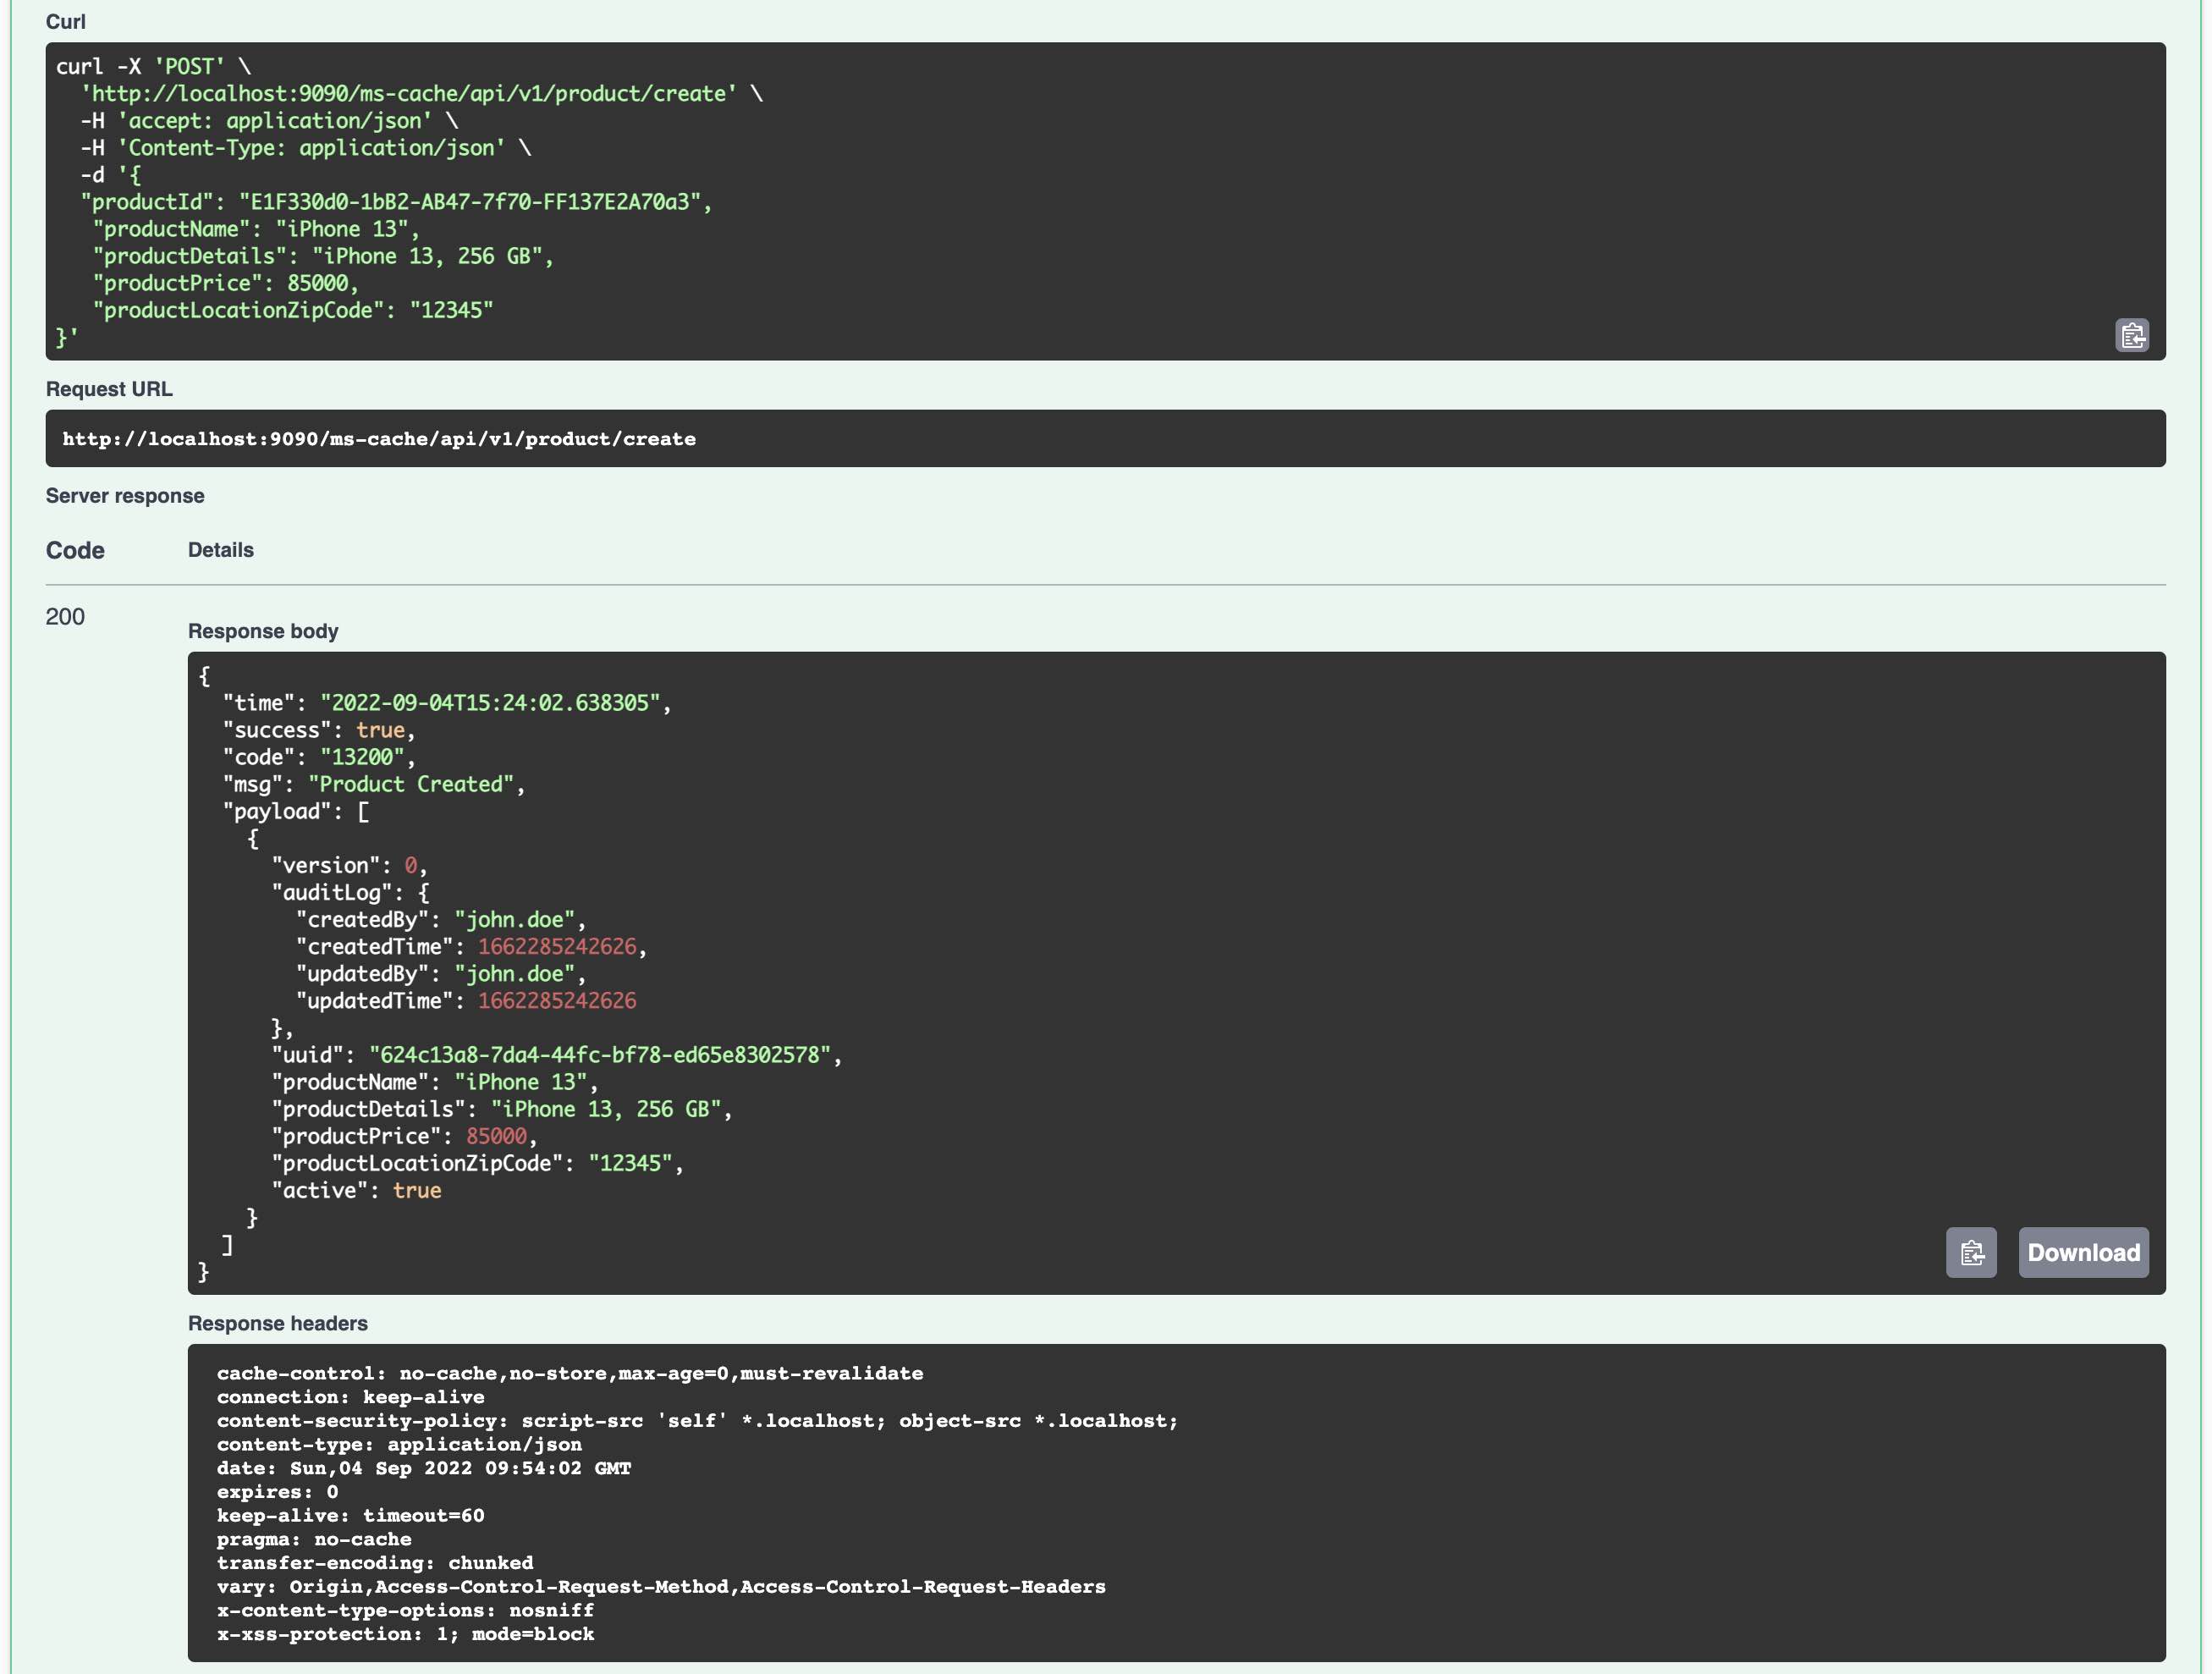
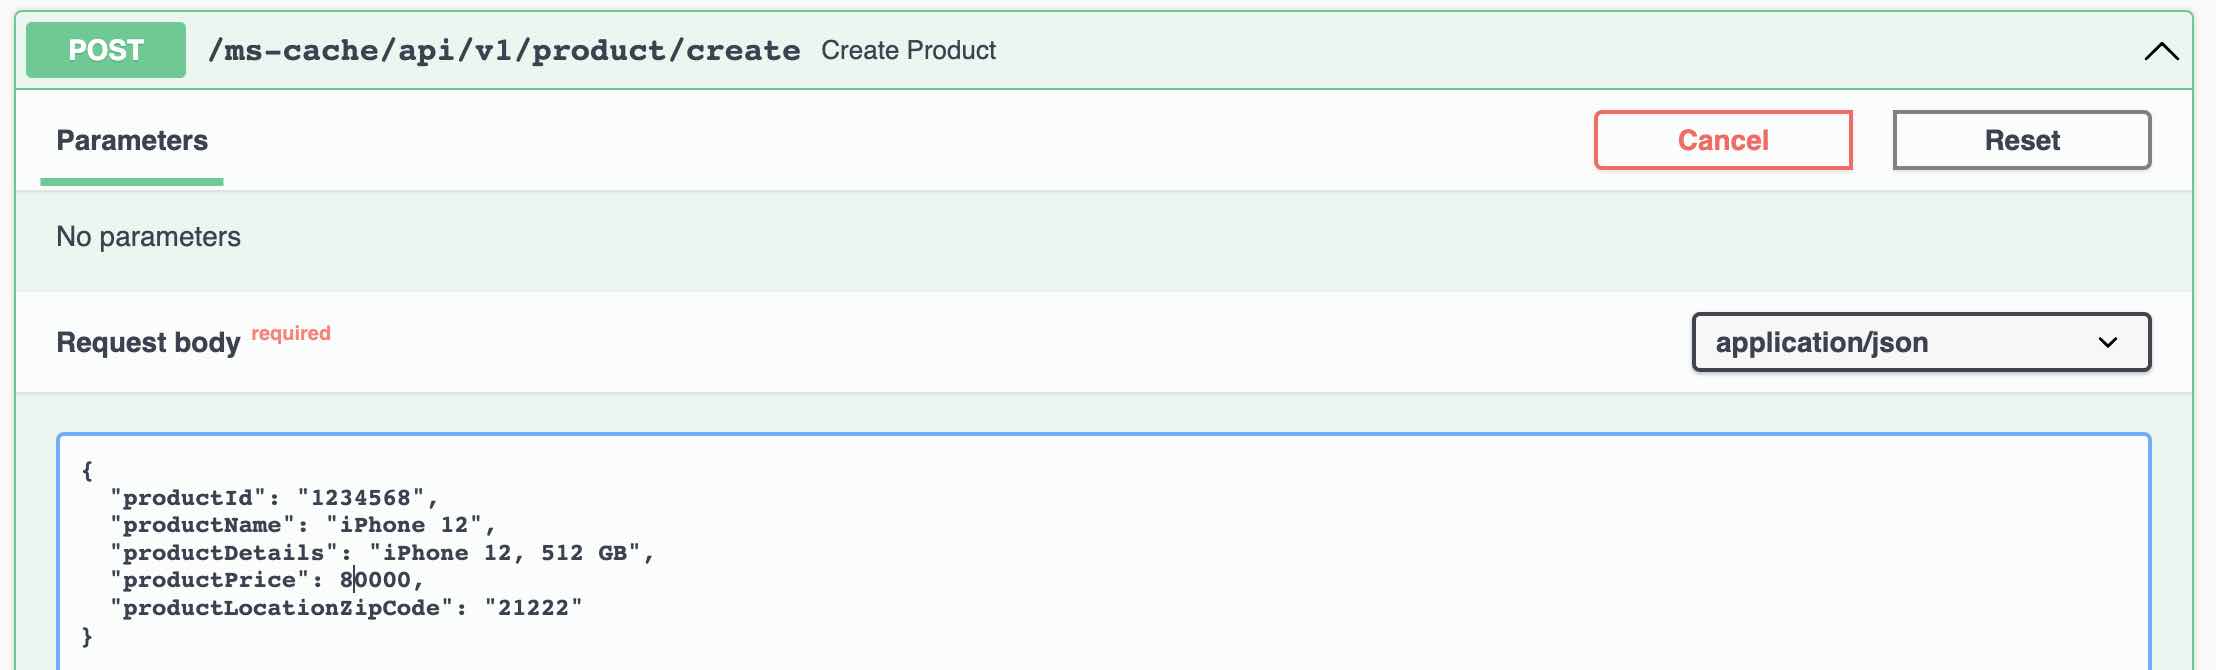
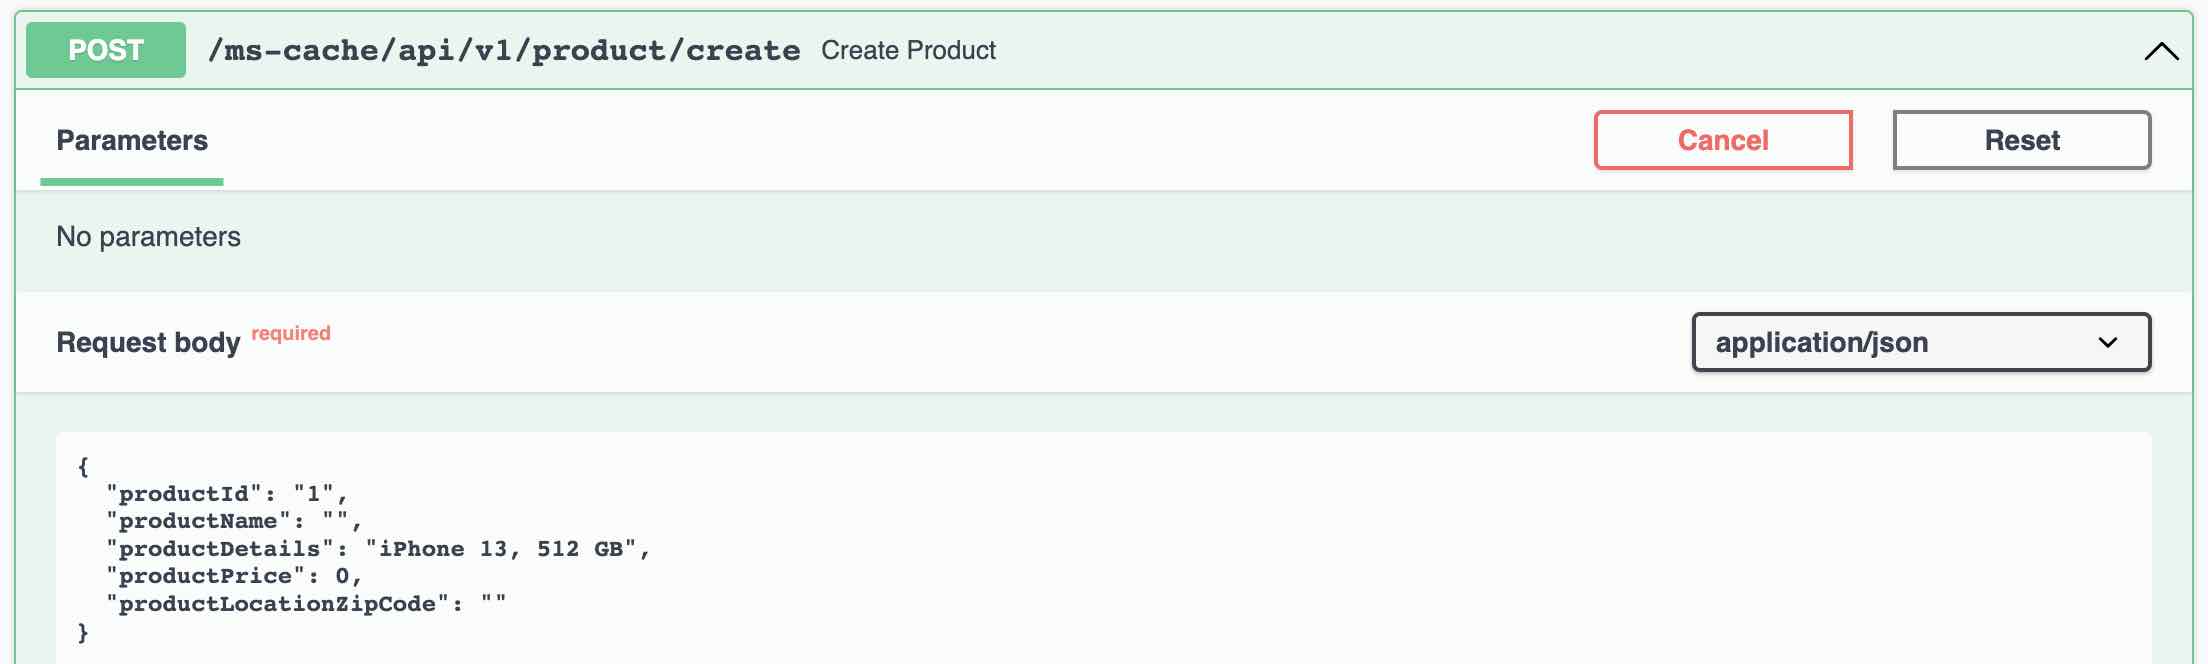
- SpringBoot App with Swagger Docs (...adapters.controllers)
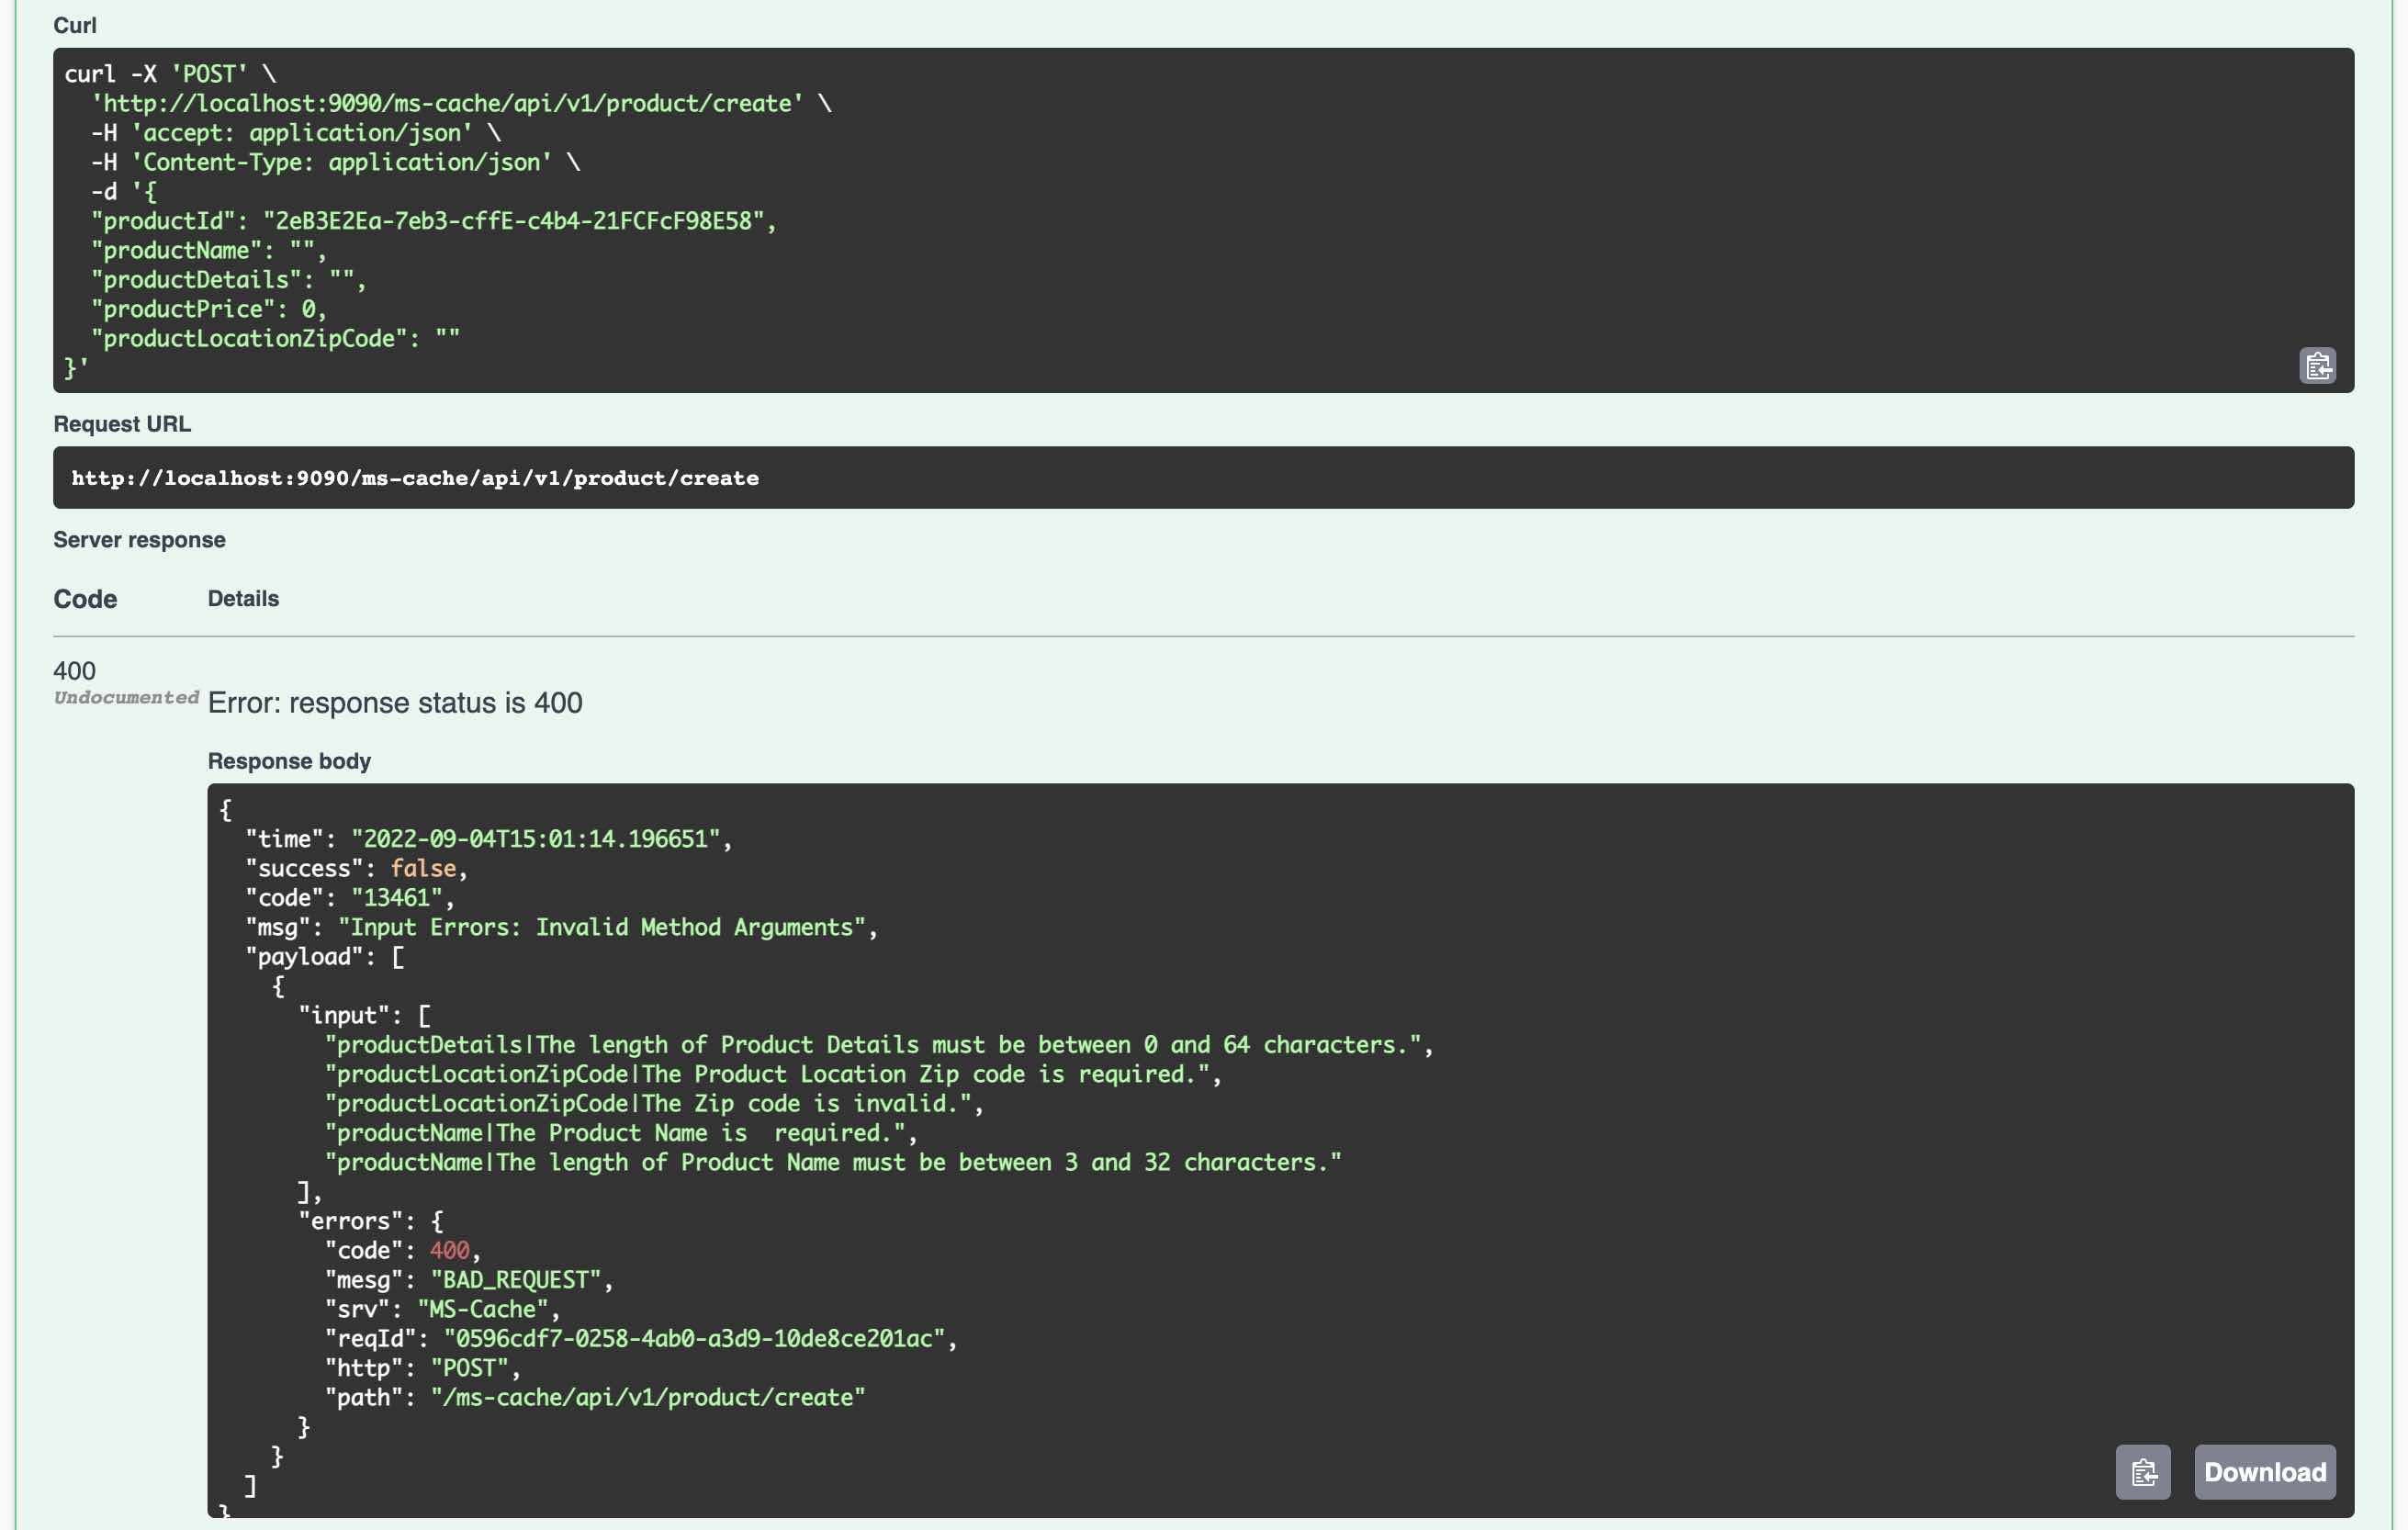
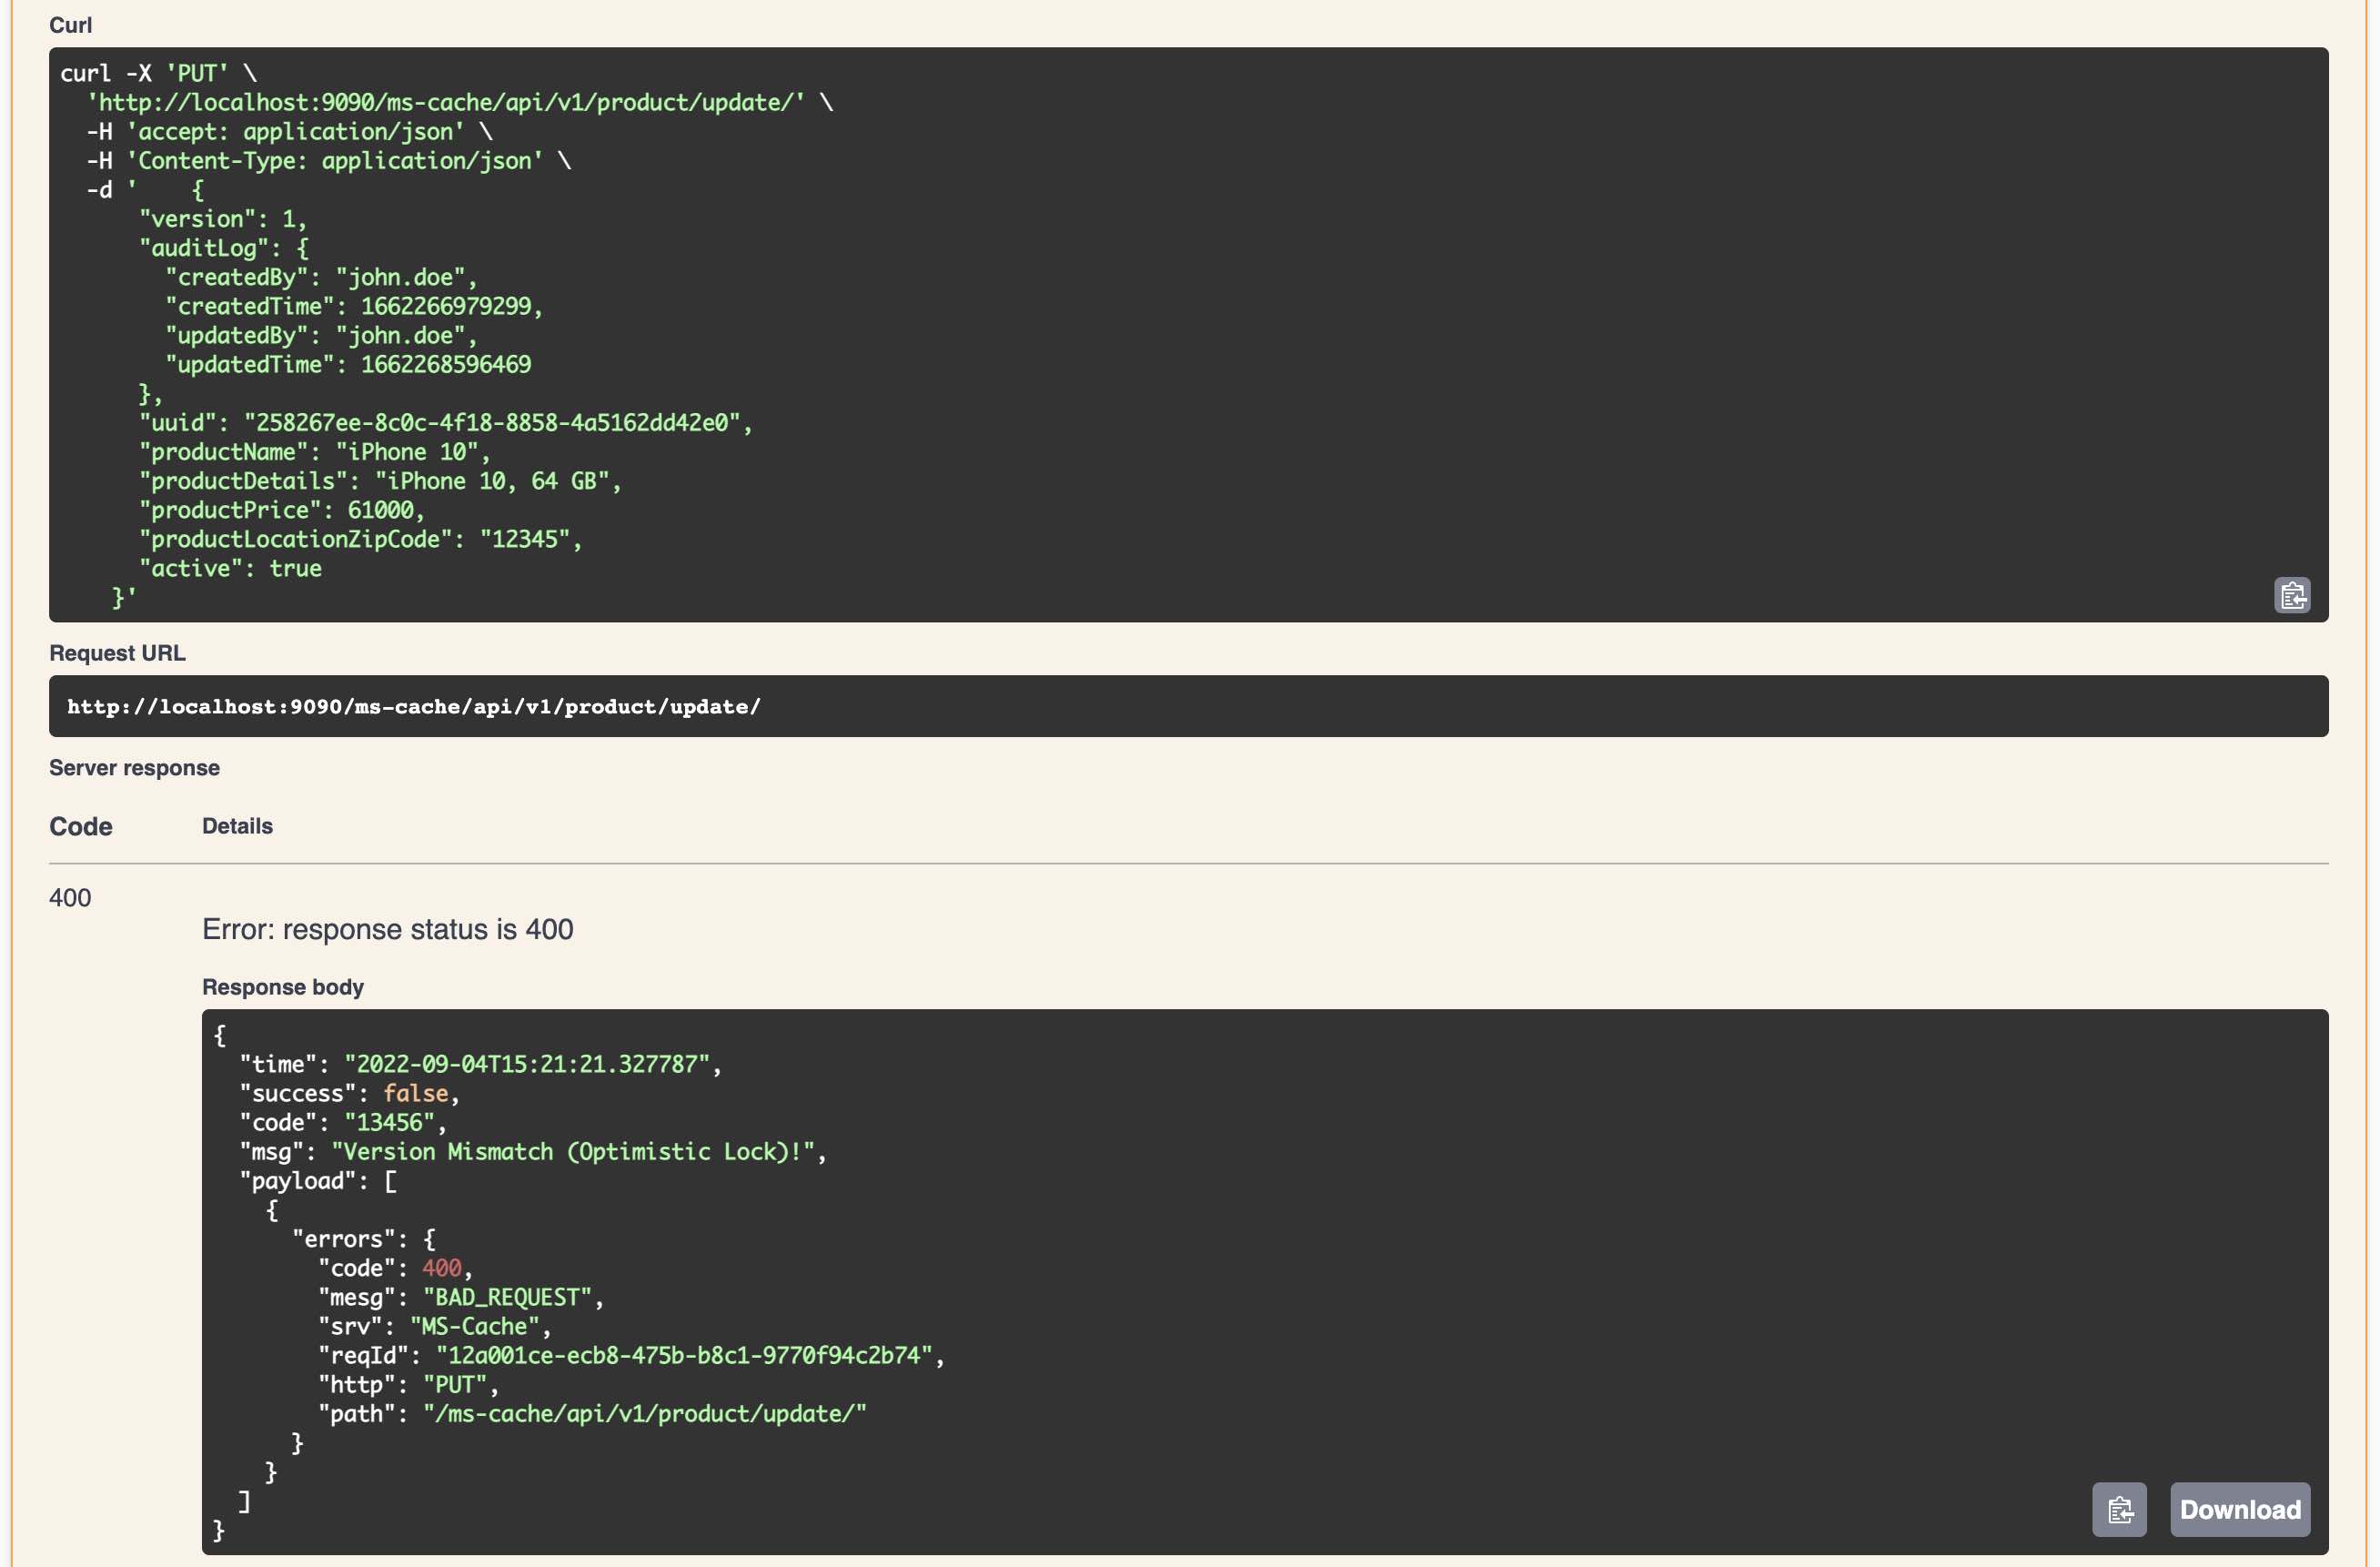
- Exception Handling with Exception Framework using AOP ( ..adapters.aop)
- Log Management using Logback (...adapters.filters)
- Standardized REST Responses (...domain.models.StandardResponse)
- Security using JWT Tokens (...adapters.security)
- Encrypting Sensitive Data using Encryption Algorithms (...security)
- R2DBC configurations for H2 and PostgreSQL (...server.config)
- SpringBoot 3.1
- Java 17
- Project Reactor
- R2DBC
- Maven 3.8.6
- Git 2.31
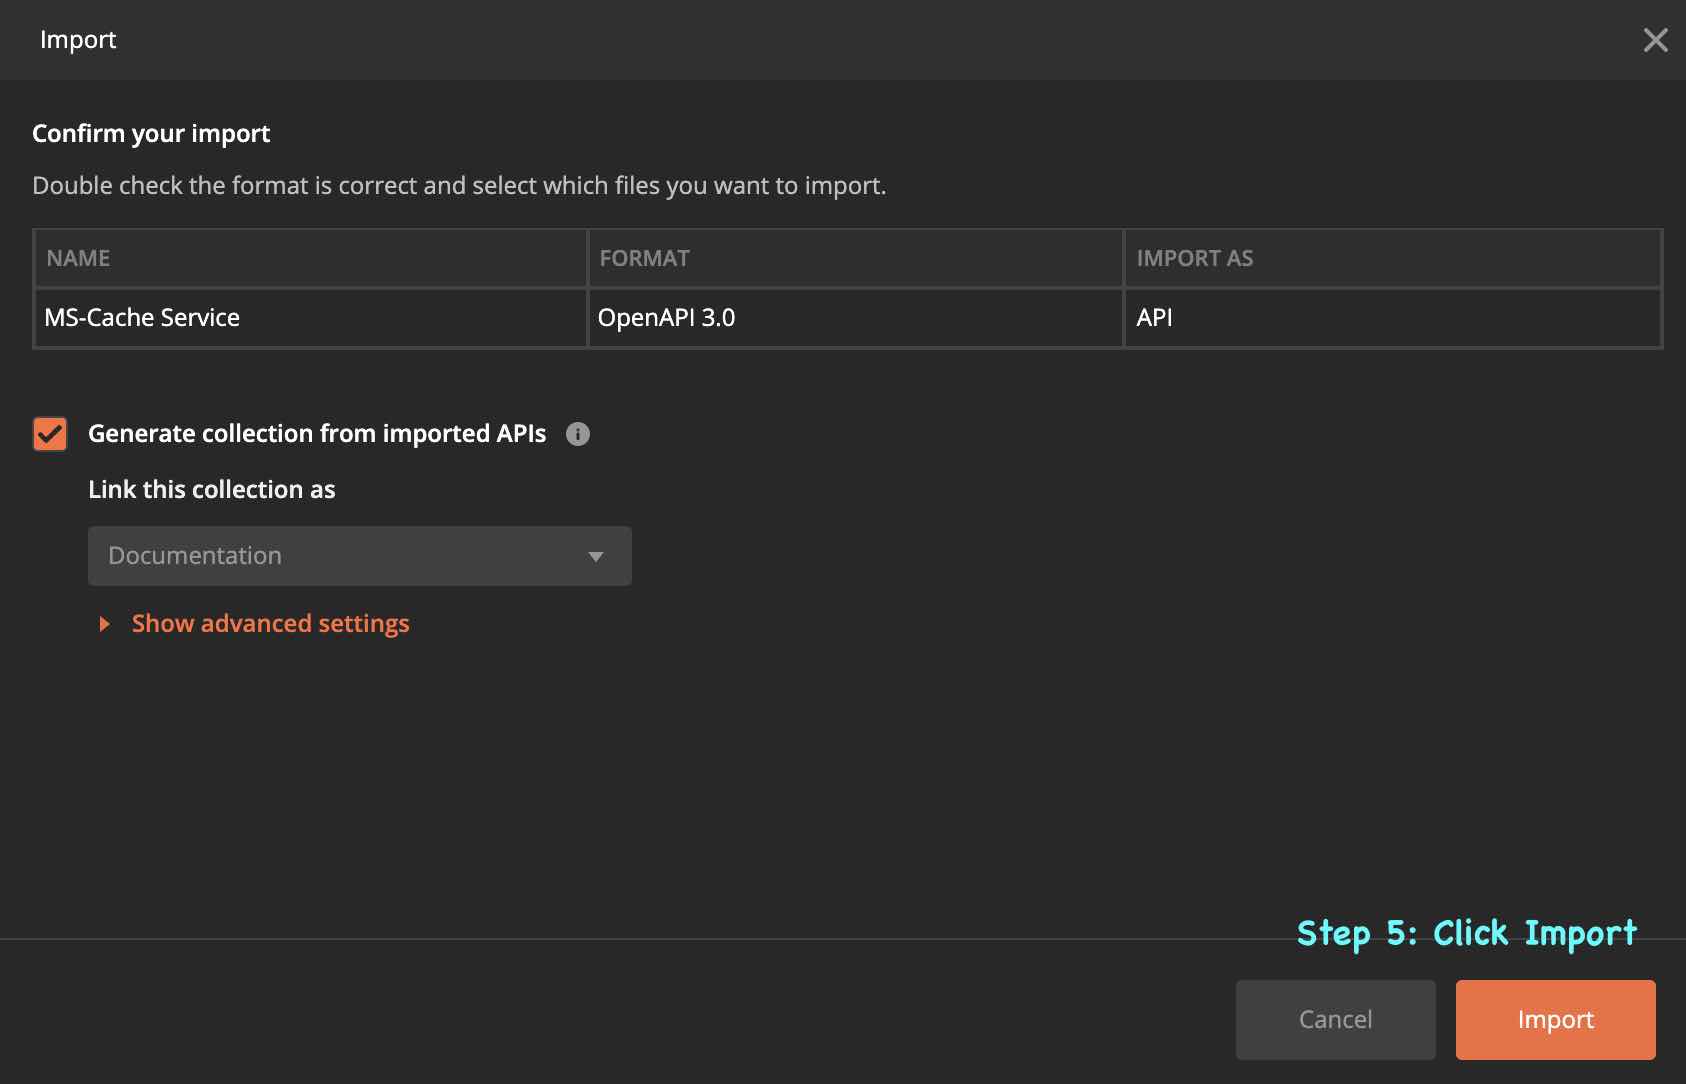
- SpringBoot App template with
- Open API 3 Ex,
- Spring Actuator,
- Micrometer and
- Redis Cache Implementation with
- H2 In Memory Database
- POM File with (SpringBoot) Fat and Thin (Maven) jar file creation and
- Dockerfile for containerisation.
- git clone https://github.com/MetaArivu/ms-cache-kafka-quickstart.git
- cd ms-cache-kafka-quickstart
Run the "compile" from ms-cache-kafka-quickstart
- compile OR ./compile (Runs in Linux and Mac OS)
- mvn clean; mvn -e package; (All Platforms)
- Use the IDE Compile options
- Clean up the target folder
- Generate the build no. and build date (takes application.properties backup)
- build final output SpringBoot fat jar and maven thin jar
- copy the jar files (and dependencies) to src/docker folder
- copy the application.properties file to current folder and src/docker folder
In Step 1.2.2 application.properties file will be auto generated by the "compile" script. This is a critical step. Without generated application.properties file the service will NOT be running. There is pre-built application properties file.
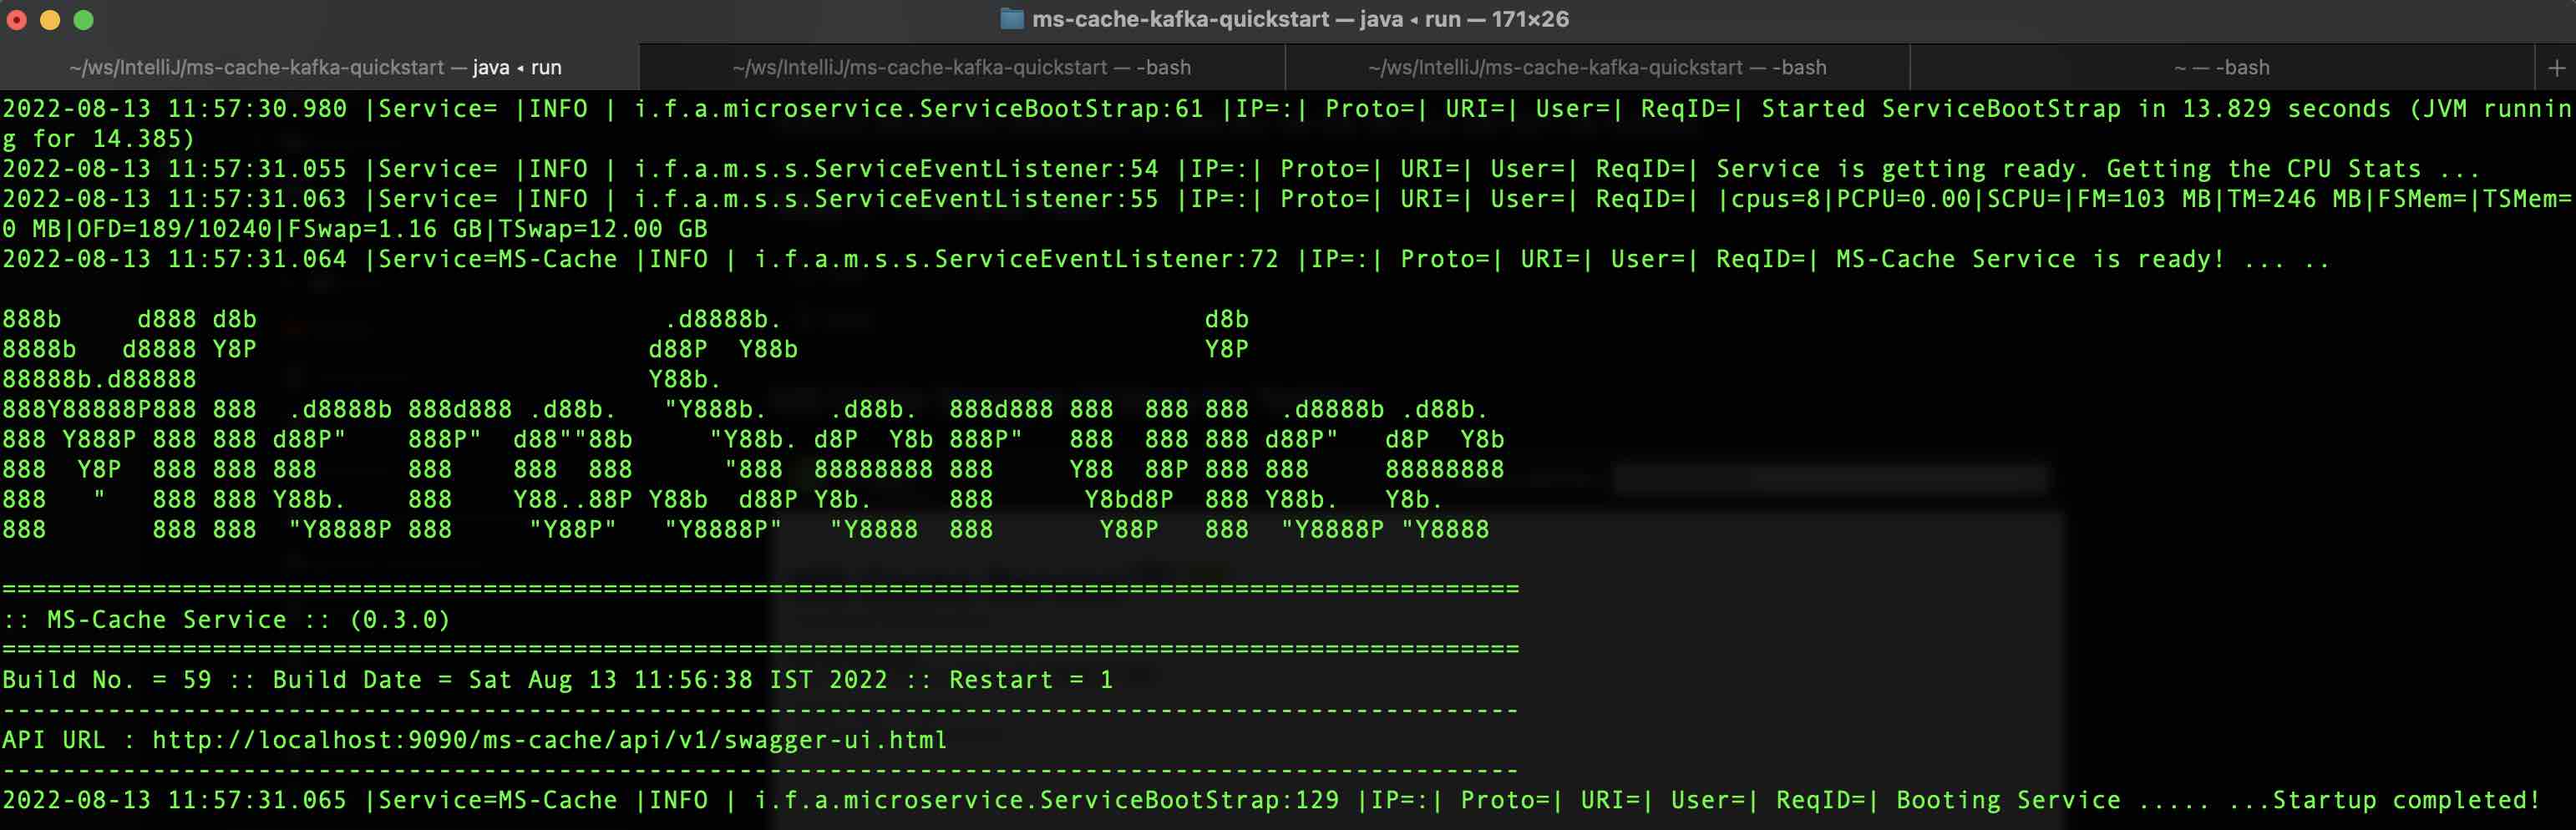
- run OR ./run (Runs in Linux or Mac OS)
- mvn spring-boot:run (All Platforms)
- test OR ./test (Runs in Linux or Mac OS)
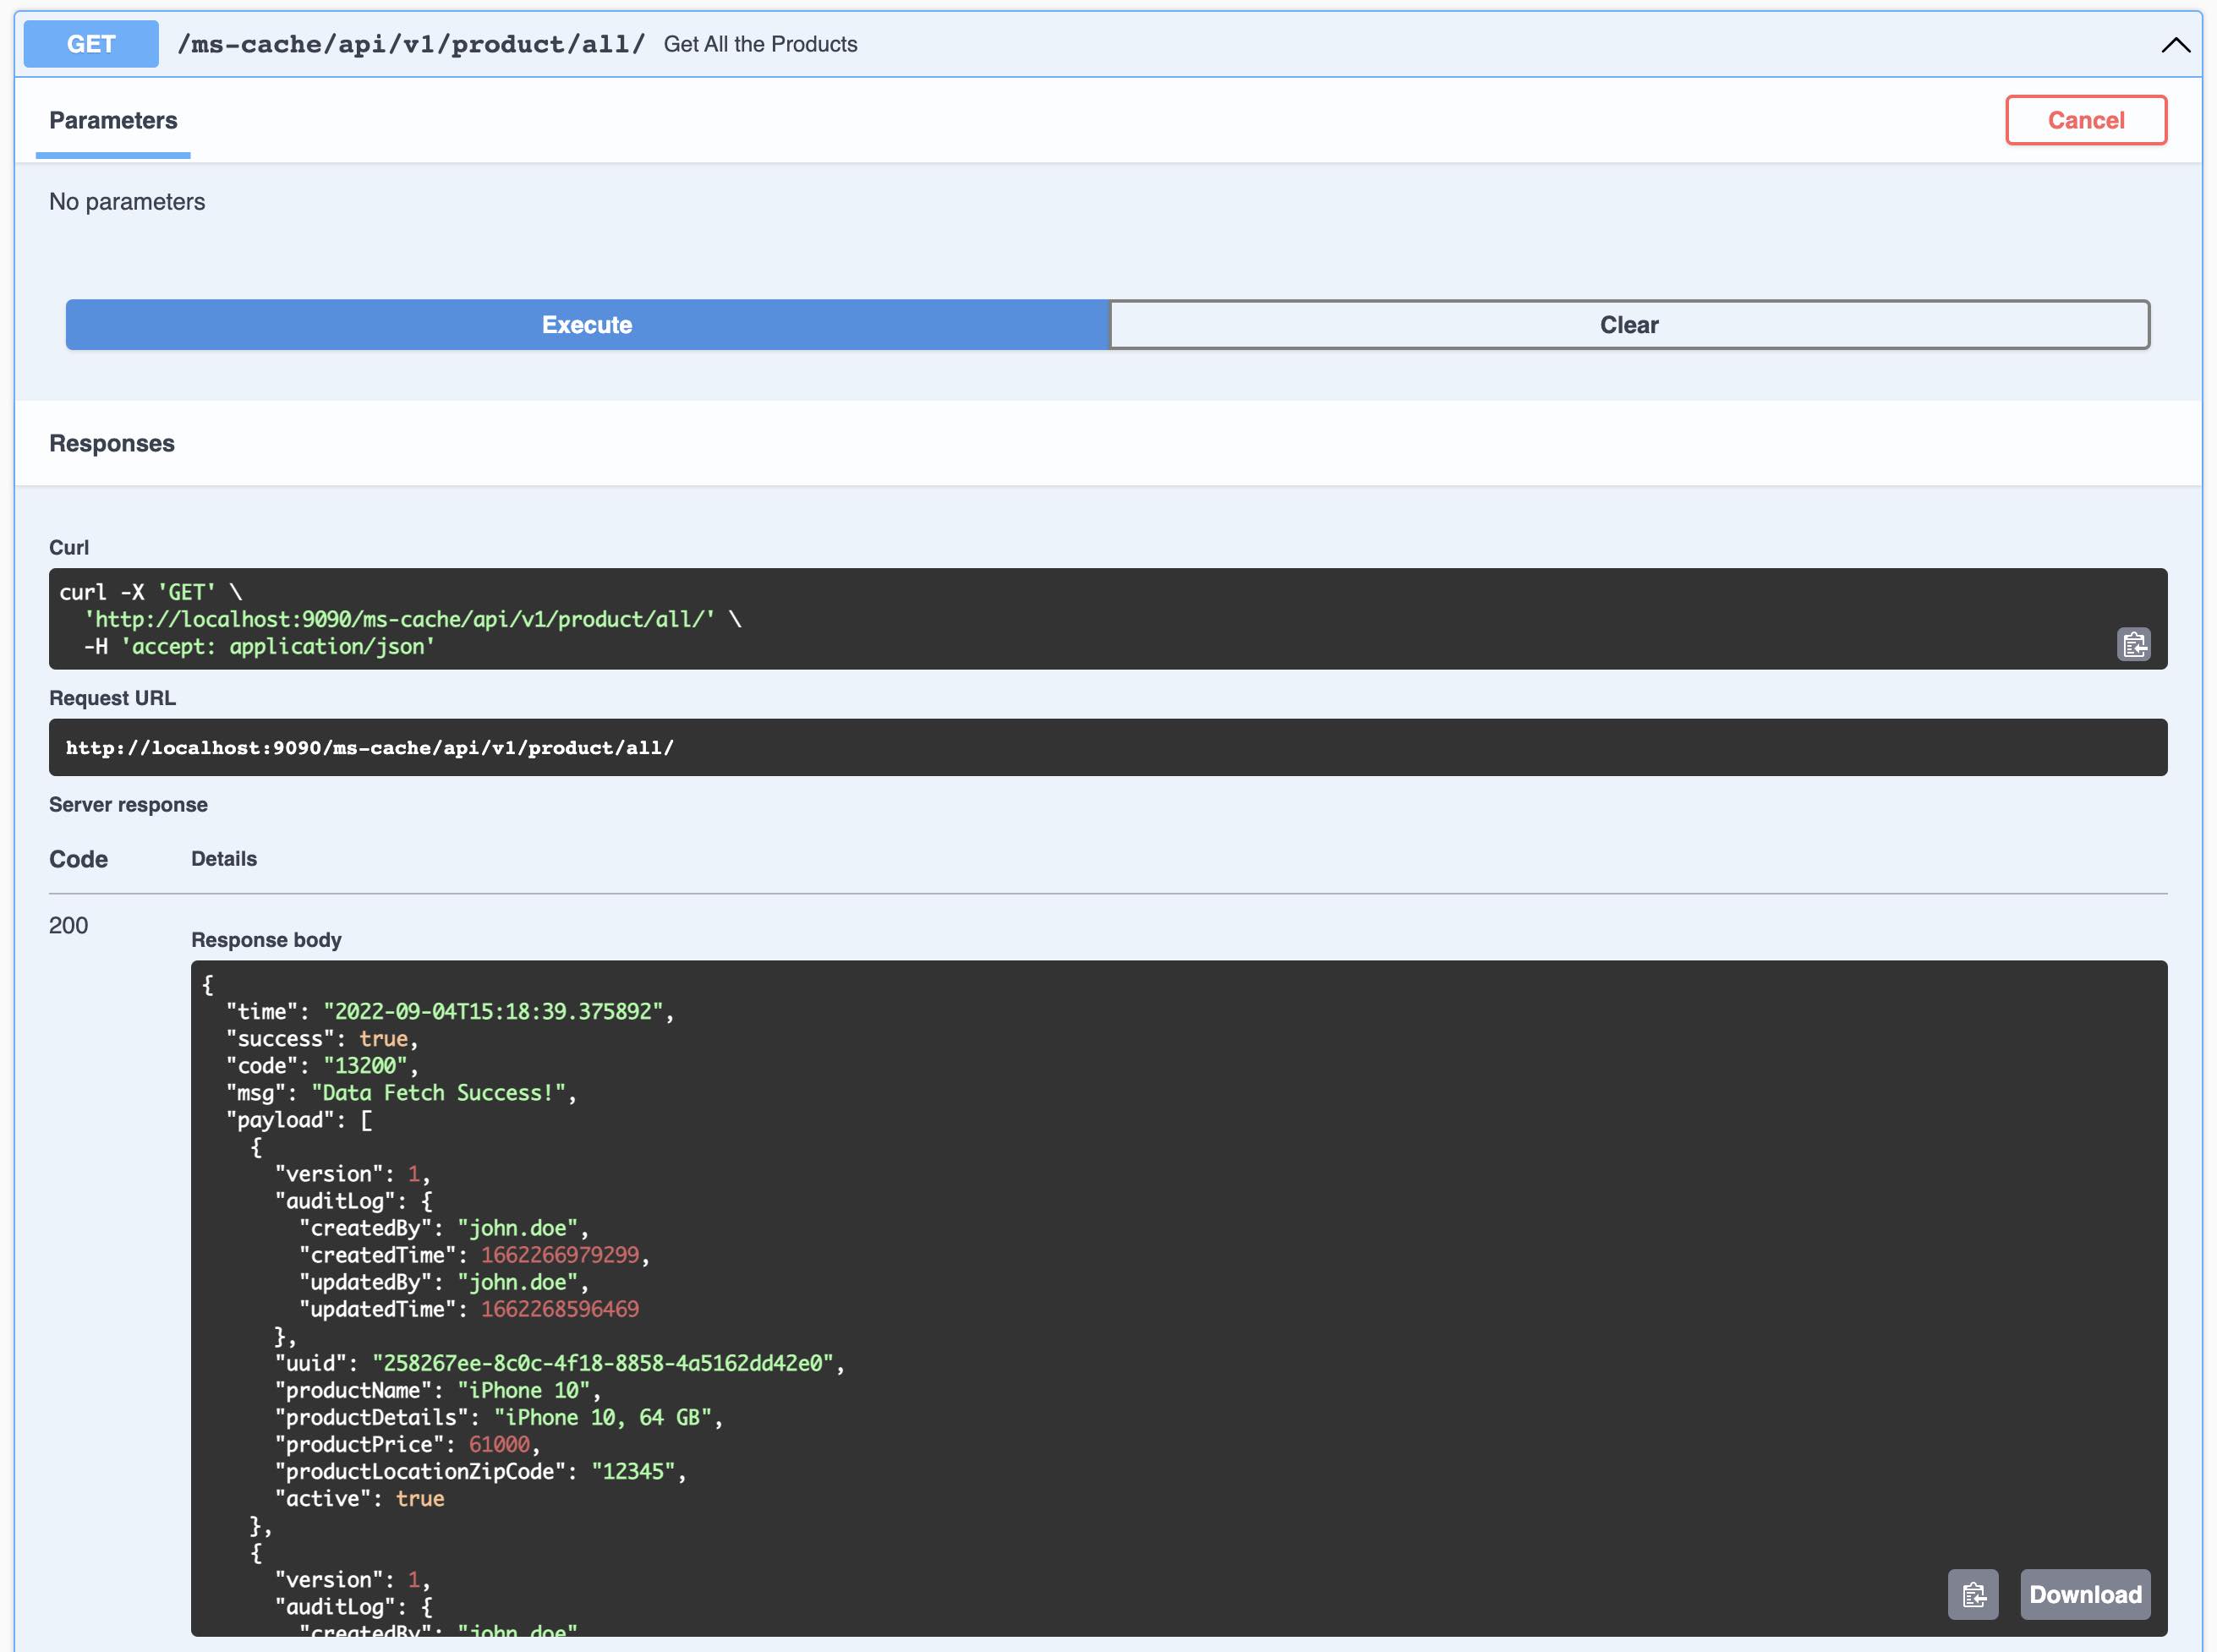
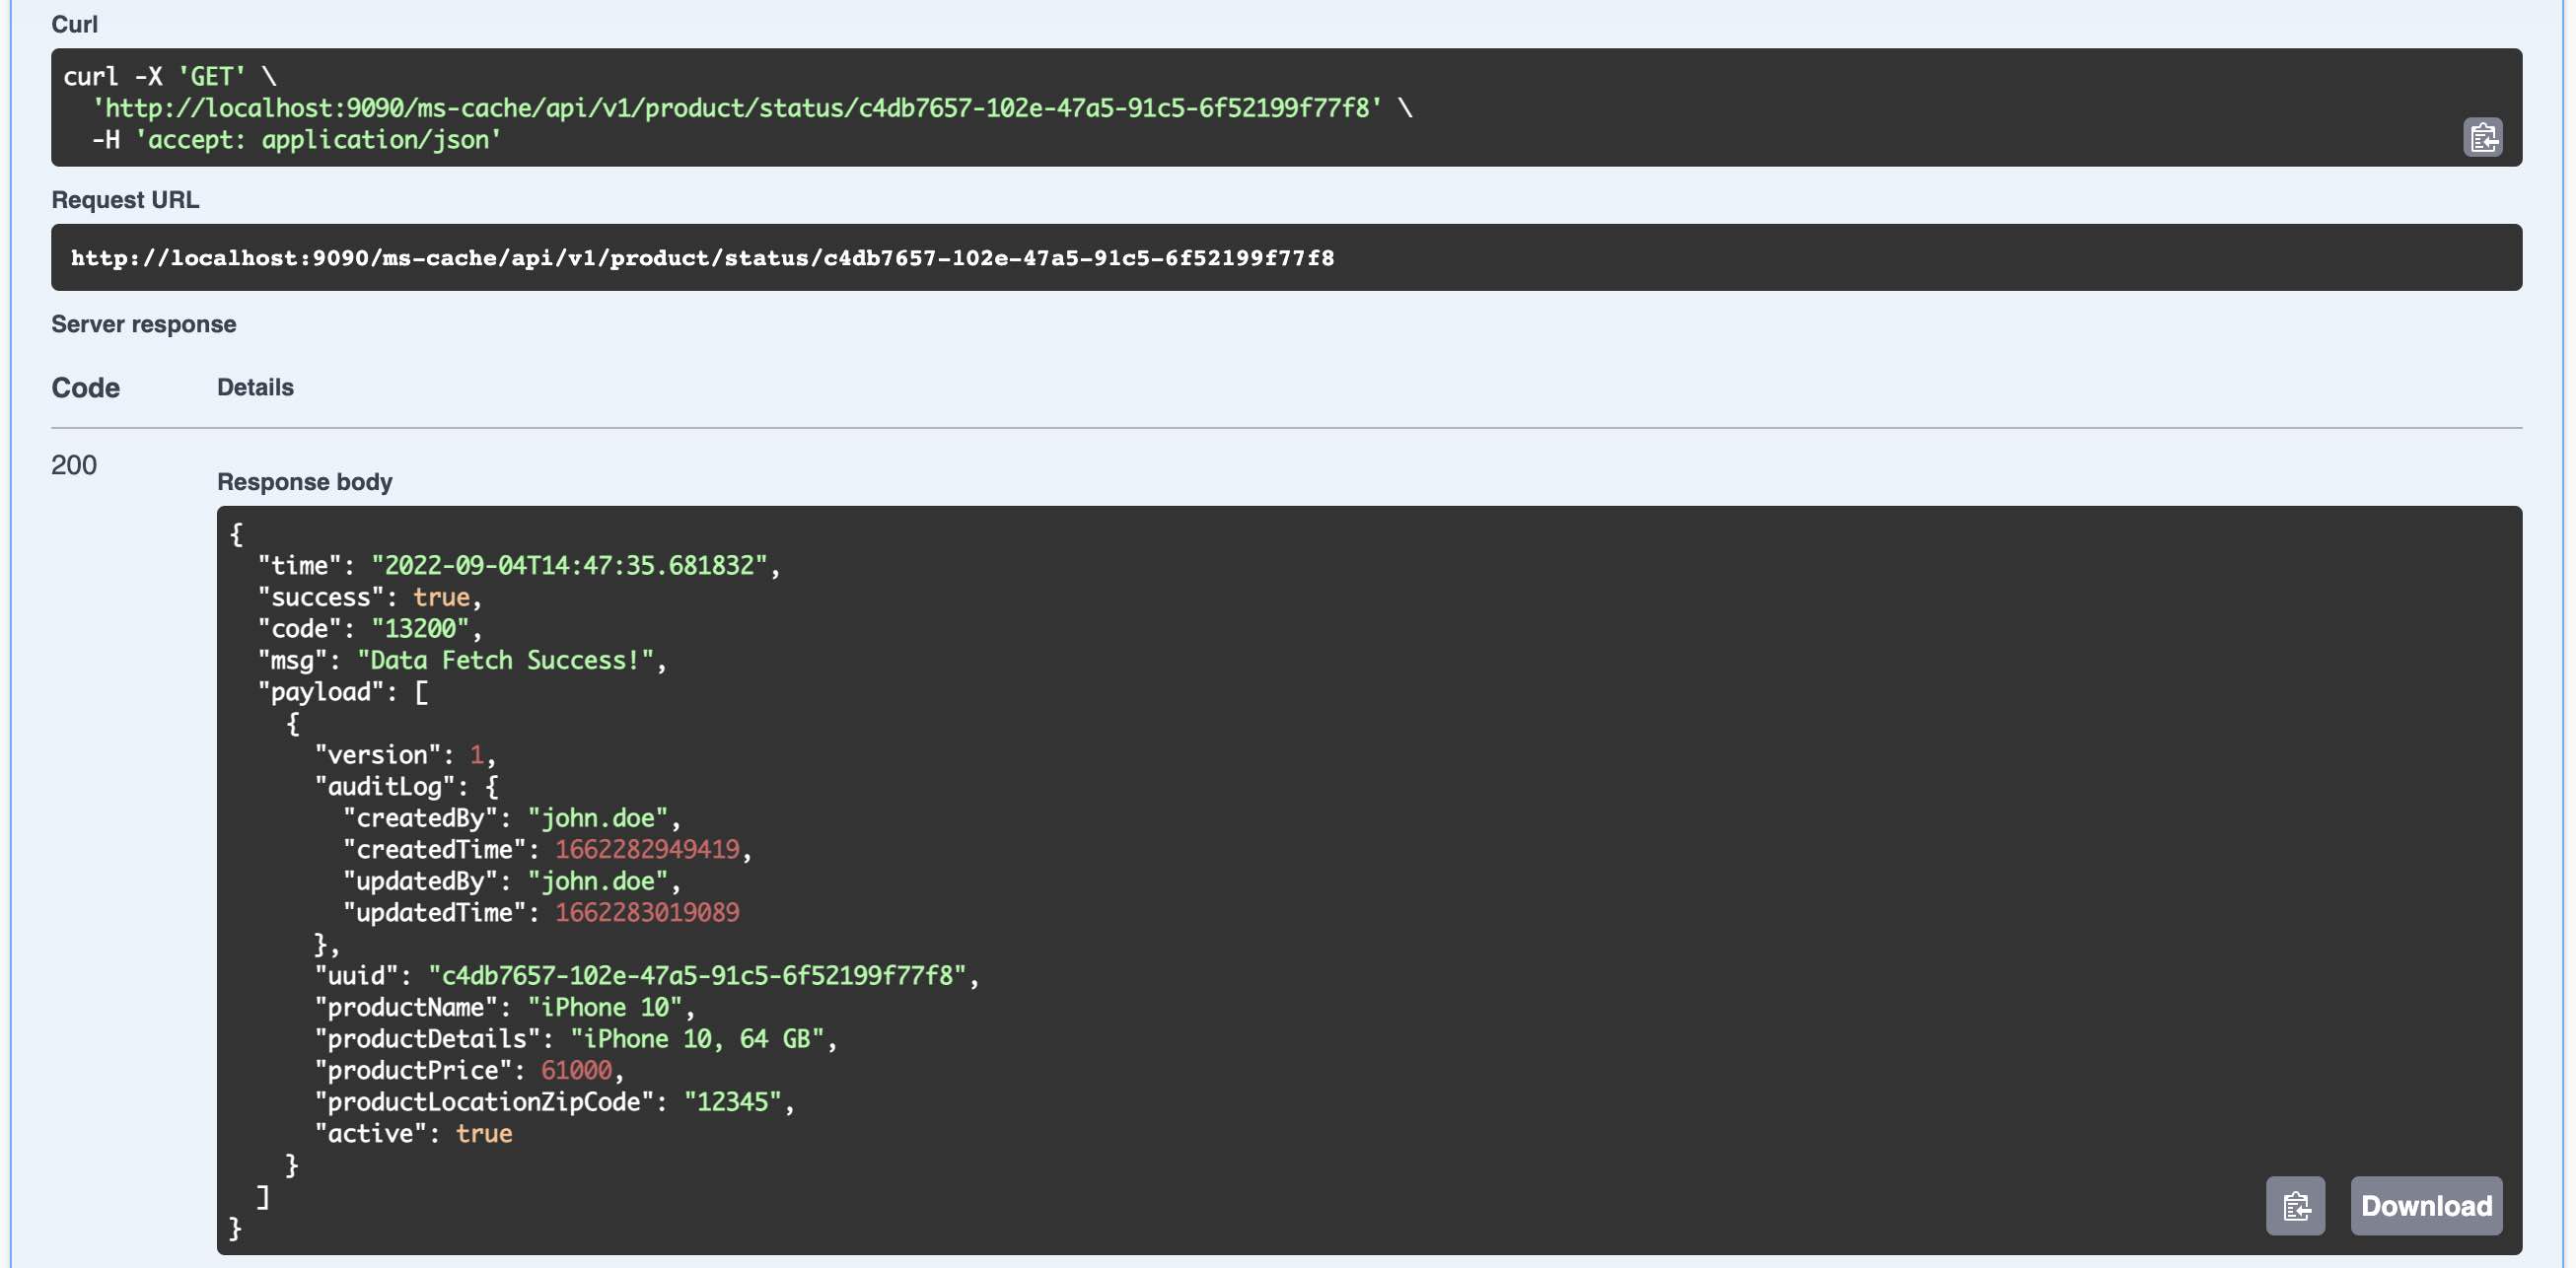
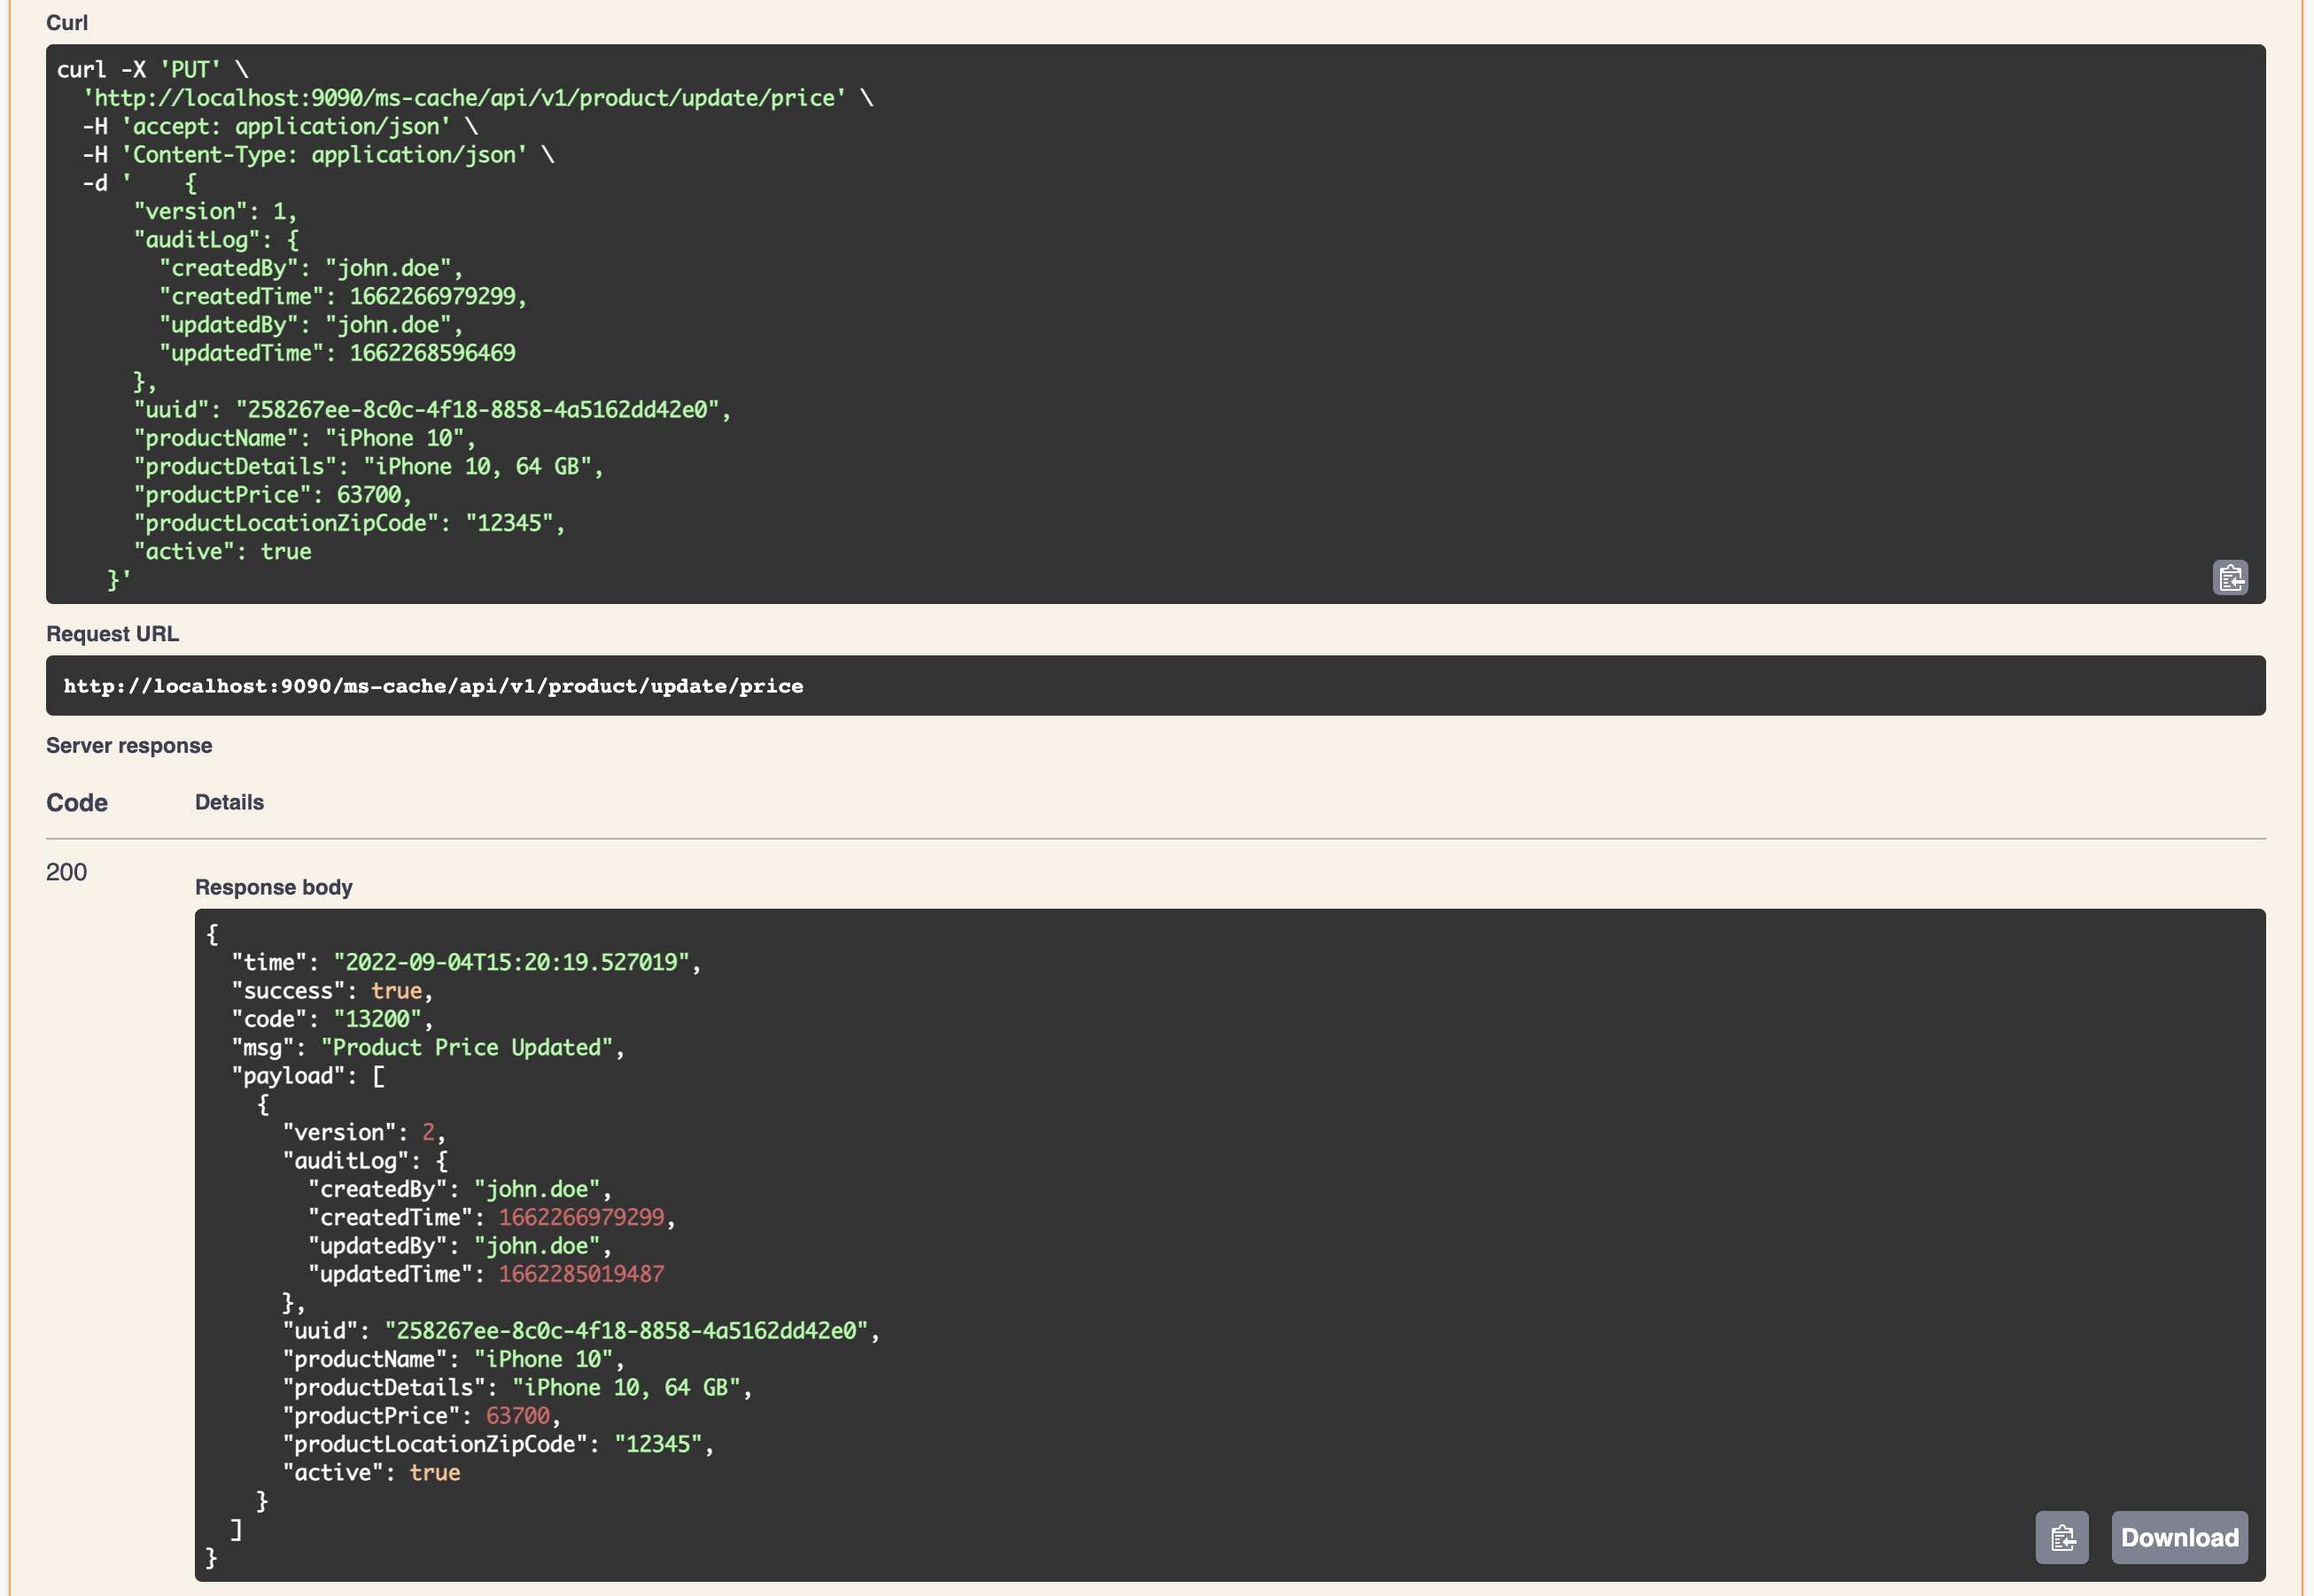
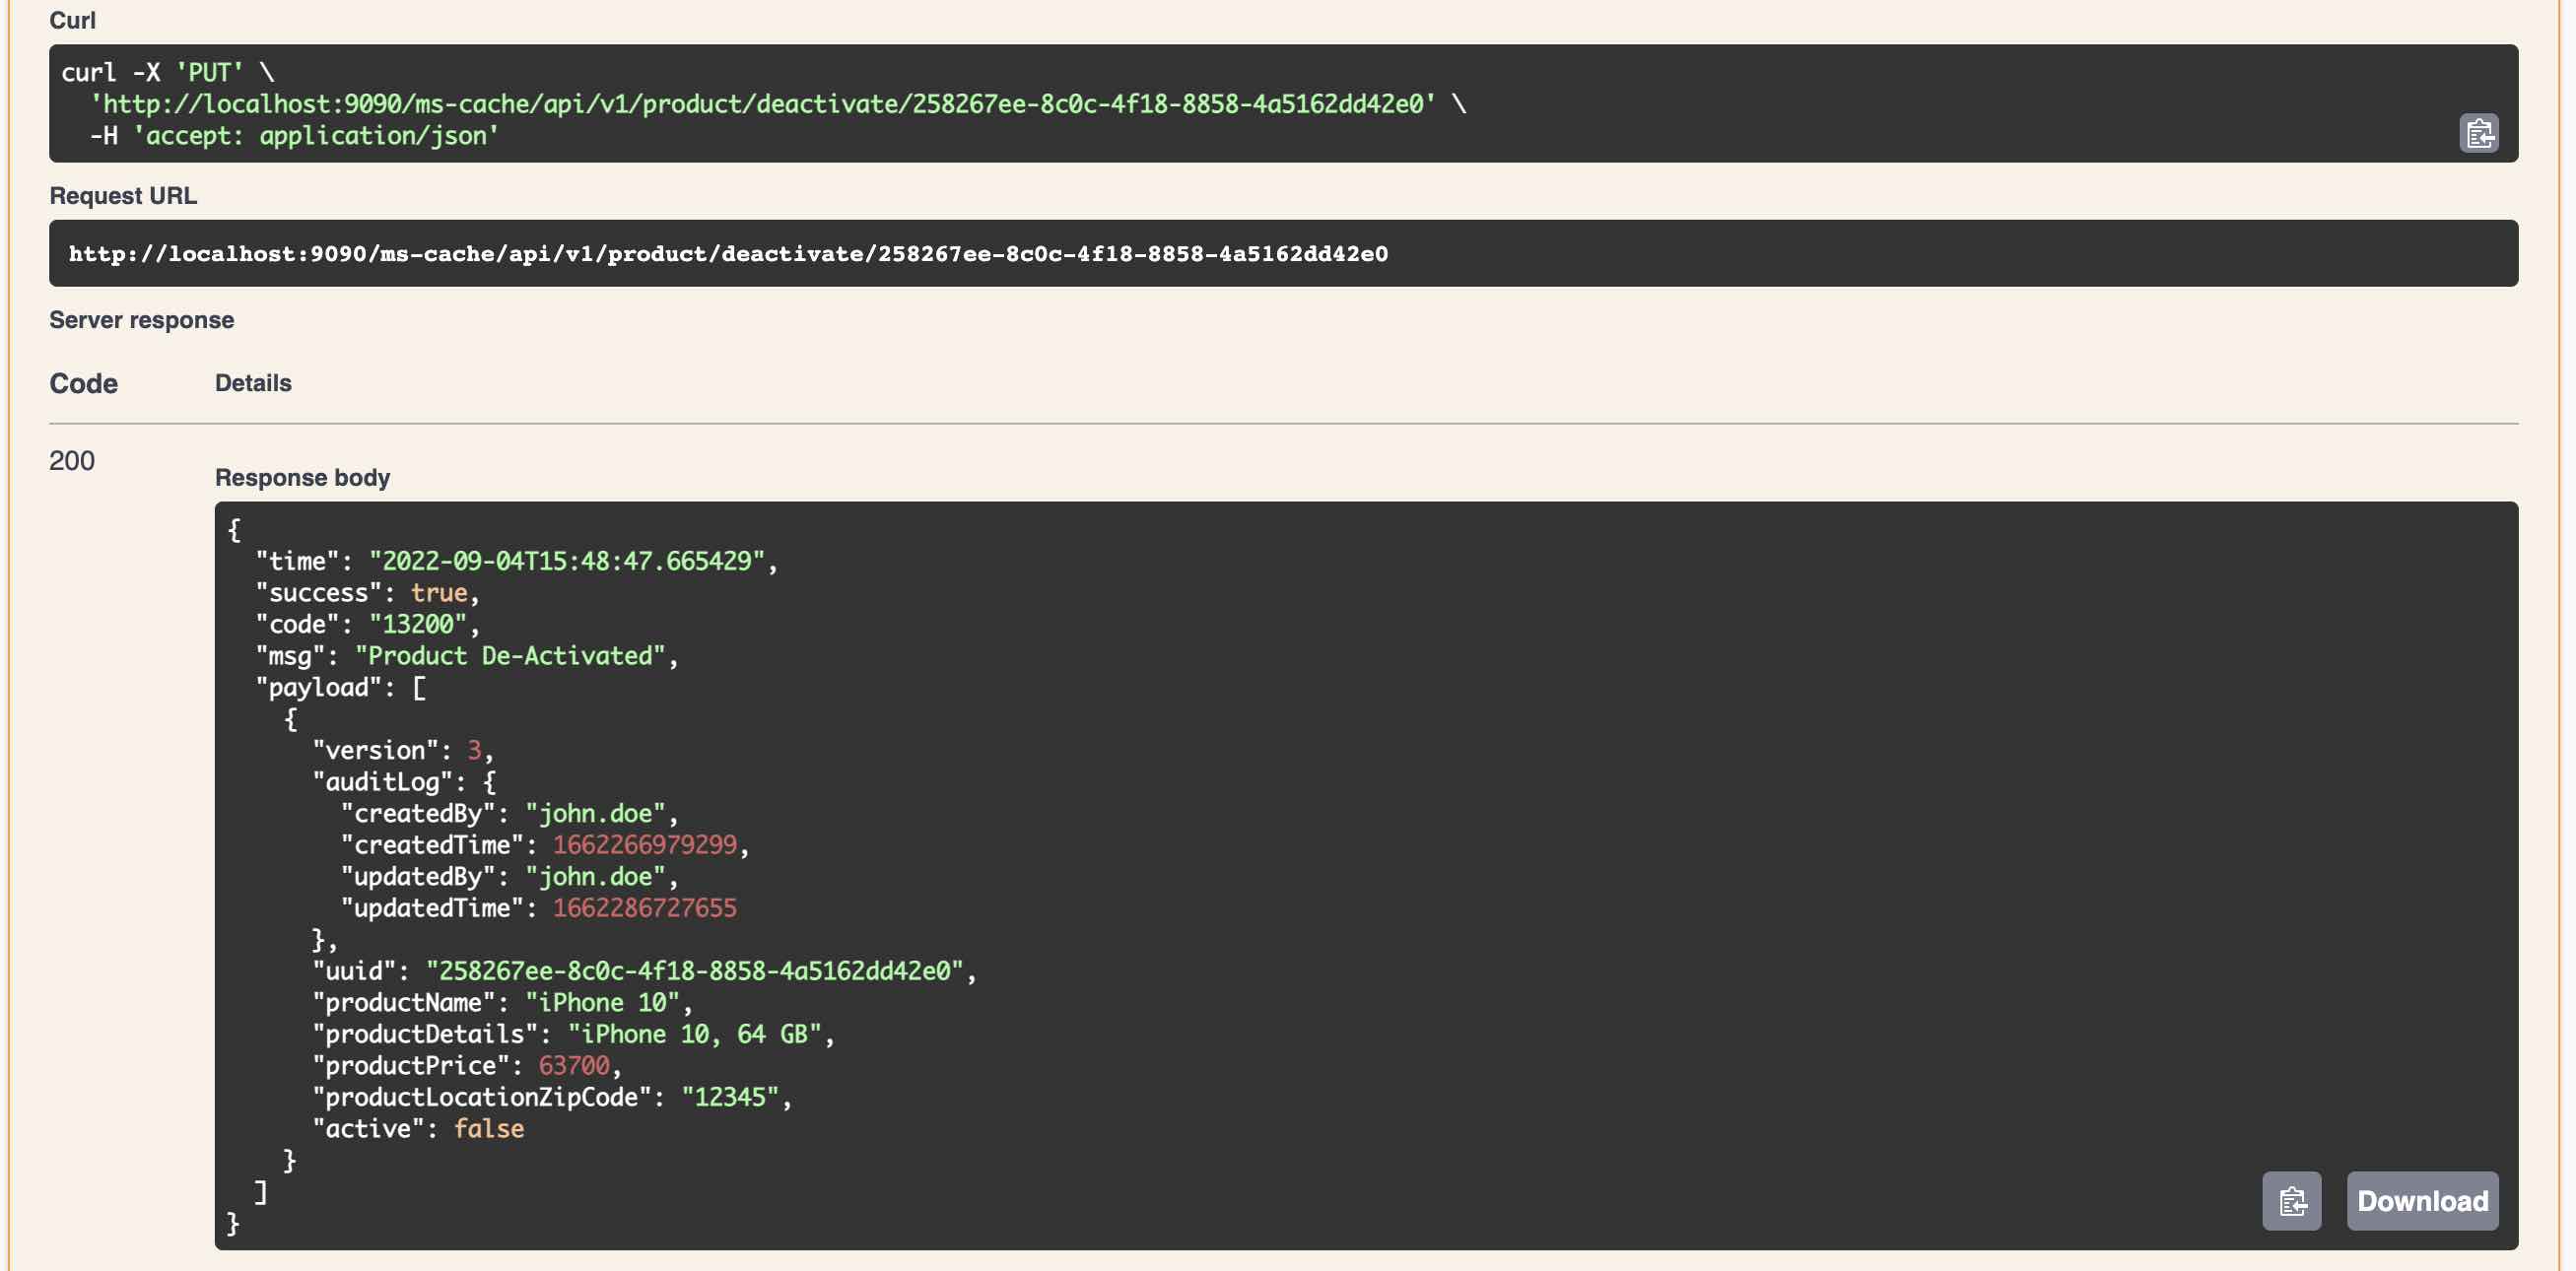
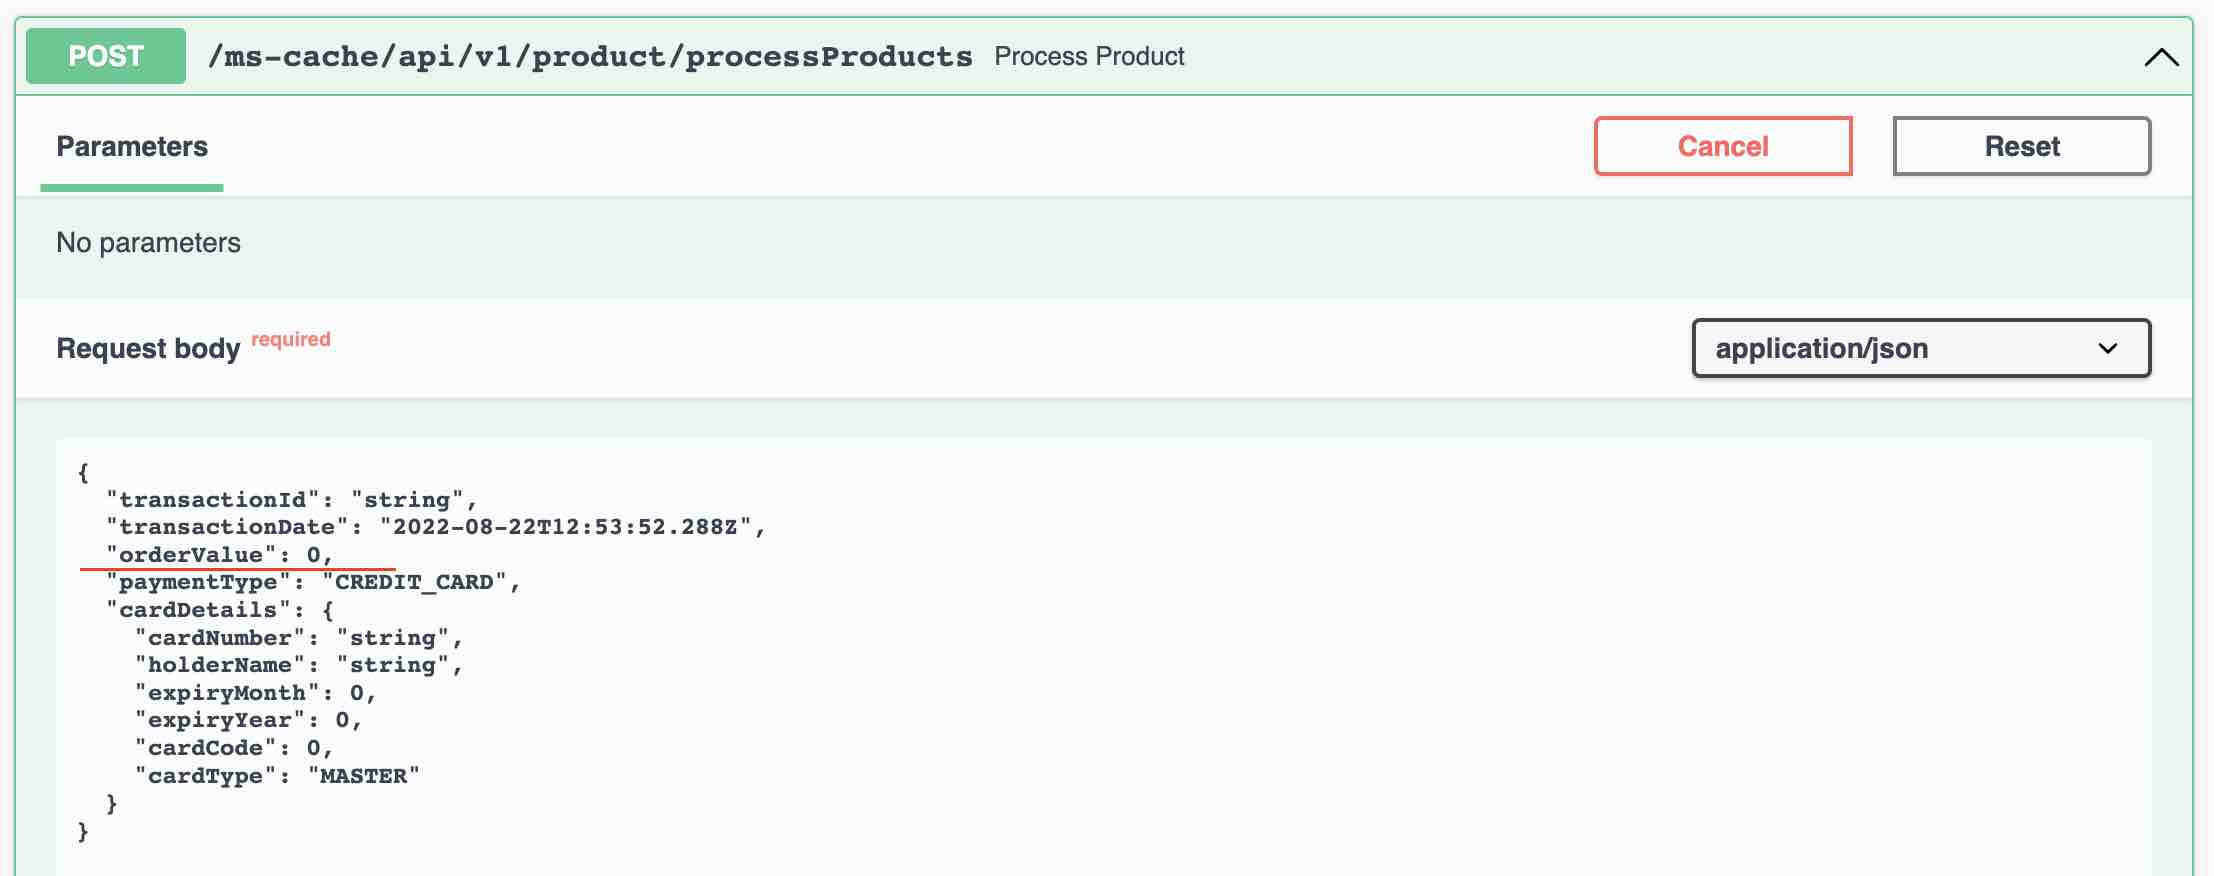
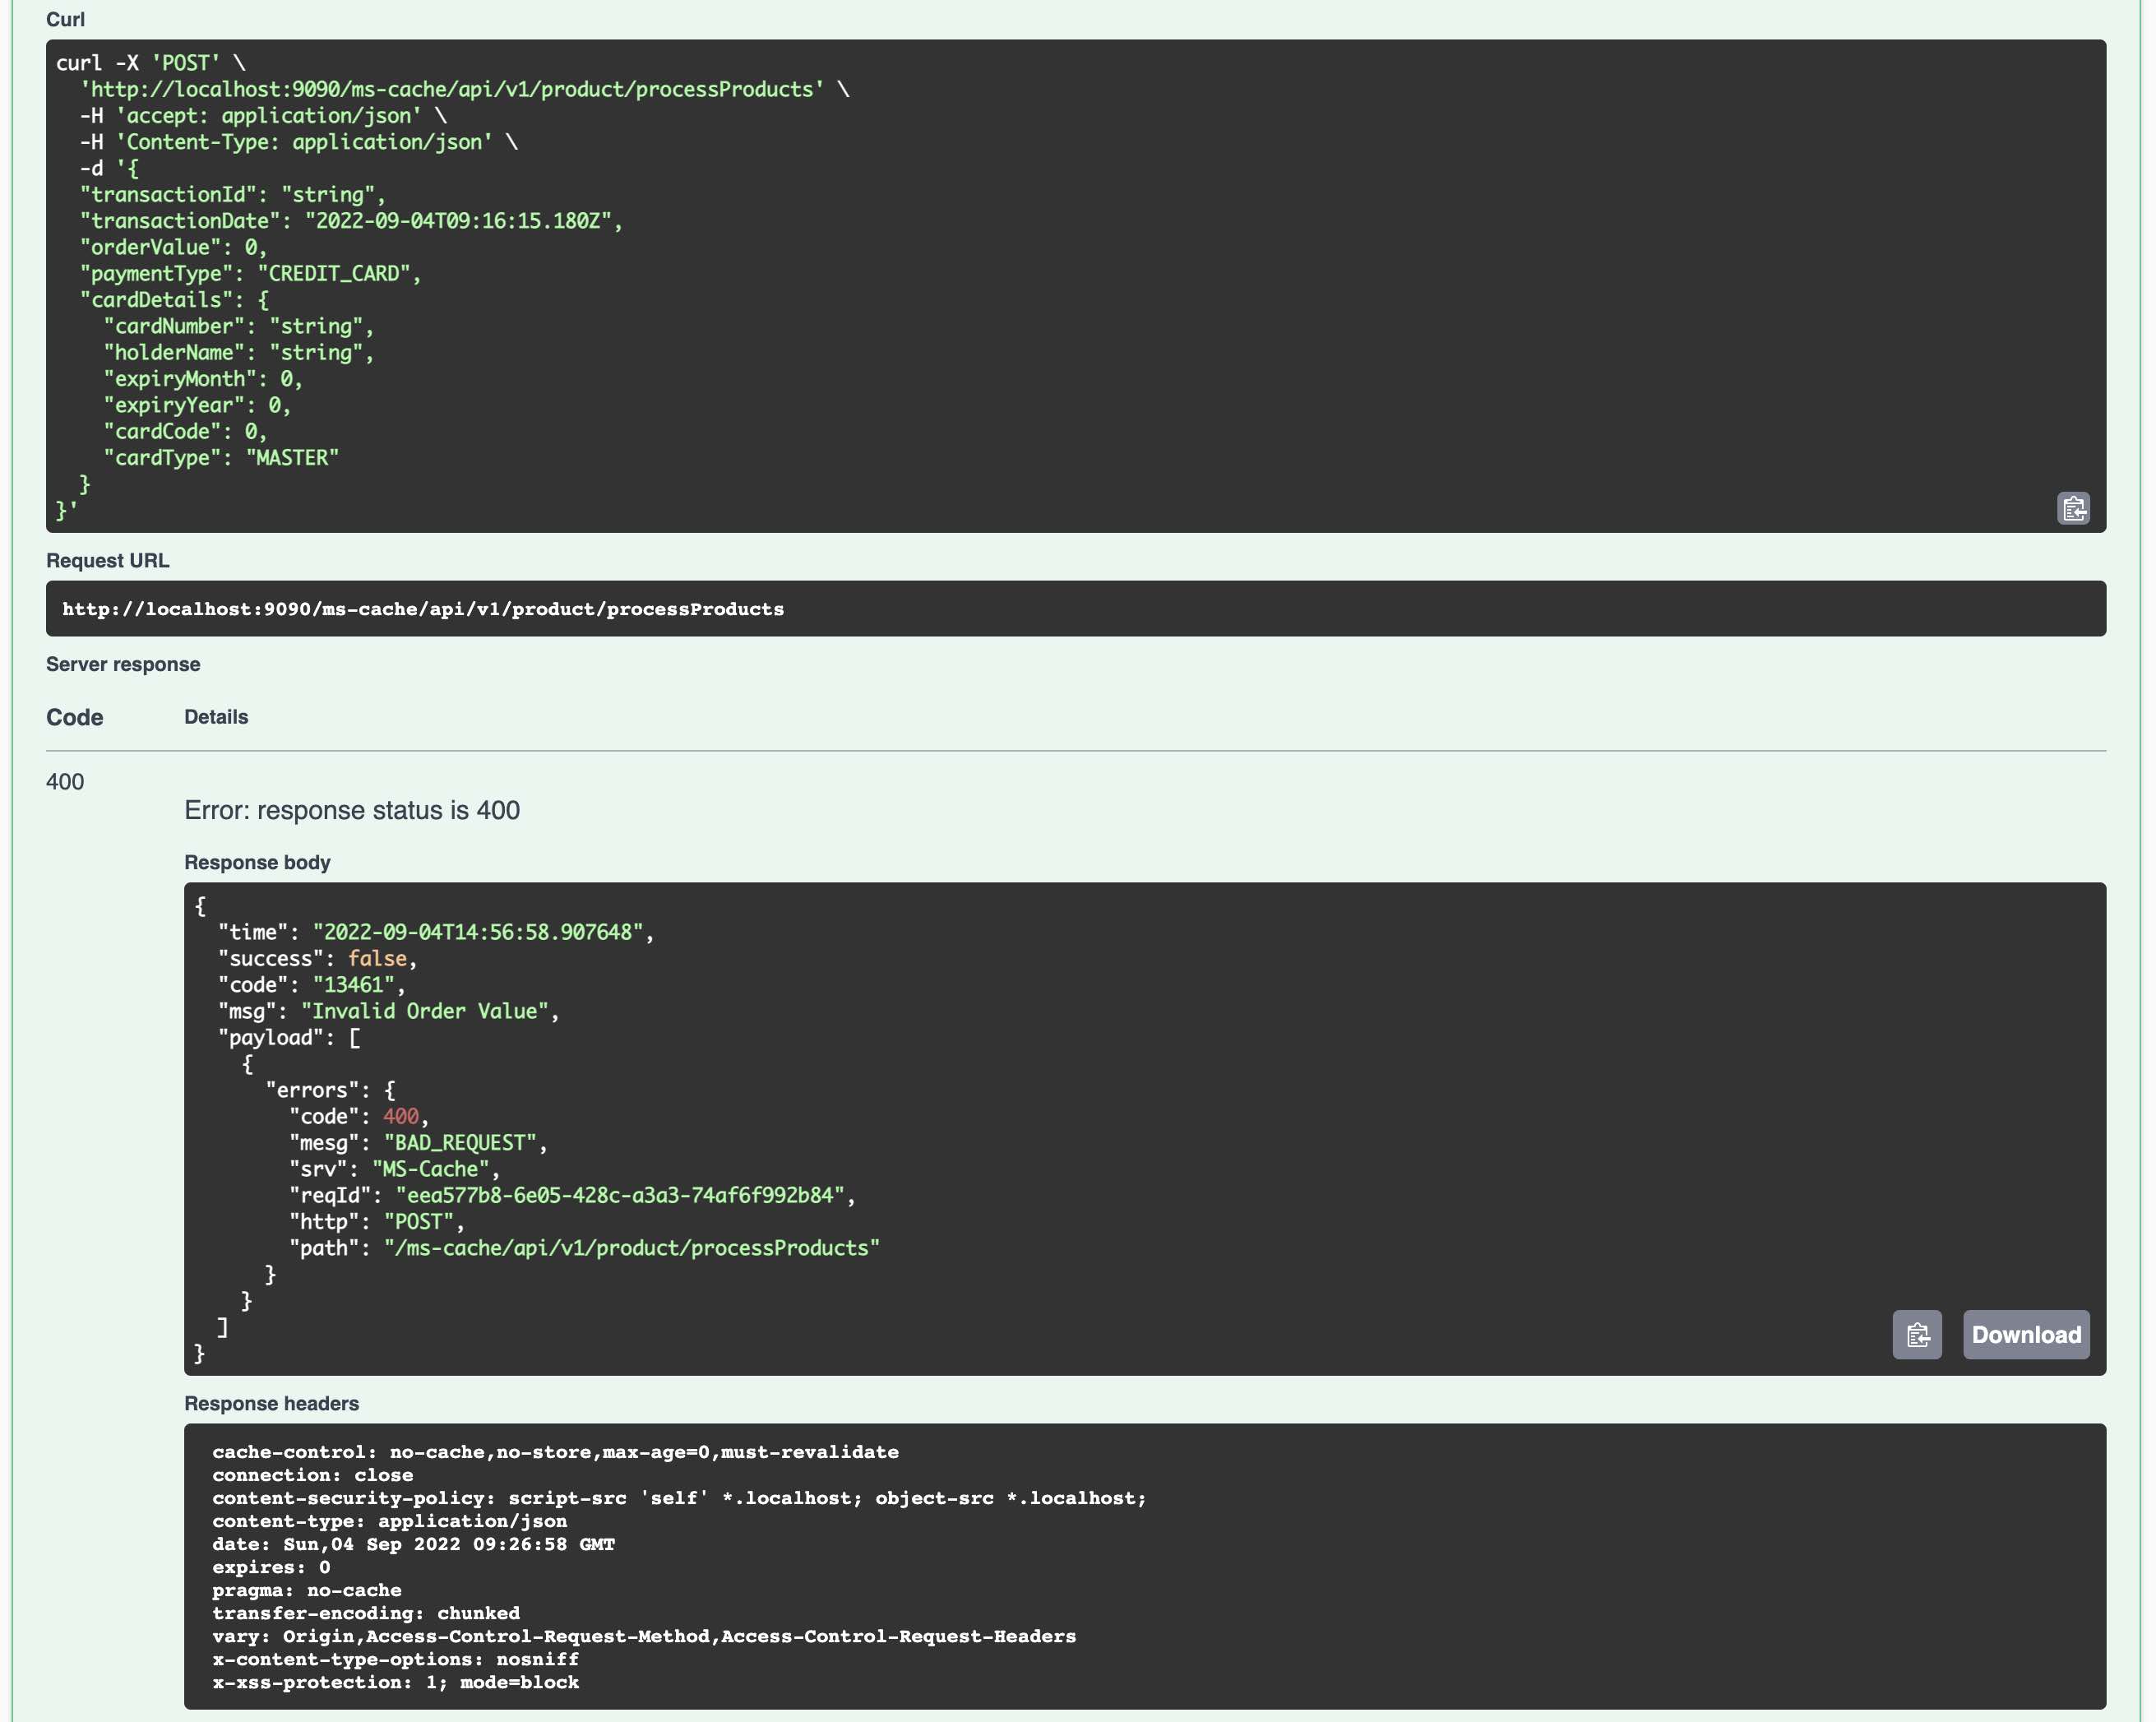
- Execute the curl commands directly (from the test script)
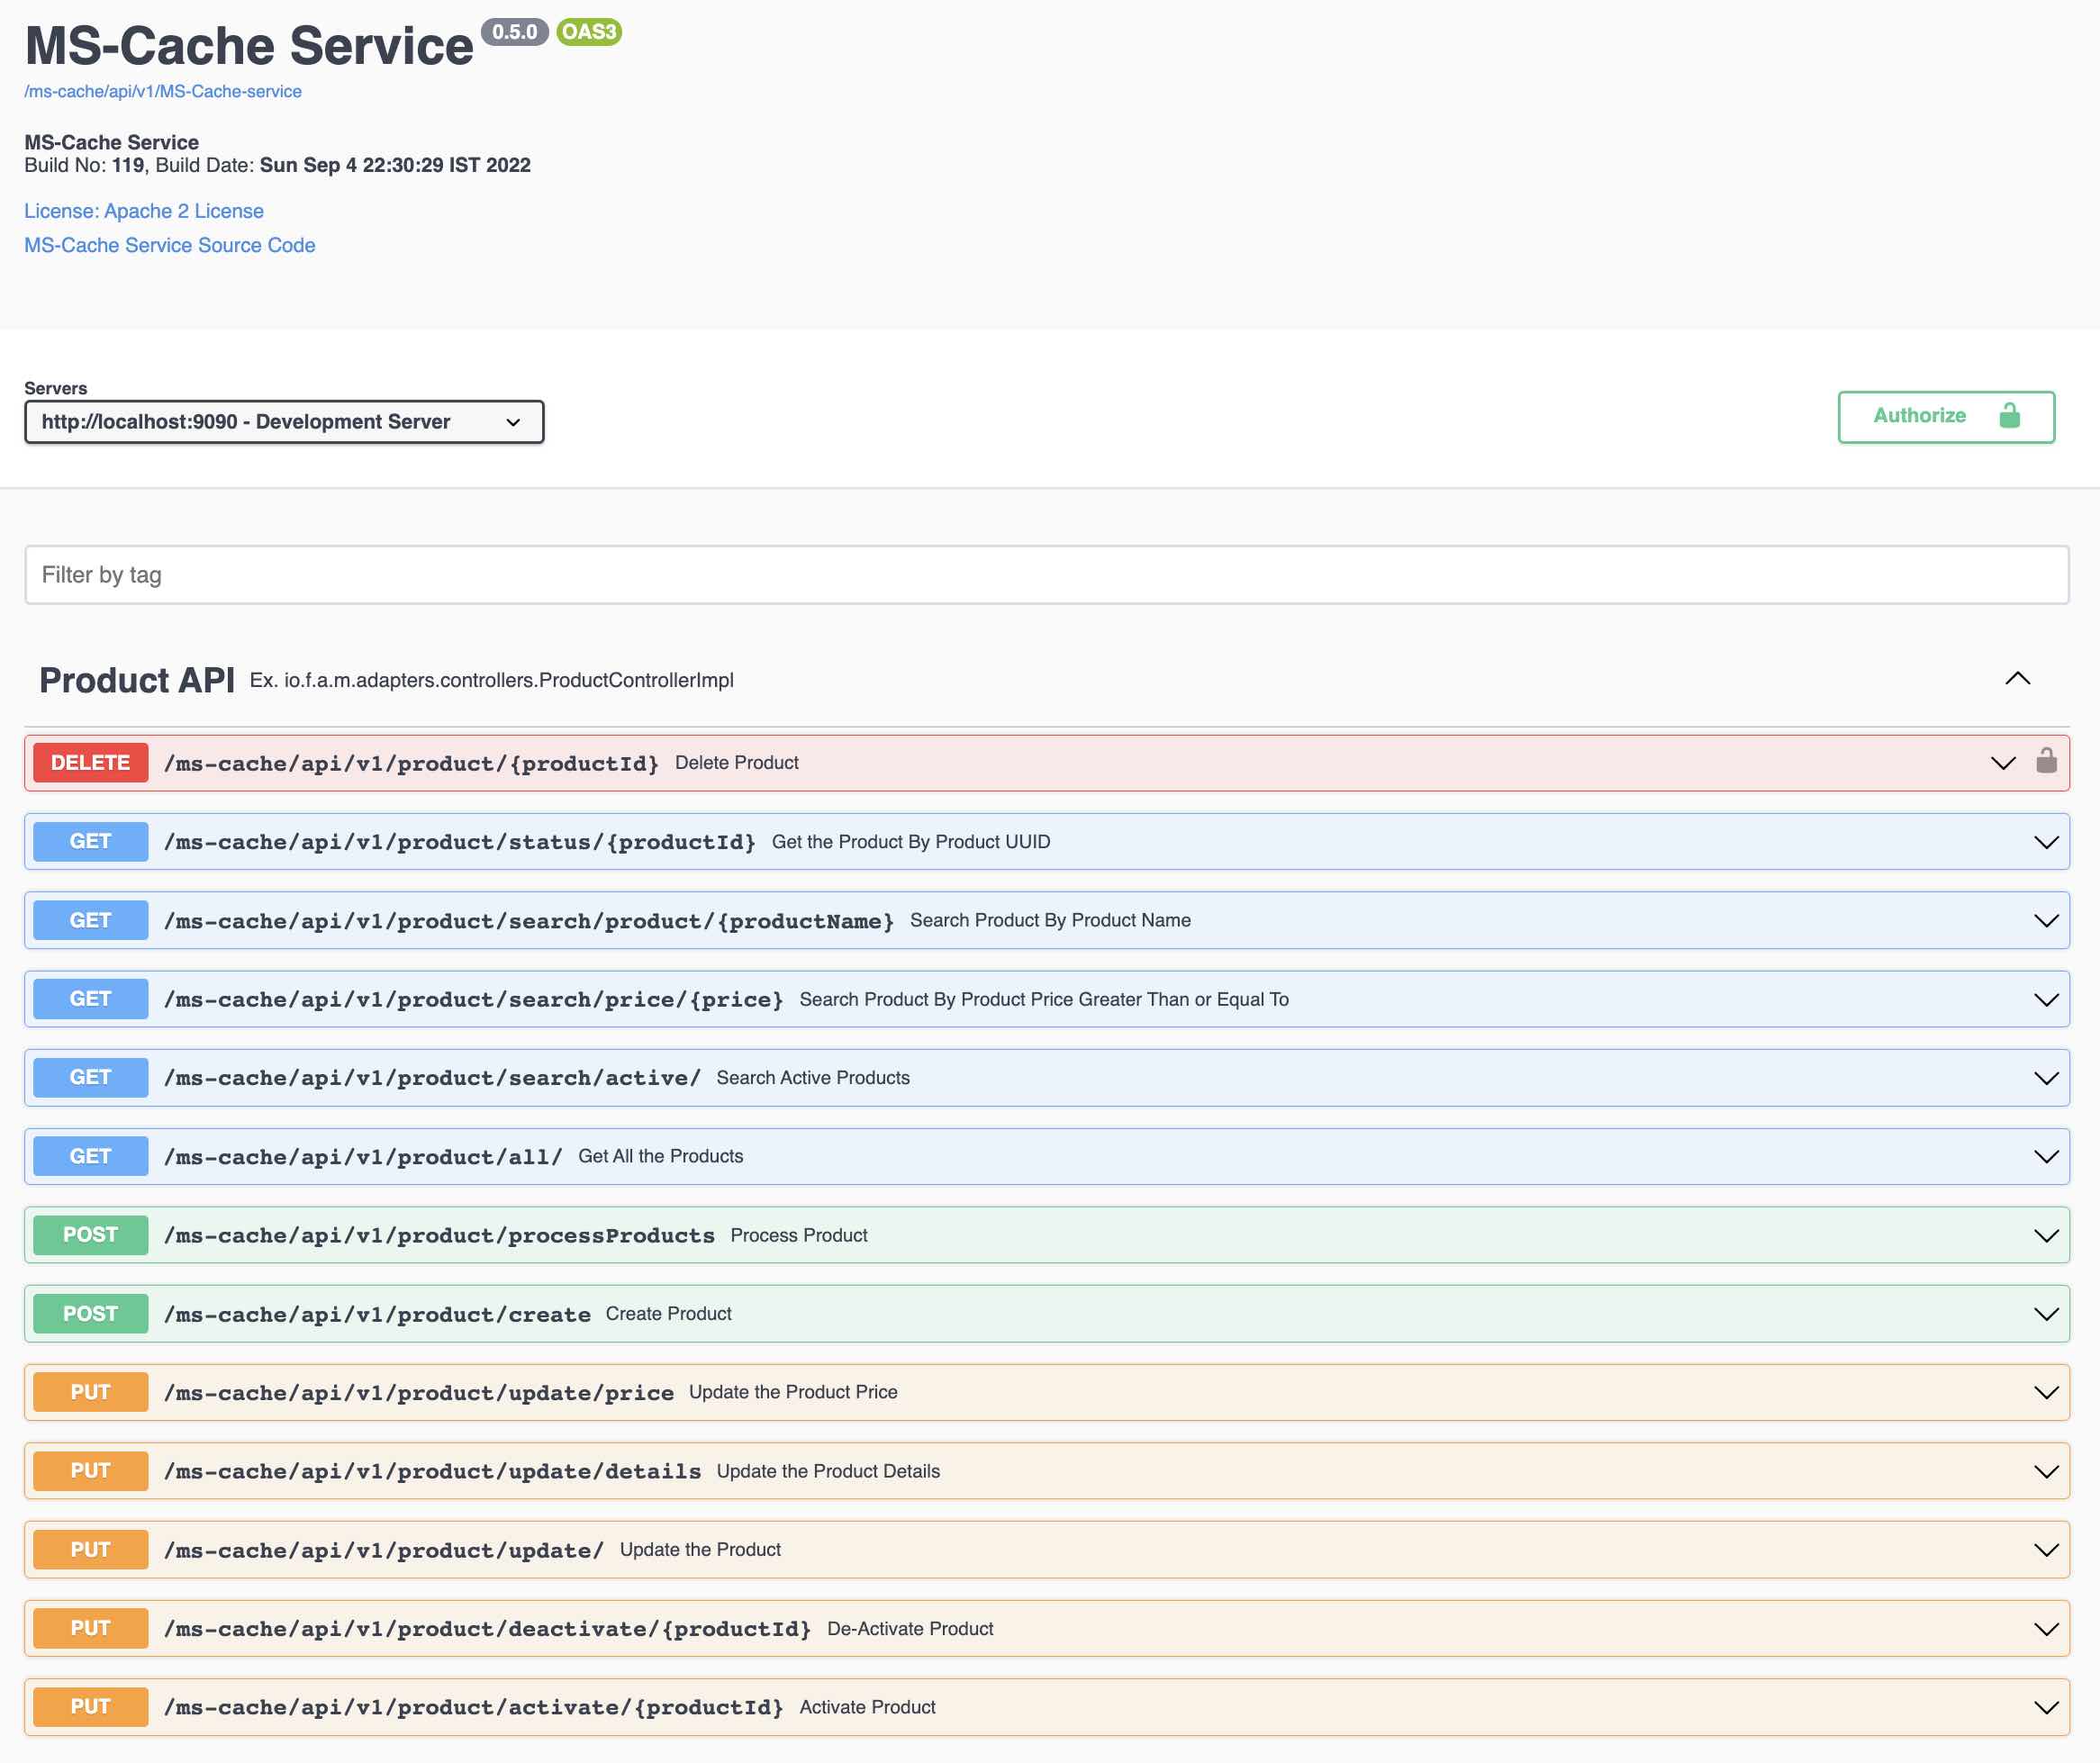
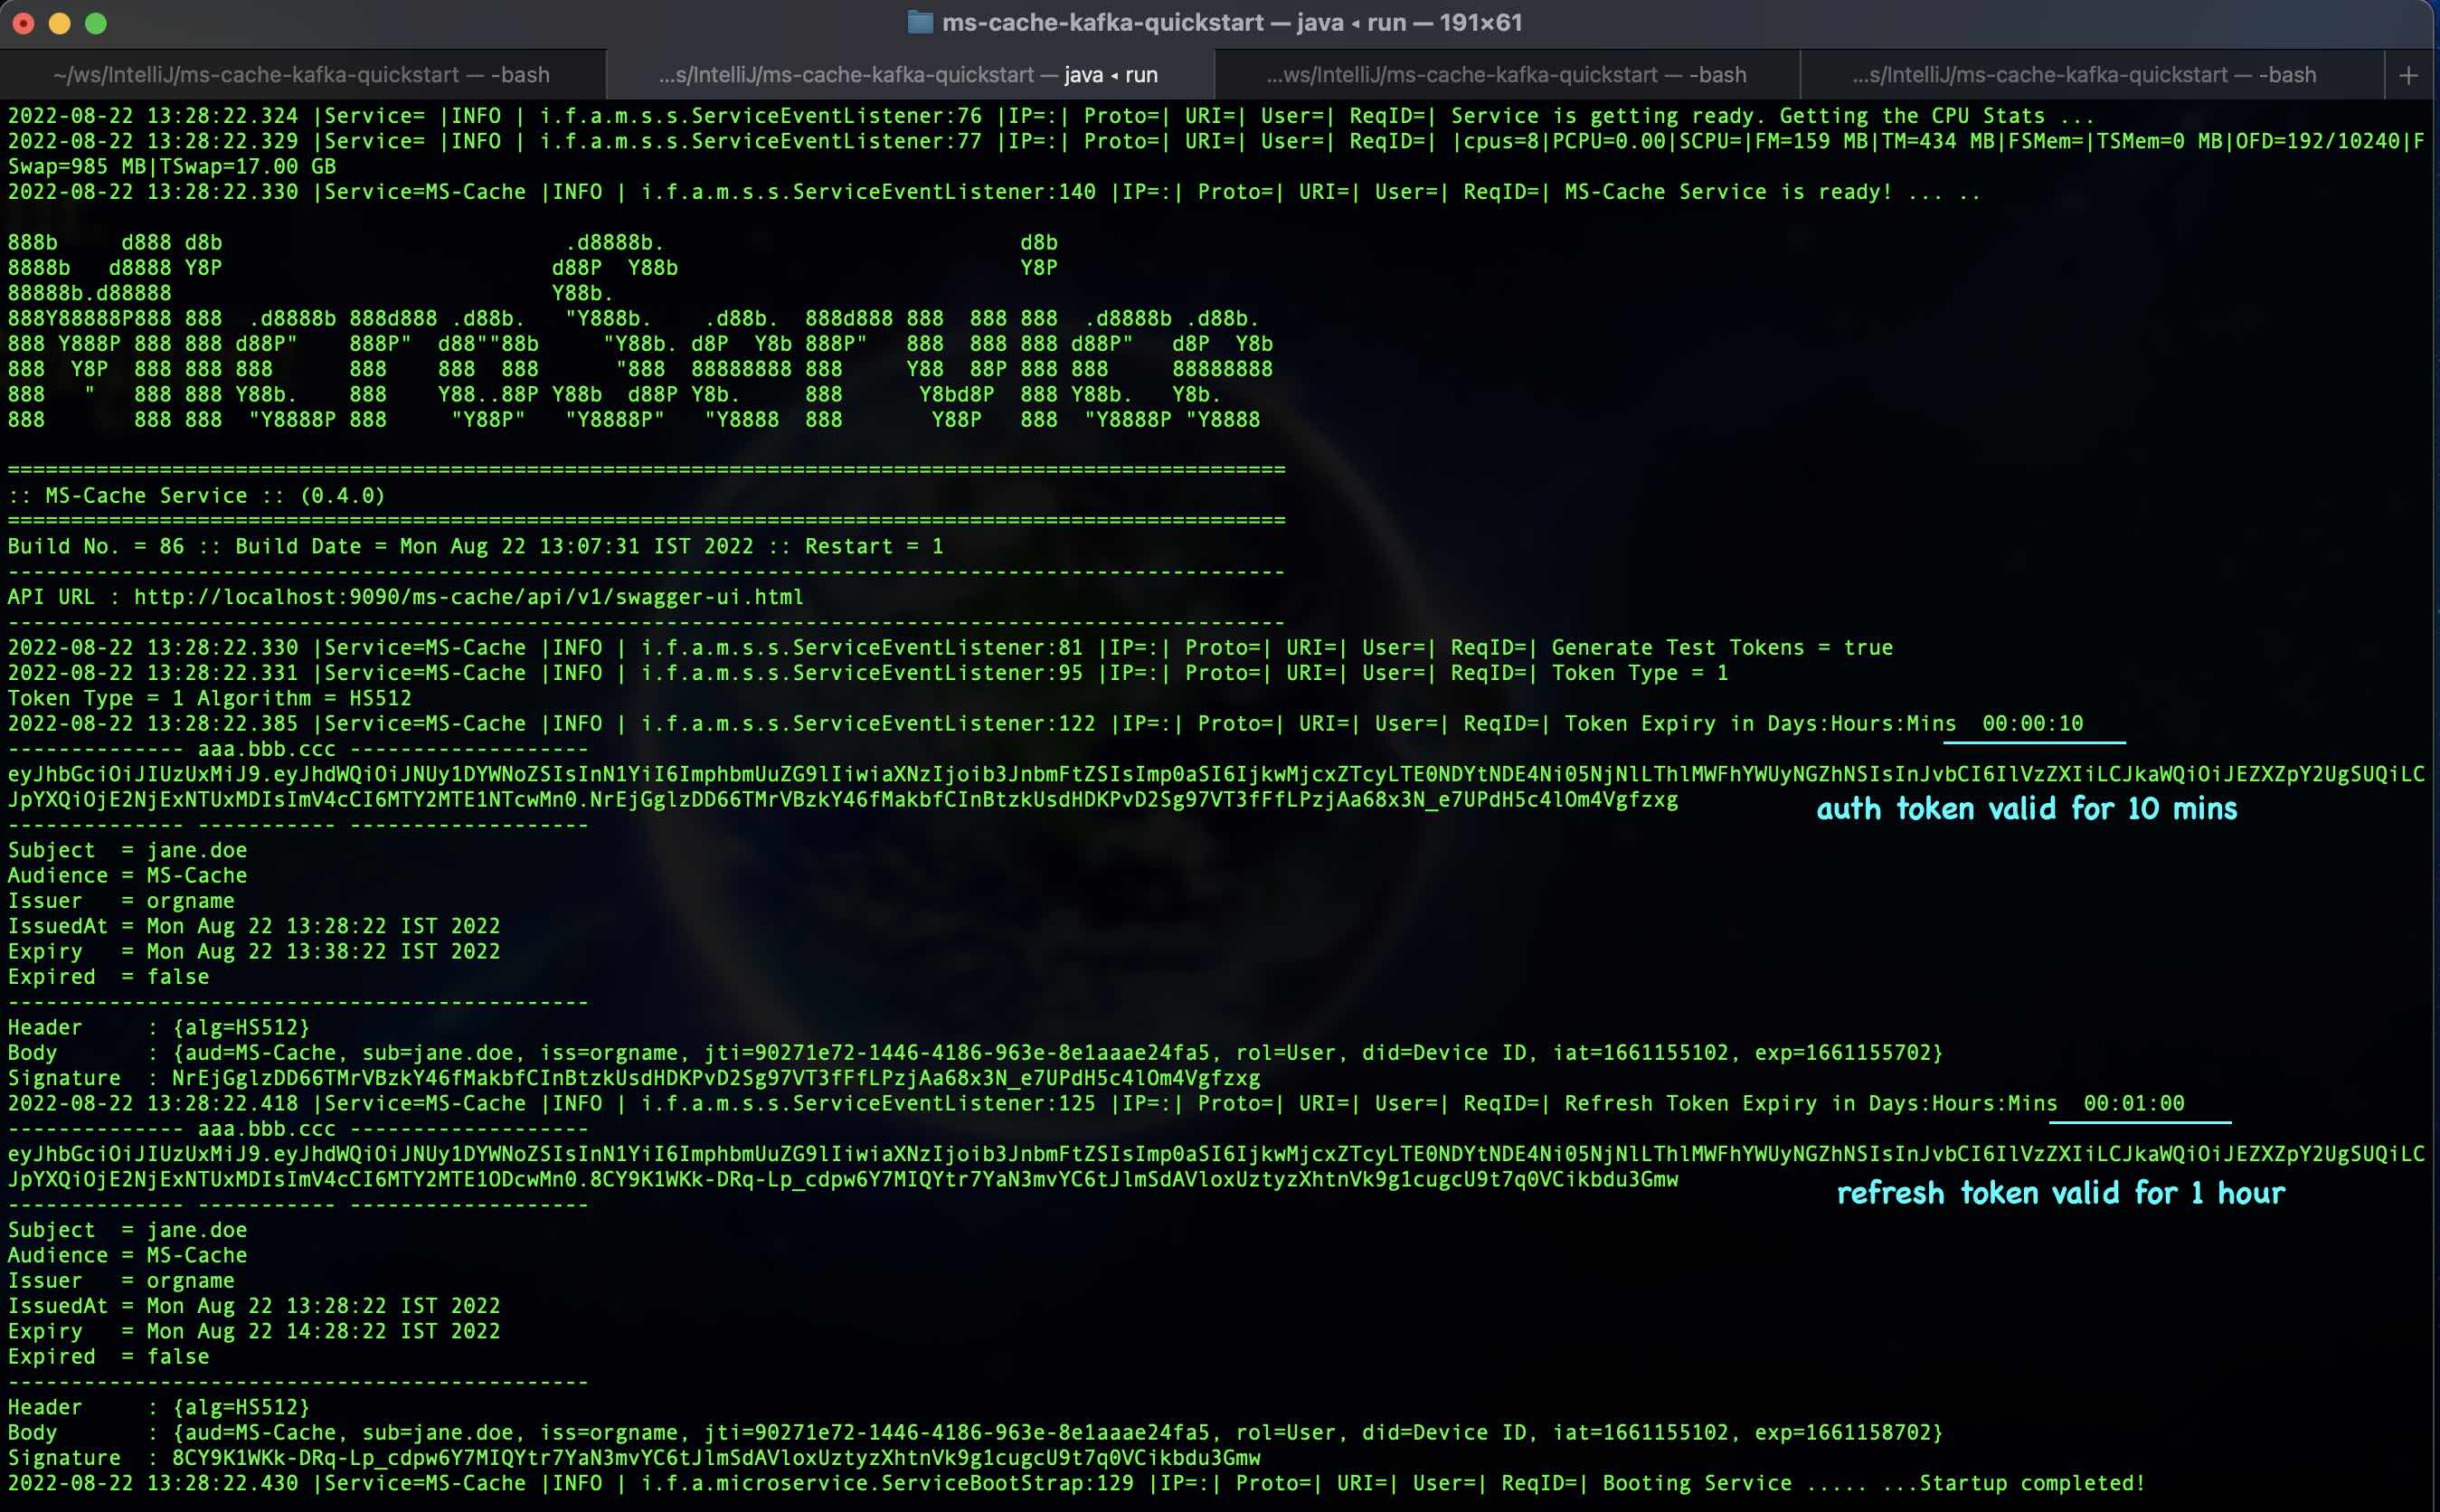
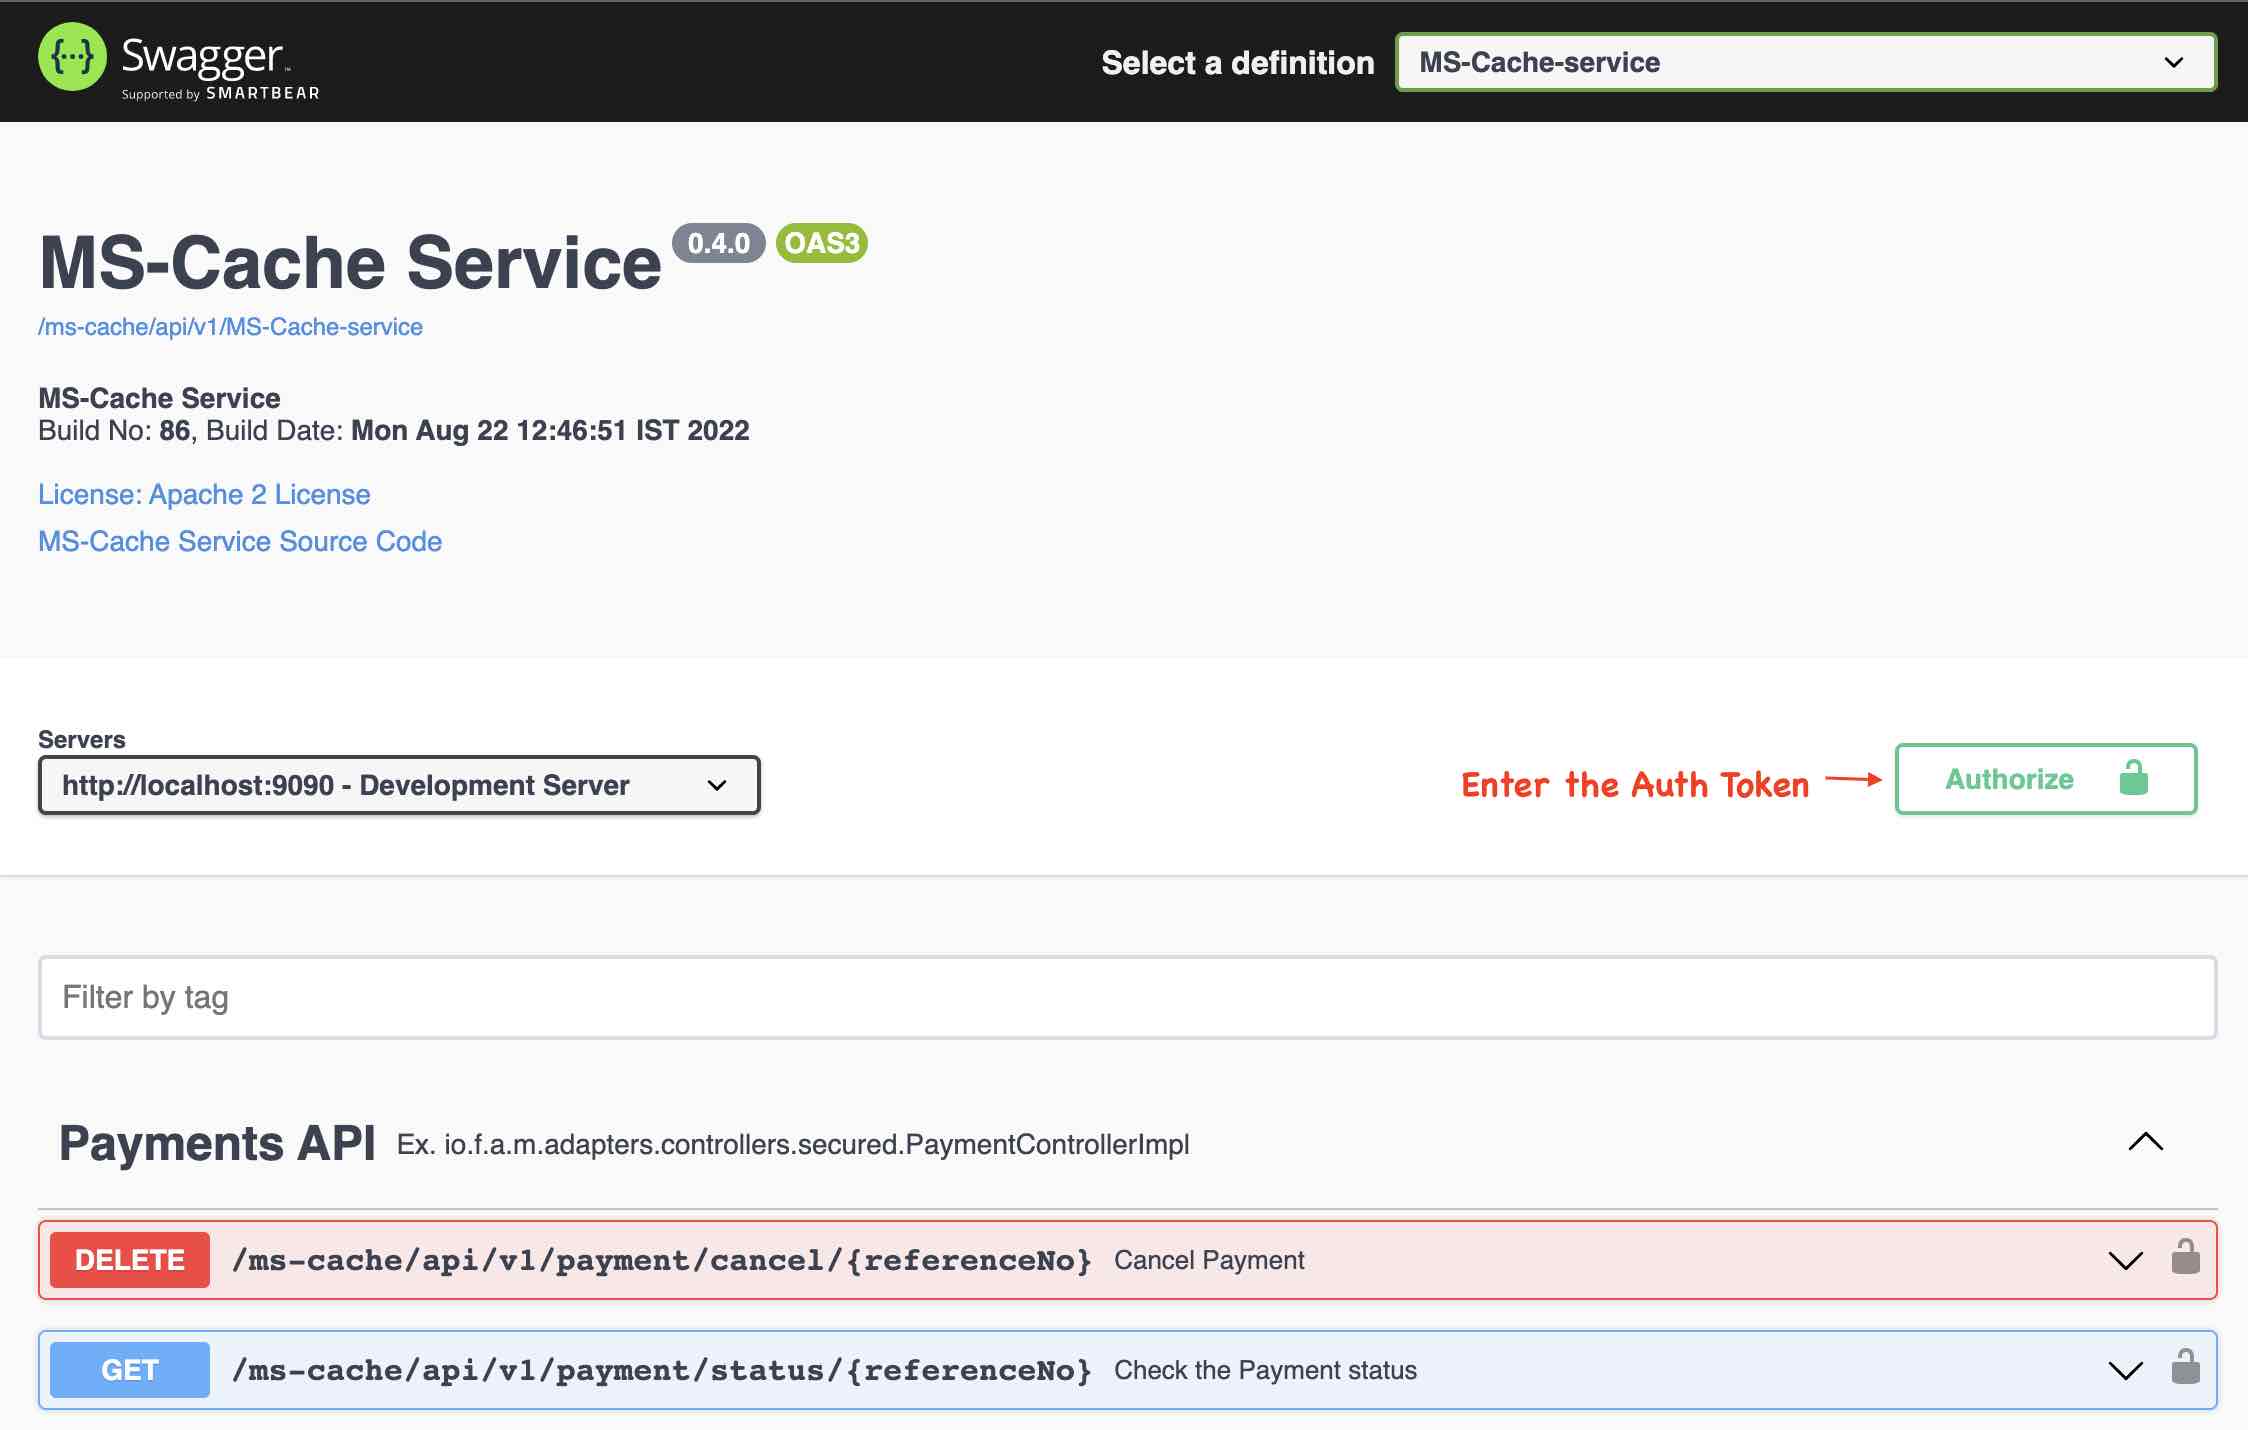
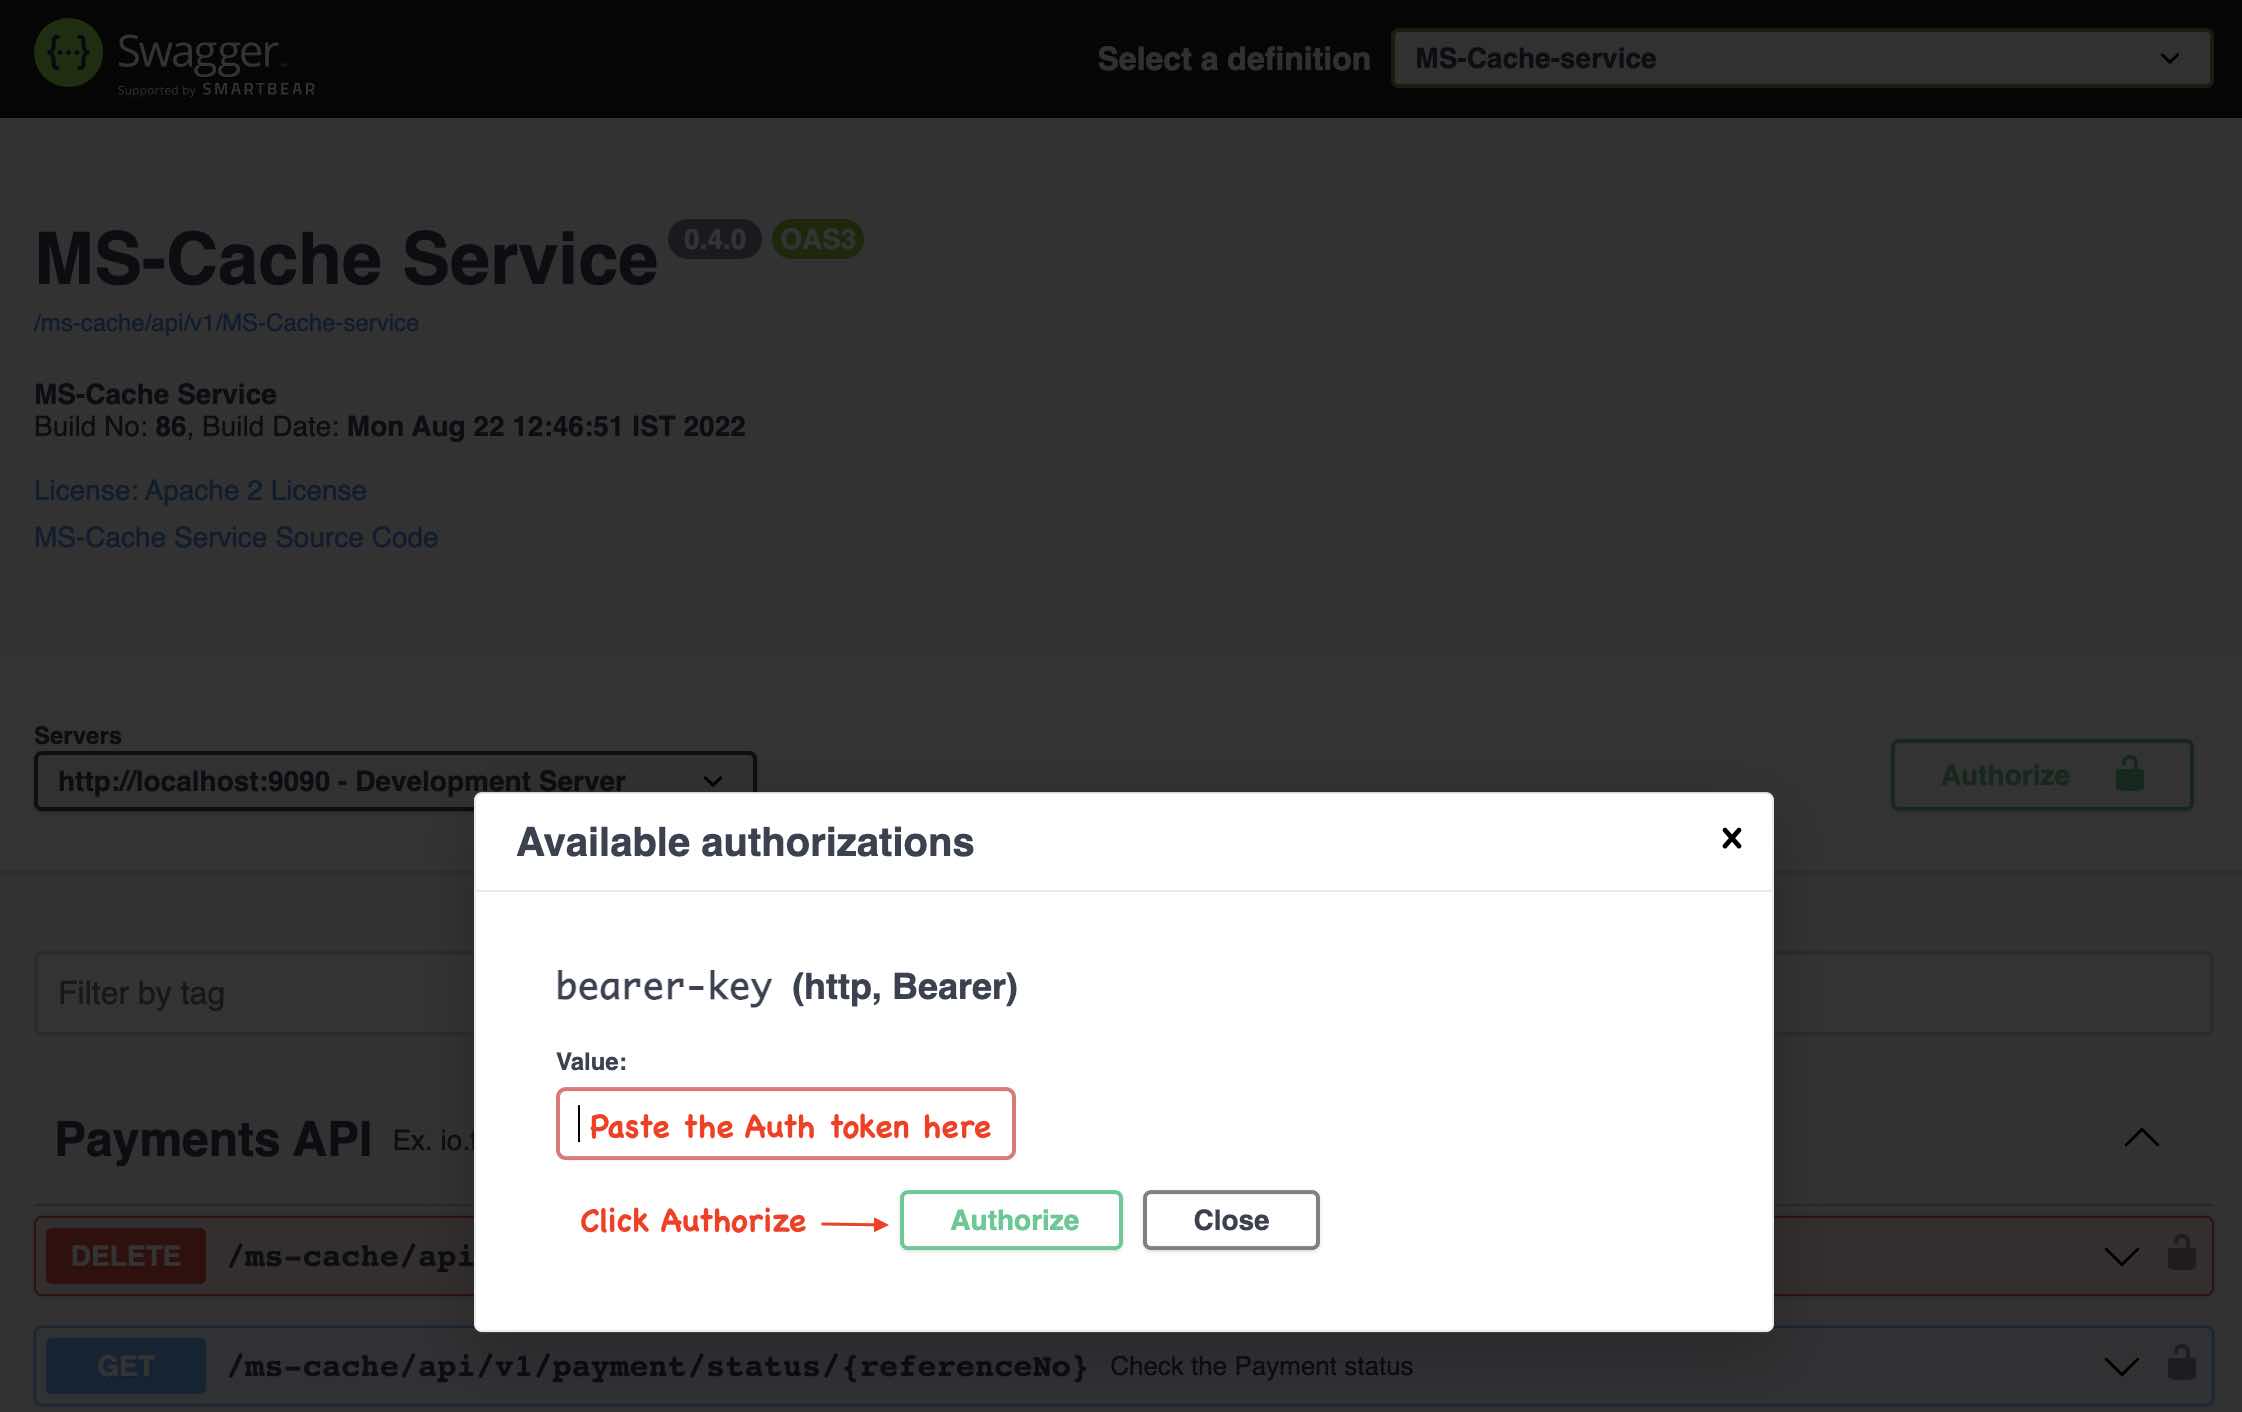
To test the APIs (in secure mode - you will see a lock icon in the Swagger Docs). These test tokens are generated based on the flag server.token.test=true in the application.properties file. (Change the app.props.tmpl if you want to change in the build process.) In the Production environment, this flag should be false. These tokens can be generated only in an Auth Service. All the services need not generate these tokens unless for the developers to test it out. In a real world scenario, disable (Comment out the function generateTestToken() from the code java file ServiceEventListener.java in the package documentation io.fusion.air.microservice.server.service) this feature for production environment.


3. Configure the Template: Setup Org, Service, & Container Name, Versions, API Path in app.props.tmpl
- git clone https://github.com/MetaArivu/ms-cache-kafka-quickstart.git
- cd ms-cache-kafka-quickstart
Update the Properties Template
- Update the Org Name in src/main/resources/app.props.tmpl file (service.org)
- Update the Microservice name in src/main/resources/app.props.tmpl file (service.name)
- Update the API Version in src/main/resources/app.props.tmpl file (service.api.version)
- Update the API Name in src/main/resources/app.props.tmpl file (service.api.name)
- Update the Container Name in src/main/resources/app.props.tmpl file (service.container)
- Update the Server Version src/main/resources/app.props.tmpl file (server.version) Pom File 0.4.0 app.props.tmpl Microservice Server Properties server.version=0.4.0
Sample Property File Template
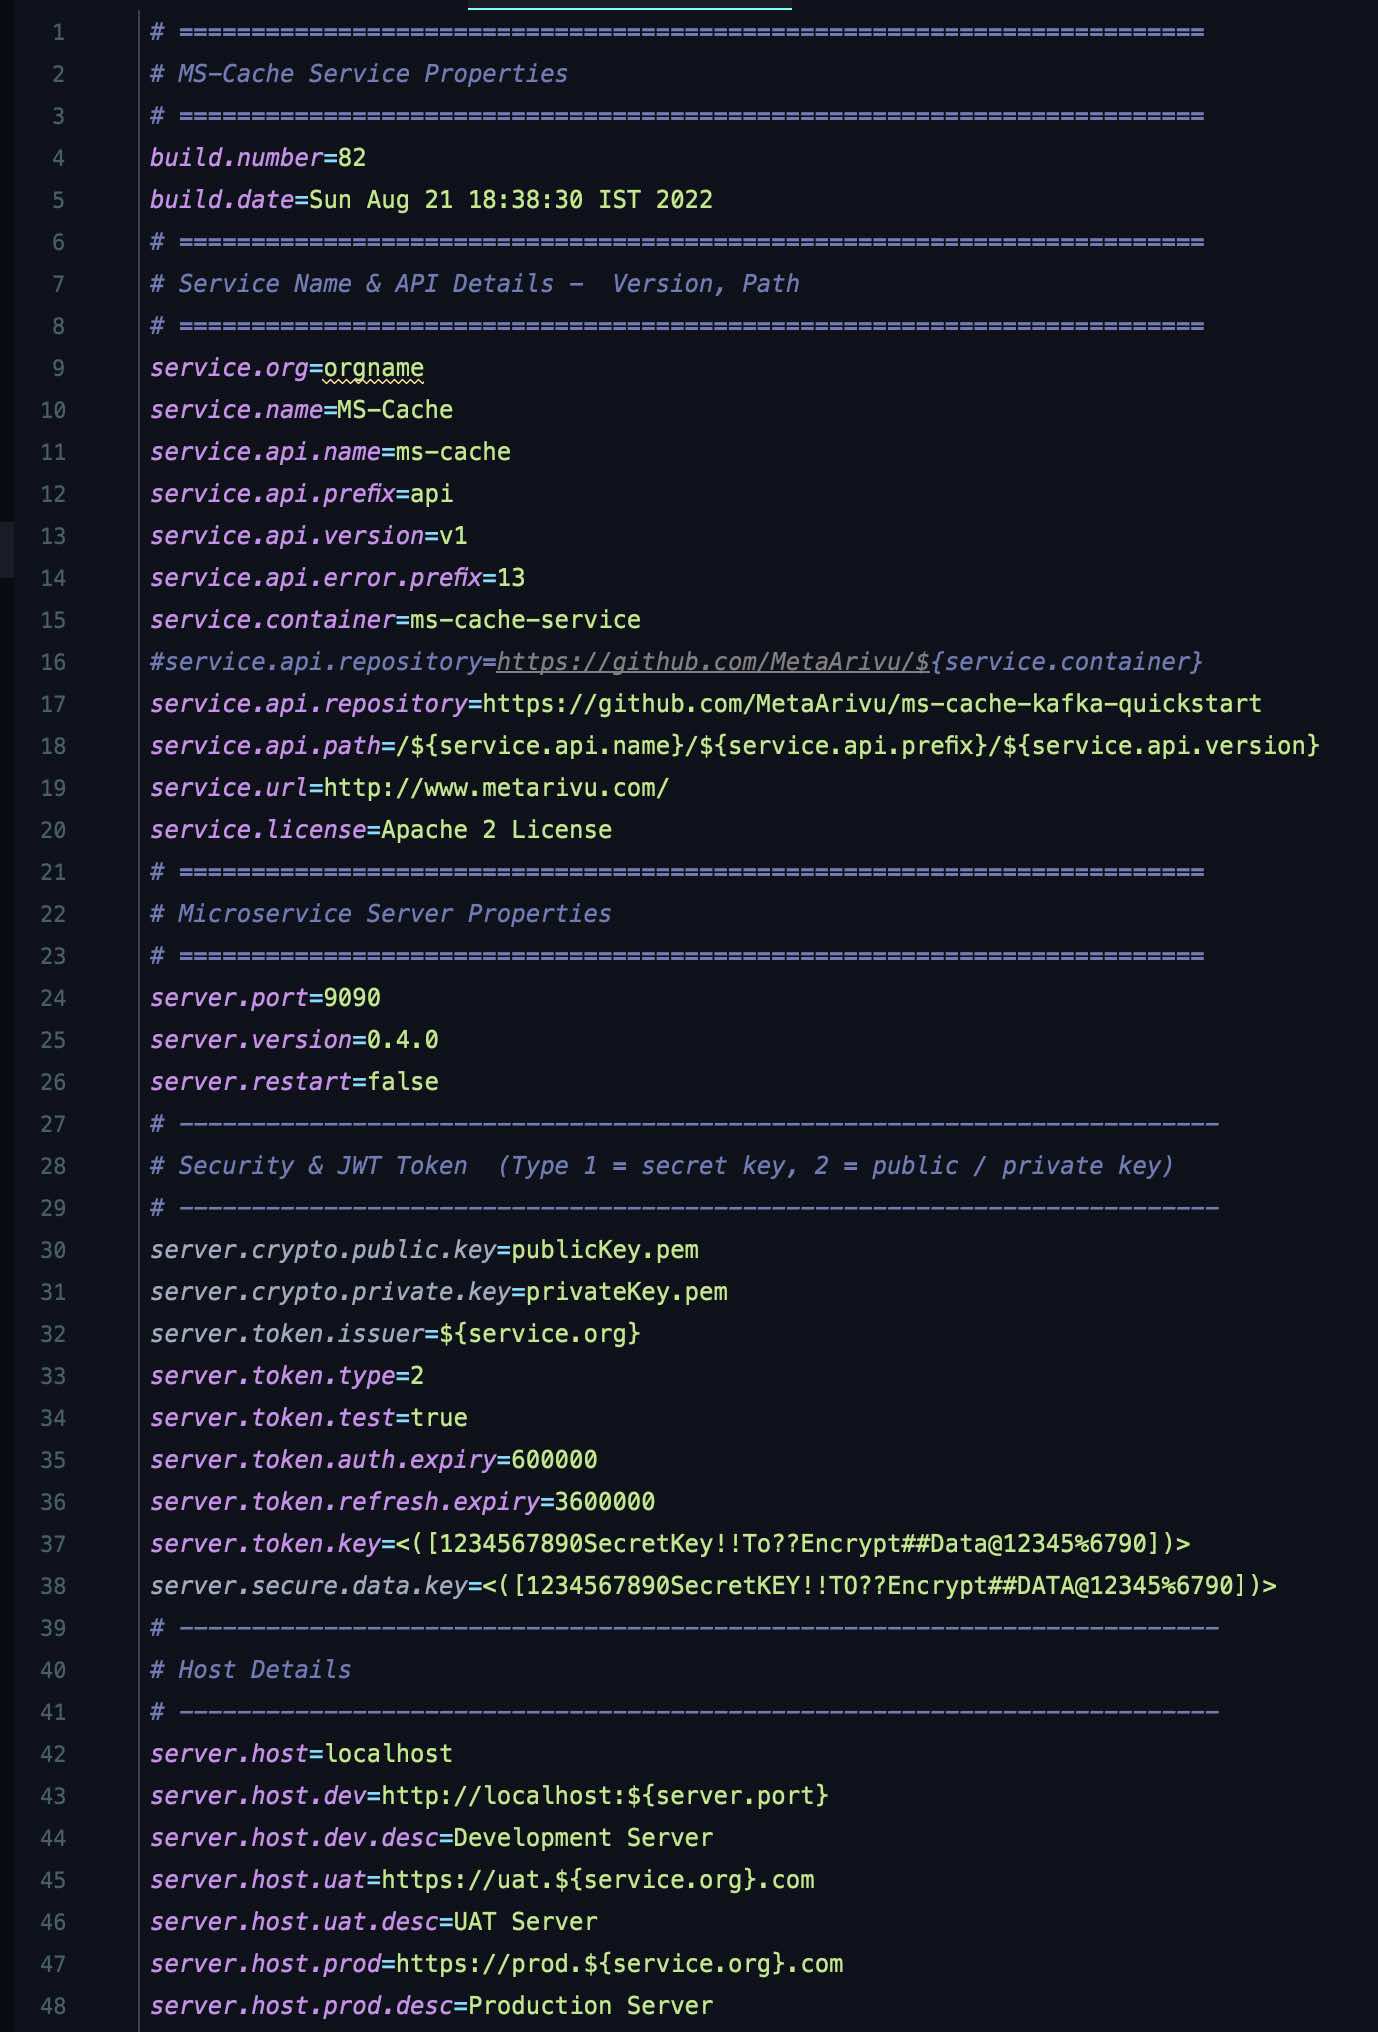
When you change the version in POM.xml, update that info in src/main/resources/app.props.tmpl - server.version property also.
- Verify the Org Name in src/main/resources/app.props.tmpl file (service.org)
- Verify the container name in src/main/resources/app.props.tmpl file (service.container)
- Verify the microservice name in src/main/resources/app.props.tmpl file (service.api.name)
- build (Build the Container)
- scan (Scan the container vulnerabilities)
- start (Start the Container)
- logs (to view the container logs) - Wait for the Container to Startup
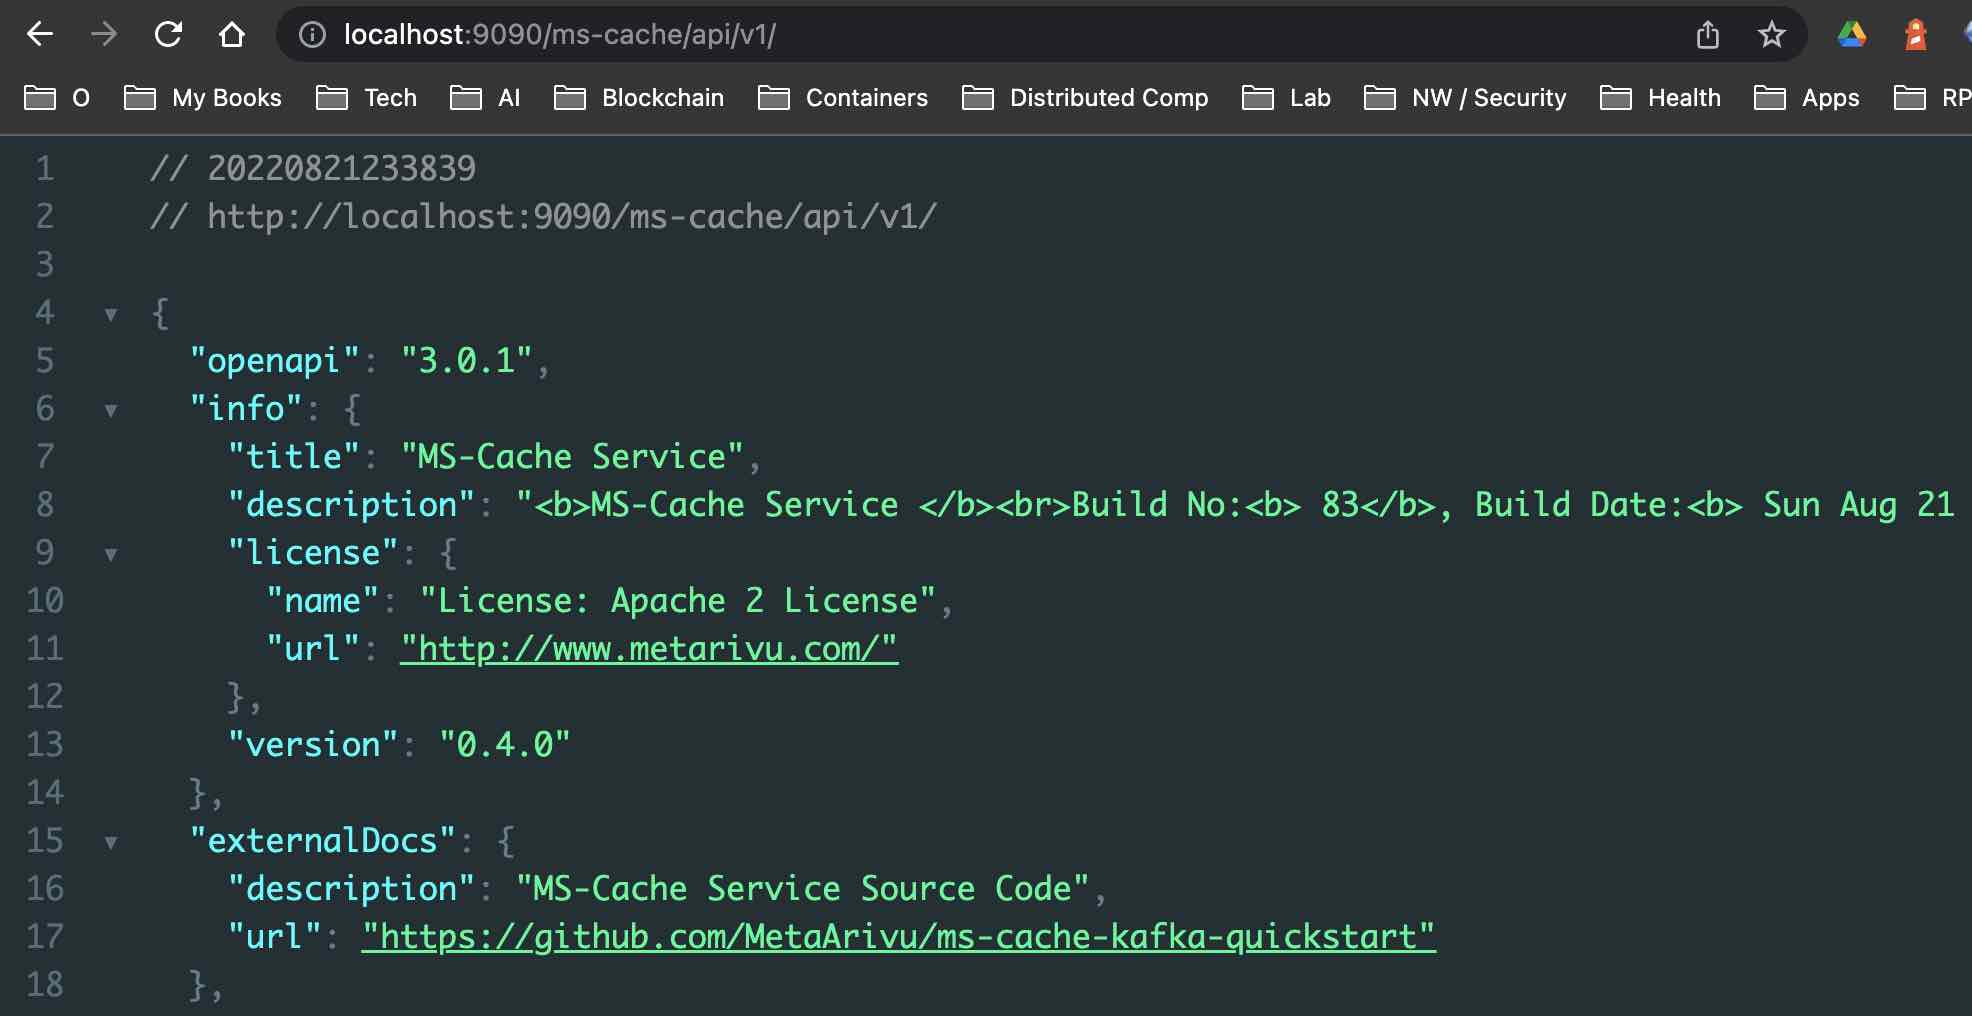
- Check the URL in a Browser
Update the Org Name in src/main/resources/app.props.tmpl file (service.org) Setup the Docker Hub or any other Container Registry
- push (Push the Container to Docker Hub)
- stop (Stop the Container)
- stats (show container stats)
(C) Copyright 2022 : Apache 2 License : Author: Araf Karsh Hamid