Opinionated React redux saga architecture sample project (In progress)
Watch DEMO here
-
Fork/clone this repo to your local machine
-
Use yarn to install dependencies
yarn install -
Start the development server
yarn start
Flux is a pattern for managing data flow in our applications, the main idea behind it is this: Data only flows in one direction. This pattern is heavily used throughout React and Redux applications.
The main parts of the Flux pattern are:
- Dispatcher: The dispatcher receives actions and sends (dispatches) them to the stores. It's important to note that every store will receive every action.
- Store: Stores will (as it name states) store data of our application. They will register to the dispatcher to receive actions, each store will determine if it should or not use the dispatched action. It's important to understand that data must only be mutated by responding to an action.
- Actions: Actions will define our application's internal API, the capture WHAT we want to do, rather than HOW we
want to do it. They are simple objects with a
typeproperty and other data required, apayloadfor example. - Views: Views will be in charge of displaying the stores' data. They will subscribe to change events from the stores in order to know when they should change what is rendered.

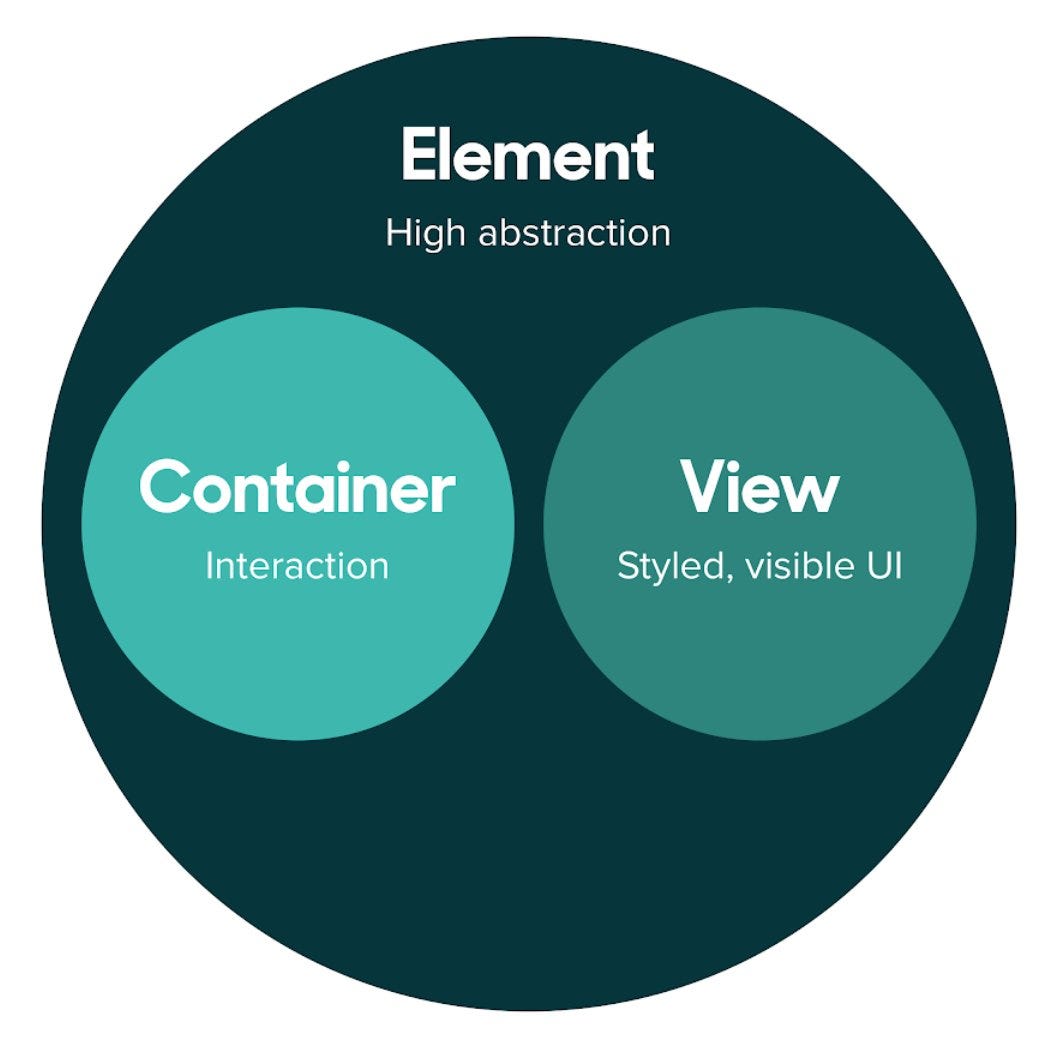
The Container-View pattern or Container-Presentational is useful design pattern that can help structure out React application as it will help divide responsibilities with ease. Although this pattern should not be strictly enforced, it will be the basic design concept to take into account when adding new features/components.
For this project we should mainly consider Container components those under the src/pages directory, and View
components all the Container's children component. This is not a strict rule as you can have a page's components
sub-component be a Container component.
The idea is simple:
Parent/Container components will:
- Be connected to redux.
- Have data fetching logic (Through Redux when possible).
- Run any complex logic needed.
- Contain multiple View components that will actually present information
Child/View components will:
- Receive information from their parent.
- Render information properly.
- (Optional) have local state that can help the presentation process.
Atomic design is a methodology for creating design systems. The idea behind this methodology is "Do one thing and fo it right". Every piece of our components should have just one responsibility. We should build our components starting from the smallest part to the whole component.
We have 5 levels in atomic design:
- Atoms: These are the basic building blocks, the smallest parts in our application's components.
- E.g. Labels, Buttons, Inputs
- Molecules: When we combine atoms together, we get the smallest fundamental unit, which will serve as the
backbone of out application.
- E.g. Form items, buttons with icons, cards
- Organisms: Once we have some building blocks (molecules) we can combine them to form relative complex
organisms. They will be a specific part of an interface
- E.g. Nav bars, side bars, item lists
- Templates: Here we stop our chemistry analogy to get more sense into the component pieces. Templates stitch together organisms to generate complete reusable components. They are more concrete and have some context behind them.
- Pages: Pages are specific instances of templates, giving the template elements a more concrete representation. This is what the user will see.

The folder structure is a simple approach to allow the project to grow to keep the same structure over time, without having to lose time in thinking about where to put what files or where to create a new component, With that in mind the suggested folder structure is the following:
-
app/- This folder is where the general configuration app components will live, which will handle loading states, transitions, routing, and redux, basically the foundations of our app runtime. -
components/- Here is where all the shared components will live, components reused throughout the entire app. Components should be exported using a name export to avoid any naming conflicts. Those components with complex logic or redux integration should be de-structured following the Container-View pattern. You could also segregate components by categories:components/form/will contain components related to forms and inputs,components/layout/will contain components specific to you layout. -
hooks/- This is where your custom hooks will live, you can add as many as you need. -
I18n/- This is where your translation or multi-lingual support configurations will live. It will mainly consist in configuration files, translation files (if used locally) and helpers to use across your application. -
pages/- This is the main sections our app. Each page consists of anindex.jsxfile which exports the screen's container. Each page should have acomponents/folder which will hold all the components specific to this page only. -
redux/- Here we will hold all the redux resources, and as our application is Redux oriented, where all the juice will live.- The main
reducersfile will combine all the reducers from out modules. - The main
sagasfile will combine all the small module sagas into one to be consumed by the store. - The
configureStorefile should contain the logic to configure the Redux store and middlewares. - Inside the
helpers/folder we will hold redux helpers such asrequestandnotify, which will help with the overall flux of redux actions. - The
modules/folder will contain each module/feature we want to implement likeauth,layout, etc.- Inside we will have a
/:module/actionsfolder that should contain files specific for each action creator and the actions constants. These actions are probably going to call our helpers by sending all the correct functions to handle the different responses and update our store; Also this is so much flexible that will allow us to set up the next steps for our app to follow-on success response and on error response. - The
/:module/reducerfile should contain the actual reducer and initial state for our module. - The
/:module/watcherwill be the one in charge of listening ournotifyactions and dispatching the sagas actions.
- Inside we will have a
- The main
-
routing/- All our routing logic will live here.history.jsis where the history helper will live, created to implement with thereact-router-domandconnected-react-router.menu.jswill contain information about the different menus we want to implement such assidebarsornav-barspaths.jscontains all the paths constants for our routing.routes.jscontains each possible route that the user can access in our application, you can also define which roles can access each route to add a small security layer. This will be consumed by outRoutesContainer.
-
services/- This is where the API management will live, an interface between our app and different servers. You can have a unique directory for each different servers/services you will use, which inside will contain any the definitions to each request. Here you should make any data transformation before it arrives to your application. Having these elements abstracted from the app gives us the ability to call them from wherever we need to (E.g a redux action creators, or a Container component if the data is not needed in redux). -
styles/- This is where all the CSS/SCSS styles, mixins, color definition, etc. Remember to include these style files in the main fileapp/app.scss, which is the main styles file for our app. -
utils/- Here we will have all the utility/helper methods, validations, types, etc. that can be shared across the project. For example, you can add here the different custom prop-types for your application.
The routing strategy is going to be mainly defined in our routing folder, those files are going to be consumed by
the RoutesContainer, we can have a simple path definition and simple route declaration that can be later used
to create the real-life routes we will use on our app.
This will bring a lot of advantages in case we need to include a new section on our site, a change on an existing path, or defining a good app flow in a single way, without having the complexity of handling JSX code embedded in the definition. Simple is better.
The main approach is base on I18Next, which is an internationalization framework, written in and for Javascript,
it goes beyond providing standard i18n features, it provides a complete solution to localize your app,
just a simple configuration, and you're ready to go, it is older than most recent frameworks, however, it is up to
date.
The configuration is very flexible, with a couple of files we can translate all the app within minutes, it has a pretty heavy and flexible fallback system.
A service will act as our API resources, it will be in charge of using a HTTP client to perform a requests, and take care of the CRUD actions. Each service action should be in a separate file, that way each file will have a single responsibility and can be easily included as a single independent piece on our strategy. This will bring a lot of benefits mainly for debugging and tracking errors.
We will also take advantage of some helpers here, to be able to perform general actions on our request, like digest some params for the Backend to consume properly, this is a great way to split responsibilities and will help us selectively include what we need and where we need it, without crowding our request files with unnecessary complexity.
One important thing about structuring an application with Redux is that there should be a Single Source of Truth (SST), which means that there is just one place where we store the general application’s state. In our case, the idea is to use the Redux Store as the SST.
Our main actors are going to be the action, they are the ones in charge of helping the component notify redux that we want to do something, and they will also define the actual saga that can help us with the async requests. This presents a bunch of advantages since we can rely on them to handle our side effects and trigger all the required steps to update our store information with ease.
The action creator is like our orchestrator, whose main role is going to be to coordinate and emit the different events our app can understand, (like guiding the orchestra until the time for the trumpet is to play), Listening to the data flux, and handling the perfect timing for an instrument to start/stop/resume playing the song.
Then our reducers are going to take care of handling modifications in our store, this is going to be the only part of our architecture to ever modify the store, by following the actions from the action creator(orchestrator). This is the one that will receive our binary partiture and send it to the store so that each part of the partiture can be correctly played in the correct order for the instruments to sound in harmony.
Then we have the store, which is going to be the partiture we need to play today, this is the truth we have. However, we do not have all the partiture's pieces from the beginning, we need to ask for each part of it when we need it, that way we do not overload all the system trying to learn all the song we are playing from the beginning.
Then we have our components, these guys are the instruments that are going to play the song, the ones that are going to use the partiture we have in our store and use is to bring to life all that beautiful music we have in our store. They will ask for a new part of the partiture to the store and even ask for future parts of the partiture to be able to play later without interruptions, also will handle silences, this is a huge part of the music, waiting until the next part of the partiture is fully loaded to continue playing.
Testing is a fundamental part on software development. It helps us detect software failures on specific conditions. This will help software engineers to check if the final product matches the expected requirements. Having a test suit reduces our chance to break something from out code-base which in the long-run will help us have a more stable and robust application.
For this project we decided to use Jest and Enzyme to test our application. Jest is a Javascript test runner, which helps
to create, run and structure tests. Enzyme is a testing utility for React that makes it easier to test
React components, as you can render, manipulate and simulate them inside your tests.
It's very important that every piece of code is tested as it will ensure our application behaves as we expect.
Ant design is component library developed by Alibaba full of out-of-the-box, easy-to-use components for every need. It is used in this project mainly for an author's preference to quickly implement UI functionality.
- Accessibility/Time: Less time worring about low-level HTML components (Buttons, select inputs, Modals, Cards, etc)
- Breadth of components: After installing Antd, there's no need for extra component libraries for specific use cases (Modals, Notifications, Grid system, Date/Time picker, etc). Antd has everything needed for an enterprise-level application
- Documentation: Ant design documentation is one of the most thorough documentations I've seen, with variety of examples and use cases.
- Easy to customize (sort of): After the correct setup, it's so easy to override antd default variables. This will create a sense of consistent style throughout the application. Everything else can be overriden through css.
It's possible to customize Antd theme through Webpack's less-loader. That's the main reason to use react-app-rewired, so that we can make some webpack overrides without the need of ejecting the application
To ensure we can have multiple environments for our application, a multi-environment setup approach was considered.
With the help of env-cmd we can use multiple .env files, mainly for the building
process.
To run an environment build just run yarn build:<environment> for example yarn build:staging will look for the
.env.staging file to configure the build.