Universal bug tracker for everyone! Helios bug tracker allows team members to collaborate, discuss and manage projects effectively.
- Team management
- Statistics
- User assignement
- Comment reactions
- Ticket labels
- Ticket history
- Role based organisation
- Change tracker
- Mail service
| Stack | - | - | - | - | - |
|---|---|---|---|---|---|
| FrontEnd |
|
|
|
|
|
| BackEnd |
|
|
|
|
|


General requirement -
In order for those projects to work, you'll need to have:
- An IDE of your choice, but I'd really recommand Visual Studio 2019. Community version would be 100% fine. If you do not own it yet, take a look here .
- An instance of SQL server installed. If you need help with that, here's a cool guide.
- The .Net 5 (Click here! )framework installed.
Clone the repo locally by doing -
git clone https://github.com/heliosCreation/BugsTracker.gitThe application will make use of a default store, so, before we can use it, we'll have to instantiate it. The migrations being already ready, you'll only have to Update the database
To do so, open your package manager, select the persistence Project and type:
Update-databaseSince the core application is protected through authentication and authorization, the first page you will directed to will be the login page

If you do not have an account yet, you can go through the registration process and wait for the confirmation mail.
But registering itself won't give you access to the application yet, you will to wait for the admin approval.
 Alternatively, if you don't want to go throuh the whole process of creating an identity, demo user representing each application's role are also available. The catch
being that you won't be able to modify any data on the server with those users:
Alternatively, if you don't want to go throuh the whole process of creating an identity, demo user representing each application's role are also available. The catch
being that you won't be able to modify any data on the server with those users:

Upon successful authentication, you will be redirected to the main page. As for the demo, I decided to register as the admin to display all the features available.
Here, it adds the User management, and system logs tabs. You have the choice to fold the sidebar for a better view if you decide so.

The upper part of the page will be in charge to display the projects while the lower part will display ticket related statistics to get an immediate idea of the state of the organization.
From the home page, an admin can create new project to work with through the organization and assign a team to it. Only the users linked to this project will have access to it and its tickets.

From the same page, by hitting the triple dots in the action section of the table, you are able to update or delete the projects. The update being pretty similar in term of UI to the creation, no sreenshot will be provided. The deletion is fairly different. Upon using the corresponding button, you will be prompted with a modal asking you to confirm your action. Deleting a project will as well delete every ticket linked to the project.

Upon clicking one of the purple project name, you will be taken to the tickets linked to the projects. They are sorted from the newest to the oldest and can be access by performing query corresponding to any of the fields presents in the table below.

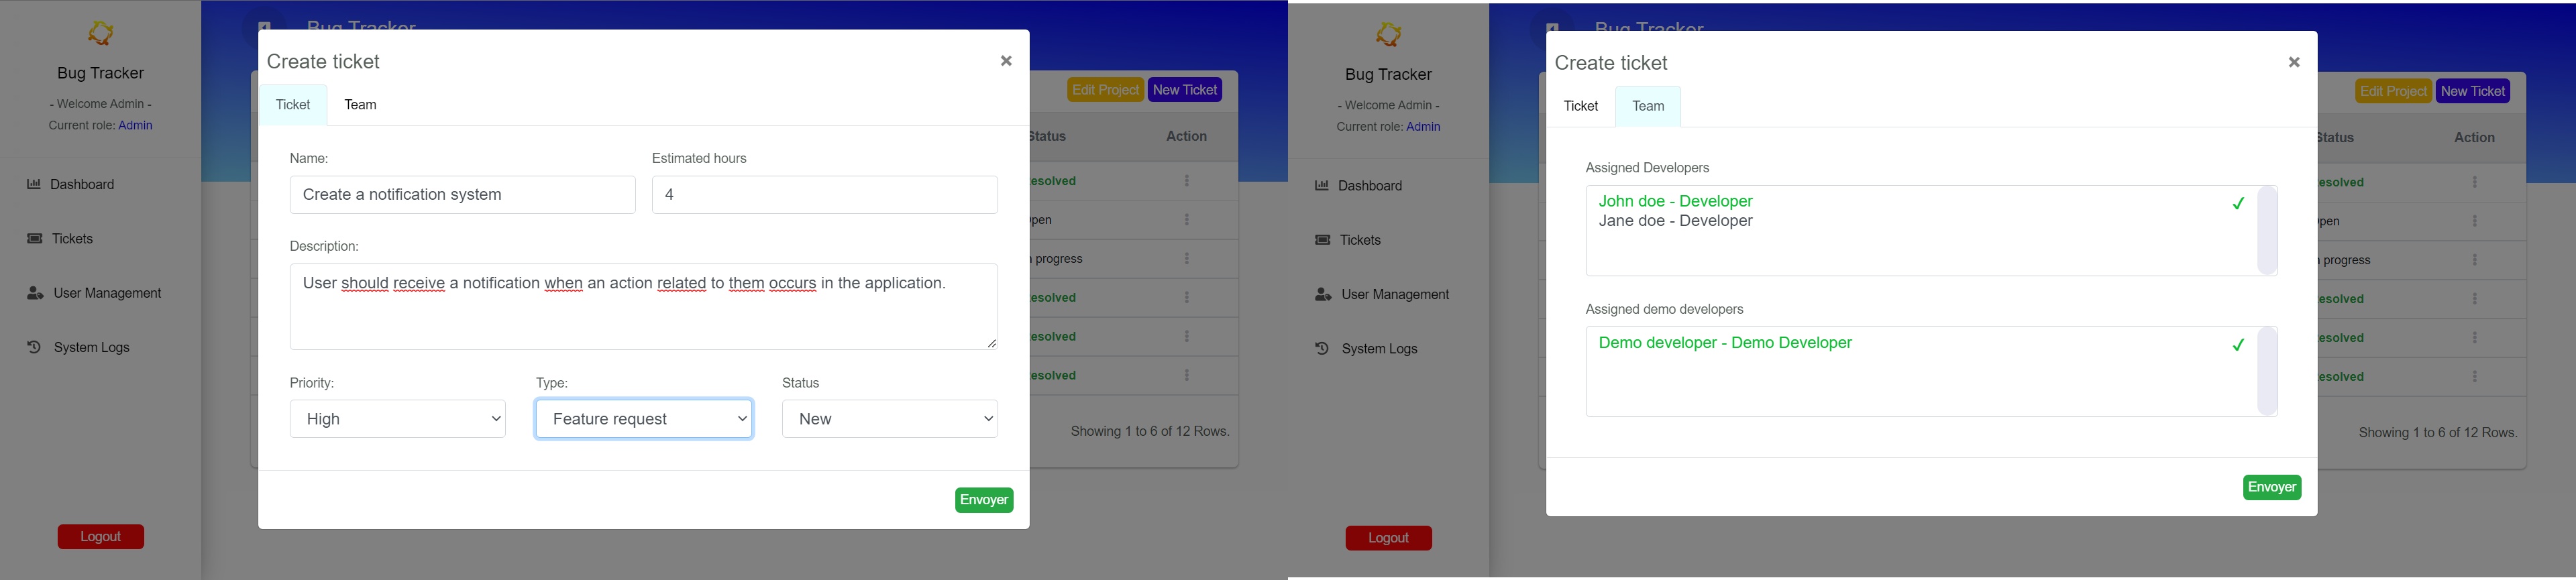
Clicking on the blue "New Ticket" button will open a modal with two tabs allowing you to create the specific fields of your new ticket and assign the developers that will work on it.
Once again, by clicking on the three dots, you will gain access to the update and delete modal. The flow of updating a ticket is again very similar to the creation. Choosing the "Delete" option will prompt you with a modal asking for confirmation.
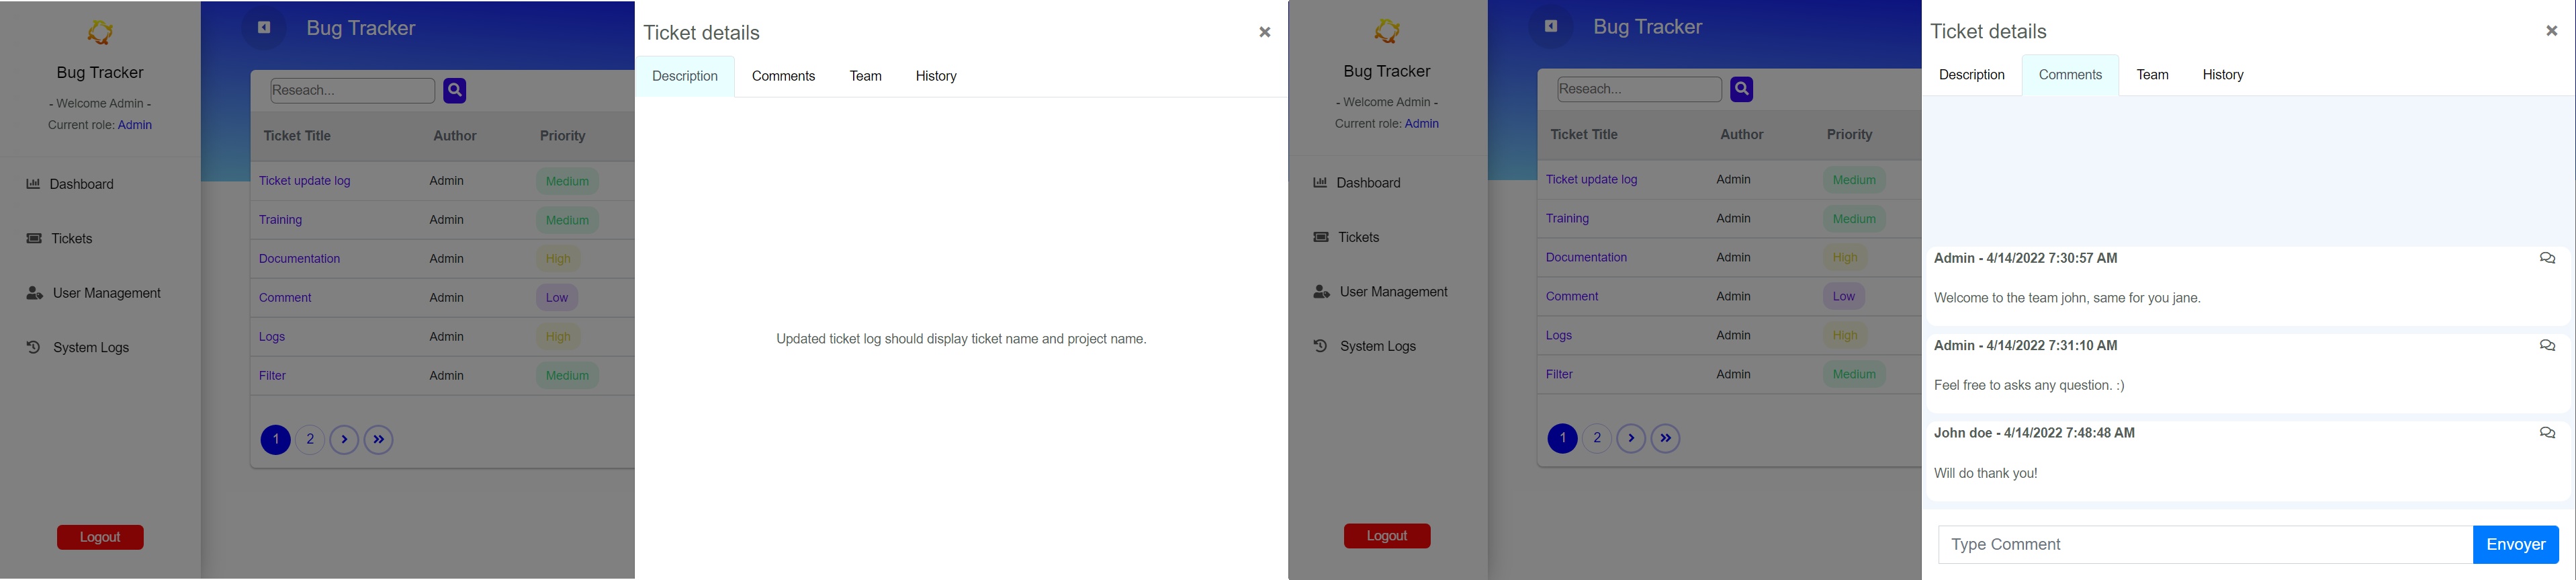
If you choose to click on the ticket name, rendered in purple in the table, you will access the ticket details.
Those details are divided in 4 categories:
- Description: A description of the tickets and its necessities.
- Comments: Let's you discuss with the members of the ticket.
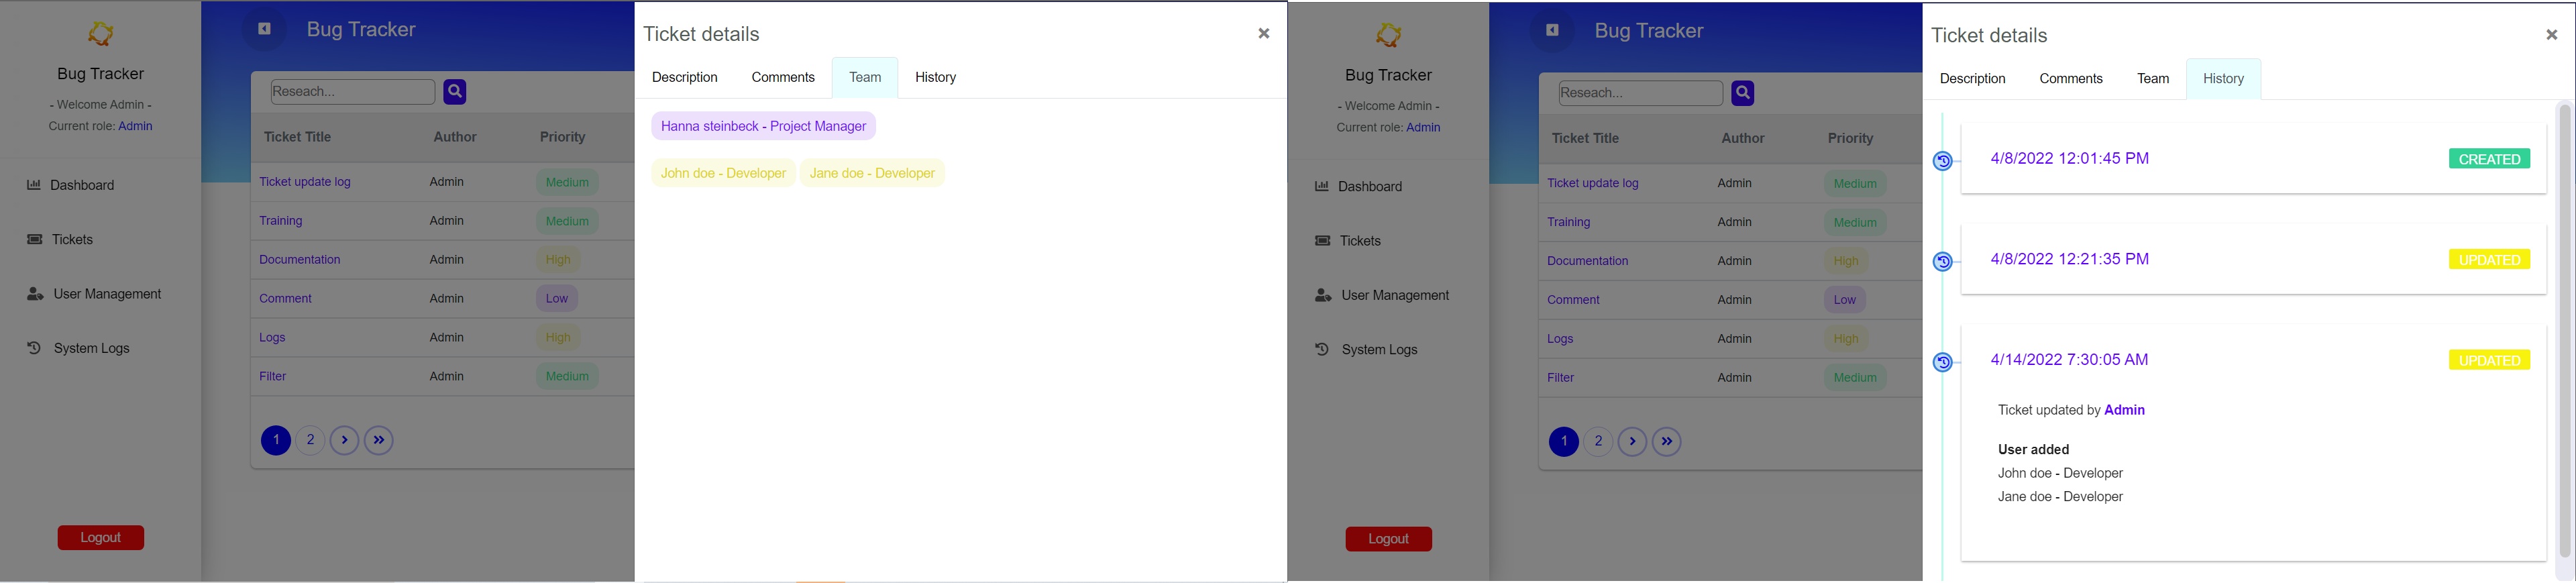
- Team: Show the other developers assigned to the ticket and the project manager.
- History: Give information about the ticket creation and each update it when through.
On the left hand side resides the main tabs of the application. If a user click on the ticket tab, it will take him to a page holding all ticket relatid to him/her. The way tickets would be fetch will depend on the role assigned to the user:
- Admin: Will fetch all the tickets of the system. Has the possibility to filter the result down to the tickets he/she created.
- Project Manager: Will fetch all the tickets linked to the projects the PM is assigned to.
- Developer: Will fetch all the tickets they are assigned to.
- Submitter: Will fetch all the tickets they created.

If the user is logged in as an Admin, he/she will have the option to click on the User management tab.
This page will fetch all the user in the system, display their name, email and roles, and allow the admin to perform diverse operations.

By clicking on the triple dot of each row, the admin will be able to perform three type of action:
Each user of the system can and should be associated to a role. That's the responsability of the admin to assign and modify said roles.
Clicking on the manage role button will result in the display of the bellow modal. All that will be left will to click and validate your choice.

Users can be both locked and unlocked from the system. Still by clicking the triple dots the admin will be able to access the below modal. If the user is locked, the option will be defaulted to unlock and vice-versa.

Finally, the admin might want to remove permanently somebody from the organization. If he/she wish to do so, the triple dots also give access to a delete user modal. He/She, will be asked for confirmation and will then be able to validate the action.

On top of tracking the history of the tickets in their Details modal, the application is keeping a track of most of interaction operated in the server.
Those change are prettyfied to human readable data and displayed in form of a table. Each column of the table is queryable to allow the admin to perform
a precise search through multiple keywords.

👤 Quentin Couissinier
- Linkedin: @Quentin Couissinier
- Github: @Quentin Couissinier
Please ⭐️ this repository if you liked the project!
Copyright © 2022 @Quentin Couissinier.
This project is MIT licensed.