This repository is a companion for a series of blog posts starting with Integrate NestJS with External Services using Microservice Transporters (Part 1).
These examples assume you have the latest NestJS (e.g., @nestjs/cli@latest; as of this writing, that's 6.14.2) installed. In particular, you need to have @nestjs/microservices version >= 6.11.6.
You'll also want Docker to run NATS (unless you prefer to install NATS locally).
I personally use Ubuntu to run Nest and NATS, so scripts are built and tested with that in mind.
While all code and scripts should be portable to other OS's, you may have to make some small adjustments, especially in things like package.json scripts, Docker, and NATS.
git clone git@github.com:johnbiundo/nest-nats-sample.gitEither cd into each project folder and run npm install:
cd nest-nats-sample/customerApp
npm install
cd ../customerService
npm install
# etc
Or, do that all in one go with the build.sh script:
# from nest-nats-sample
sh build.shYou can easily run a local copy of NATS (say on an Ubuntu server), but I strongly prefer Docker. Assuming Docker is installed, you can run this at the command line:
# from nest-nats-sample directory
docker-compose up
This starts a container running the official NATS image. The container runs in the foreground and uses the -Dv flag so you can watch the message traffic as you run the various code samples.
If you want to get more familiar with how Nest and NATS play together, you're going to want to run several servers and interact with and monitor them from the command line. (Aside: this is one of the reasons I use Ubuntu (over Windows) for this kind of work. I find it much easier to work with multiple server processes. Anyway...)
If you're interested in learning Tmux, here's a good place to start. I've also included my .tmux.conf file, which does a few useful things:
- Maps the "prefix" key sequence to
Ctrl-a. - Maps F11 and F12 to previous pane and next pane respectively
- Creates nice pane titles
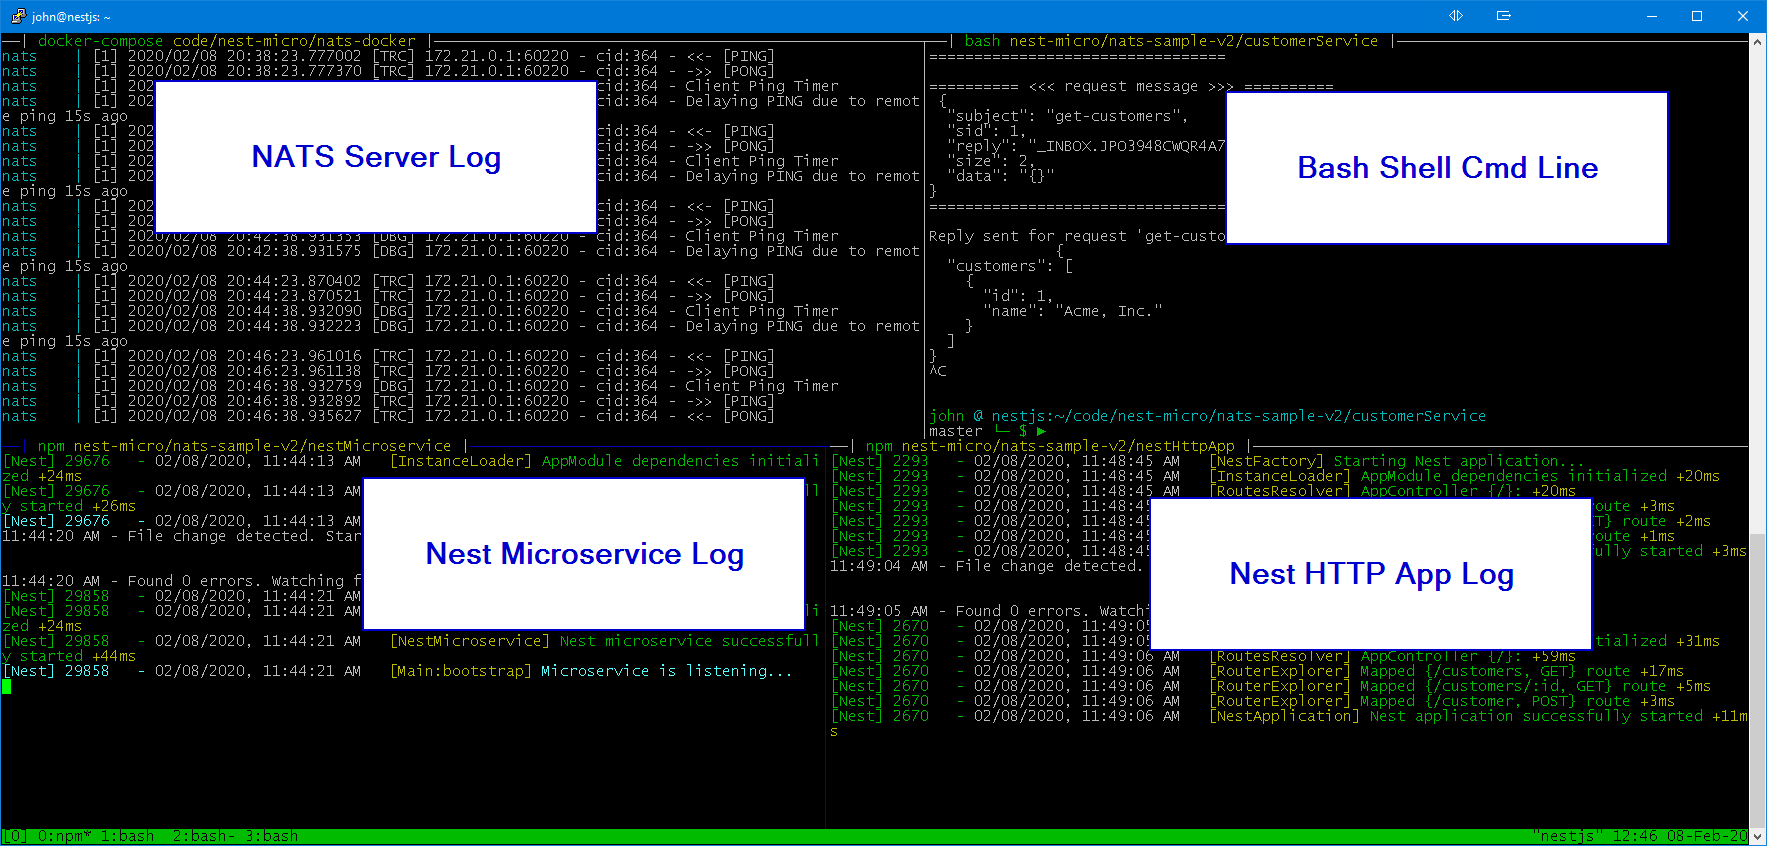
As an inducement to use it, here's what mine looks like when running some of the code in this repo. It's super handy to be able to tab through these panes, run commands, and watch the logs.
To run an "All-Nest" configuration — that is, the Nest requestor (nestHttpApp) and the Nest responder (nestMicroservice) communicating with each other in a "classic" Nest microservices mode, follow these steps:
-
With NATS up and running, launch the nestMicroservice app in one window:
# from the nest-nats-sample/nestMicroservice directory npm run start:dev -
Launch the nestHttpApp in a separate window:
# from the nest-nats-sample/nestHttpApp directory npm run start:dev -
In a third window, simulate REST requests with cURL or httPie. The following are shown as httPie commands at the OS command line:
# get all customers
http get localhost:3000/customers
The expected response is:
{
  "customers": [
    {
      "id": 1,
      "name": "nestjs.com"
    }
  ]
}
# get customer by id (passing id of 1)
http get localhost:3000/customers/1
The expected response is:
{
  "customers": [
    {
      "id": 1,
      "name": "nestjs.com"
    }
  ]
}
# add a customer
http post localhost:3000/customer name="Nestles, Inc"
# get all customers
http get localhost:3000/customers
The expected response is:
{
  "customers": [
    {
      "id": 1,
      "name": "nestjs.com"
    },
    {
      "id": 2,
      "name": "Nestles, inc."
    }
  ]
}
To run an "All-Native-App" configuration — that is, the native TypeScript/NATS requestor (customerApp) and the native TypeScript/NATS responder (customerService) communicating with each other over NATS, follow these steps:
-
It's best to stop the running Nest apps if they are still running from earlier.
-
With NATS up and running, build, then launch the customerService app in one window:
# from the nest-nats-sample/customerService directory npm run build npm run start -
Build, then run the customerApp in a separate window:
# from the nest-nats-sample/customerApp directory
#
# first build the app
npm run build
# run the requestor, passing the 'get-customers' option
npm run get-customers
# run the requestor, passing the 'add-customer' option and a new customer
npm run add-customer "Hersheys, Inc."
# get customers again
npm run get-customers
You should see some verbose output in each of the windows. It can be very helpful to trace through the code, the logging output, and the NATS server log to correlate each step in the process and to get familiar with the message flows.