A tutorial on creating a Node.js Telegram bot using AWS Lambda with AWS API Gateway.
![]()
I am choosing Asia Pacific (Singapore) region for AWS Lambda and Asia Pacific (Singapore) region for AWS API Gateway.
- Go to Telegram Web.
- Start a chat with @BotFather.
- Type "/start".
- Type "/newbot" to create a new bot. I named my bot "lesterchan_bot".
- Note the HTTP API access token that @BotFather will reply you after you created the bot.
$ git clone https://github.com/lesterchan/telegram-bot.git
$ cd telegram-bot
$ npm install --production
$ cp token.sample.js token.js
Open up token.js and fill in your Telegram HTTP API access token obtained in the first step then run this command:
$ zip -r telegram-bot.zip *.js node_modules/*
- Go to AWS Lambda.
- Click "Get Started Now".
- Under the "Select blueprint" screen, search for "hello-world"and you will see the hello-world blueprint which says "A starter AWS Lambda function.".
- Click on "hello-world" (NOT "hello-world-python").
- You will be brought to the "Configure Function" page.
- Under "Name", you can choose any name for your function. I called it "telegram-bot".
- Under "Runtime", ensure it is "Node.js".
- Under "Code entry type", choose "Upload a .ZIP file" and click the "Upload" button" to browse for the file "telegram-bot.zip" which you have zipped previously.
- Under "Handler", we leave it as "index.handler".
- Under "Role", we choose "Basic Execution Role".
- You will be brought to a "Role Summary" page.
- Under "IAM Role", choose "lambda_basic_execution".
- Under "Role Name", choose "oneClick_lambda_basic_execution_.....".
- Click "Allow".
- You will be brought back to the "Configure Function" page.
- Leave "Memory (MB)" as "128MB".
- You might want to increase "Timeout" to "15" seconds.
- Under VPC, choose "No VPC".
- Click "Next".
- Click "Create function".
- Go to AWS API Gateway.
- Click "Get Started Now".
- Under "API name", enter the name of your API. I will just name it "Telegram Bot".
- Click "Create API".
- You will be redirected to the "Resources" page.
- Click "Create Method" and on the dropdown menu on the left, choose "POST" and click on the "tick" icon.
- Now, you will see the "/ - POST - Setup" page on the right.
- Under "Integration Type", choose "Lambda Function".
- Under "Lambda Region", choose "ap-southeast-1".
- Under "Lambda Function", type "telegram" and it should auto-complete it to "telegram-bot".
- Click "Save" and "Ok" when the popup appears.
- You will be brought to the "/ - POST - Method Execution" Page.
- Click "Integration Request".
- Click "Mapping Templates" and the section should expand.
- Click "Add Mapping Template" and type in "application/json" and click on the "tick" icon.
- Under "Input Passthrough" on the right, click on the "pencil" icon.
- Choose "Mapping Template" on the dropdown that appears.
- Copy and paste
{"body": $input.json('$')}to the template box. - Click on the "tick" icon beside the dropdown once you are done.
- Click on "Deploy API" button on the top left.
- Under "Deployment Stage", click "New Stage".
- Under "Stage Name", I will type in "production".
- Click "Deploy".
- Note the "Invoke URL" at the top and your API is now live.
- Replace <ACCESS_TOKEN> with your Telegram HTTP API access token obtained in the first step.
- Replace <INVOKE_URL> with your Invoke URL obtained in the previous step.
- Run this command:
$ curl --data "url=<INVOKE_URL>" "https://api.telegram.org/bot<ACCESS_TOKEN>/setWebhook"
You should get back a response similar to this:
$ {"ok":true,"result":true,"description":"Webhook was set"}
- Message your Telegram Bot that you have created.
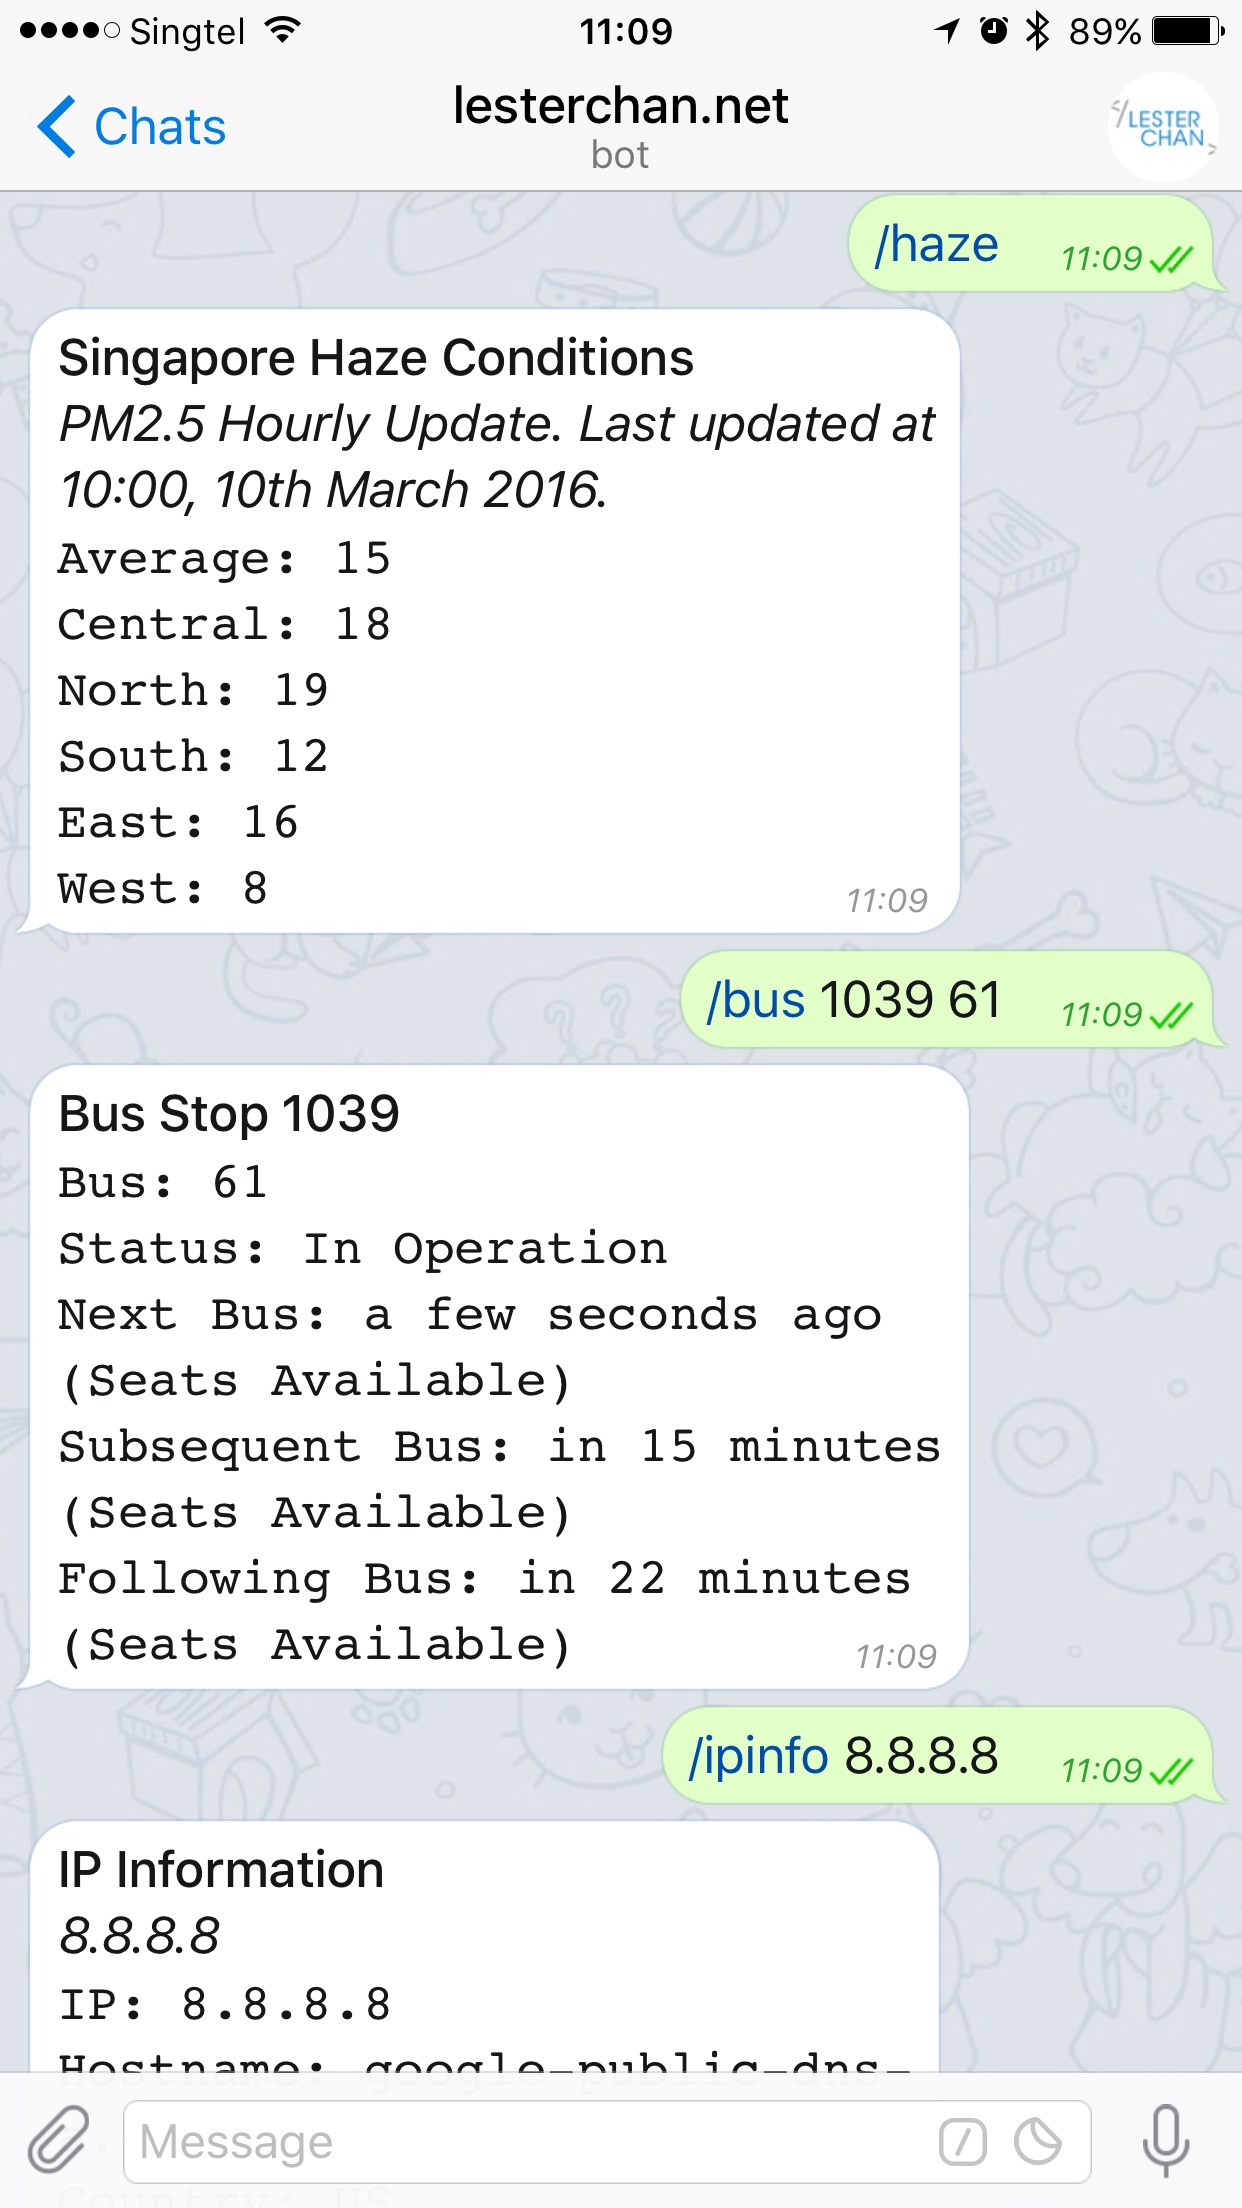
- Type in "/haze" (without the quotes).
- You should get back a nicely formatting response as shown in the first screenshot.
Usage: /bus <busStopNo> <busNo>
Example: /bus 30111 991
Usage: /bus <busStopNo>
Example: /bus 44591
Usage: /haze
Example: /haze
Usage: /weather
Example: /weather
Usage: /ipinfo <ip>
Example: /ipinfo 8.8.8.8
Usage: /socialstats <url>
Example: /socialstats https://lesterchan.net