Onchain Wallet (watch-only) - LNbits extension
For more about LNBits extension check this tutorial
Monitor an extended public key and generate deterministic fresh public keys with this simple watch only wallet. Invoice payments can also be generated, both through a publically shareable page and API.
You can now use this wallet on the LNbits SatsPayServer extension
- a user can add one or more
xPubsordescriptors- the
xPubmust be unique per user - such and entry is called an
Wallet Account - the addresses in a
Wallet Accountare split intoReceive AddressesandChange Address - the user interacts directly only with the
Receive Addresses(by sharing them) - see BIP44 for more details
- same
xPubwill always generate the same addresses (deterministic)
- the
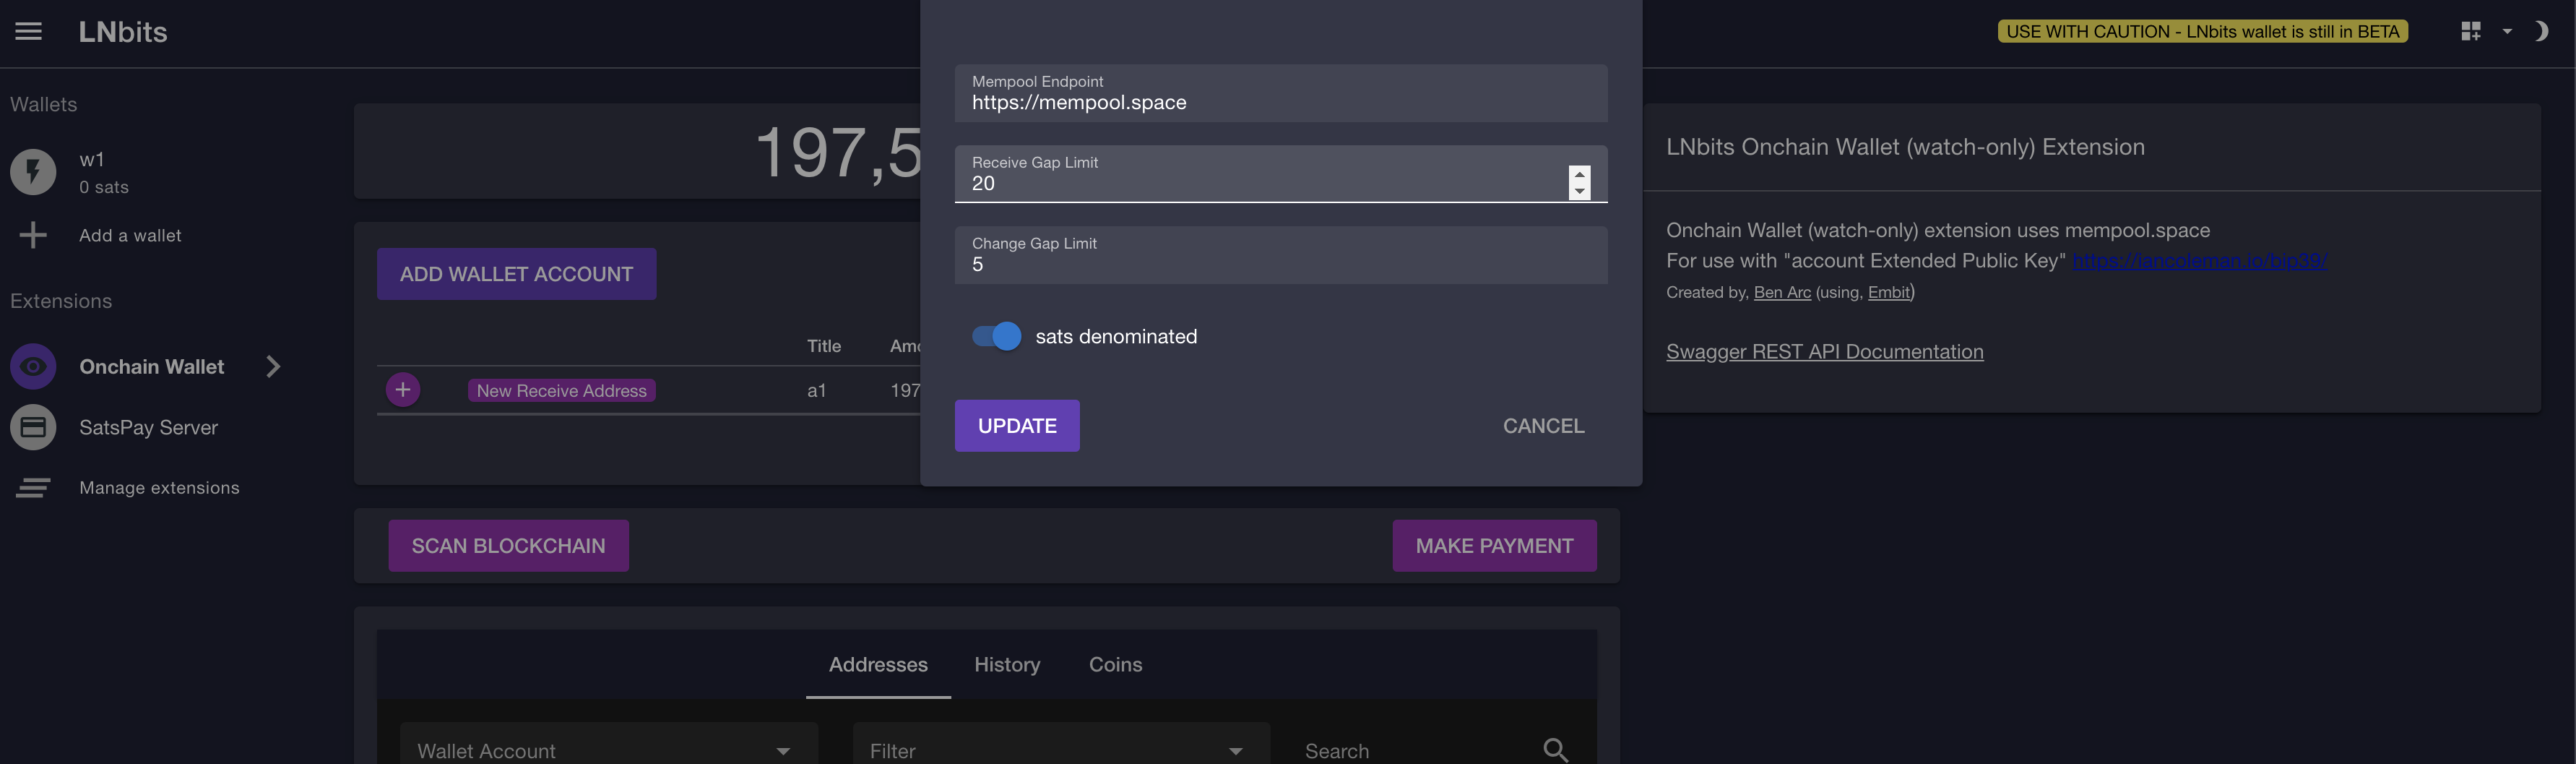
- when a
Wallet Accountis created, there are generated20 Receive Addressesand5 Change Address- the limits can be change from the
Configpage (seescreenshot 1) - regular wallets only scan up to
20empty receive addresses. If the user generates addresses beyond this limit a warning is shown (seescreenshot 4)
- the limits can be change from the
- an account can be added
From Hardware Device
- when the user clicks
Scan Blockchain, the wallet will loop over the all addresses (for each account)- if funds are found, then the list is extended
- will scan addresses for all wallet accounts
- the search is done on the client-side (using the
mempool.spaceAPI).mempool.spacehas a limit on the number of req/sec, therefore it is expected for the scanning to start fast, but slow down as more HTTP requests have to be retried - addresses can also be rescanned individually form the
Address Detailssection (Addressestab) of each address
- the
New Receive Addressbutton show the user the NEXT un-used address- un-used means funds have not already been sent to that address AND the address has not already been shared
- internally there is a counter that keeps track of the last shared address
- it is possible to add a
Noteto each address in order to remember when/with whom it was shared - mind the gap (
screenshot 4)
- the
Addressestab contains a list with the addresses for all theWallet Accounts- only one entry per address will be shown (even if there are multiple UTXOs at that address)
- several filter criteria can be applied
- unconfirmed funds are also taken into account
Address Detailscan be viewed by clicking theExpandbutton
- shows the chronological order of transactions
- it shows unconfirmed transactions at the top
- it can be exported as CSV file
- shows the UTXOs for all wallets
- there can be multiple UTXOs for the same address
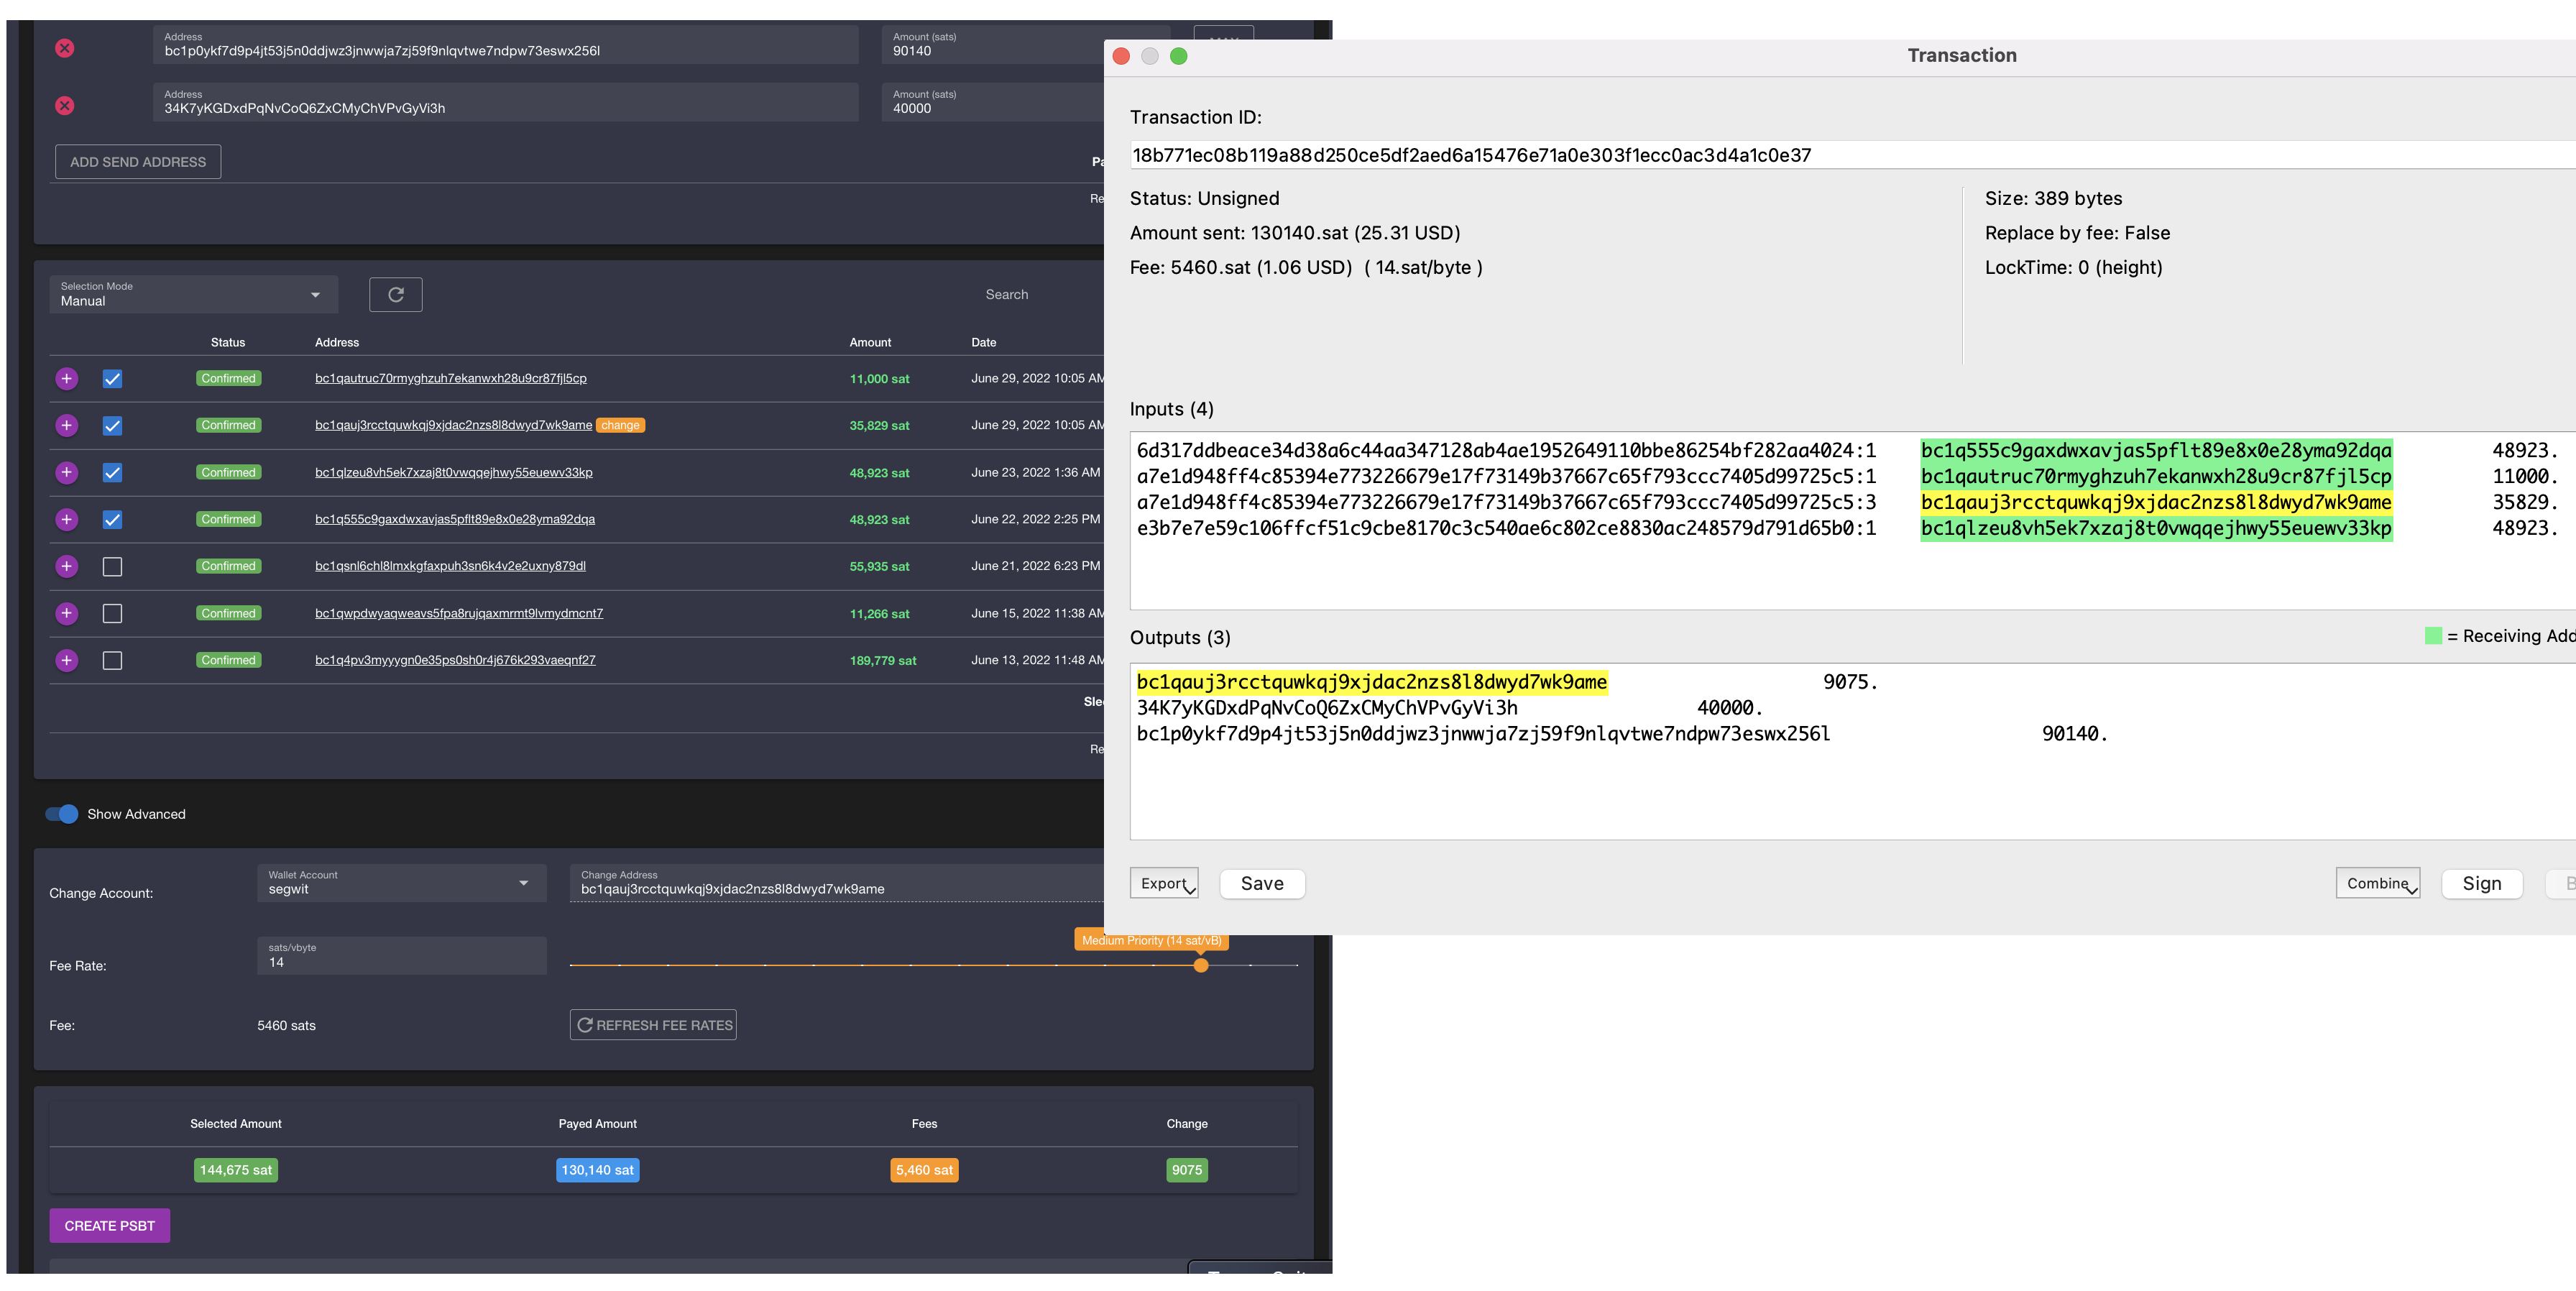
- create a new
Partially Signed Bitcoin Transaction - multiple
Send Addressescan be added- the
Maxbutton next to an address is for sending the remaining funds to this address (no change)
- the
- the user can select the inputs (UTXOs) manually, or it can use of the basic selection algorithms
- amounts have to be provided for the
Send Addressesbeforehand (so the algorithm knows the amount to be selected)
- amounts have to be provided for the
Show Changeallows to select from which account the change address will be selected (defaults to the first one)Show Custom Feeallows to manually select the fee- it defaults to the
Mediumvalue at the moment theNew Paymentbutton was clicked - it can be refreshed
- warnings are shown if the fee is too Low or to High
- it defaults to the
- creates the PSBT and sends it to the Hardware Wallet
- a confirmation will be shown for each Output and for the Fee
- after the user confirms the addresses and amounts, the transaction will be signed on the Hardware Device
- Show the PSBT without sending it to the Hardware Wallet
-
screenshot 1:
-
screenshot 2:

-
screenshot 3:
-
screenshot 4:
