Warning: According to this and some other sources, when iOS 11 and the new app store releases, no custom rating screens will be allowed. Use this library at your own risk since you may be rejected.
- Stops users feeling annoyed from pop ups asking for ratings.
- Customizable for your app needs.
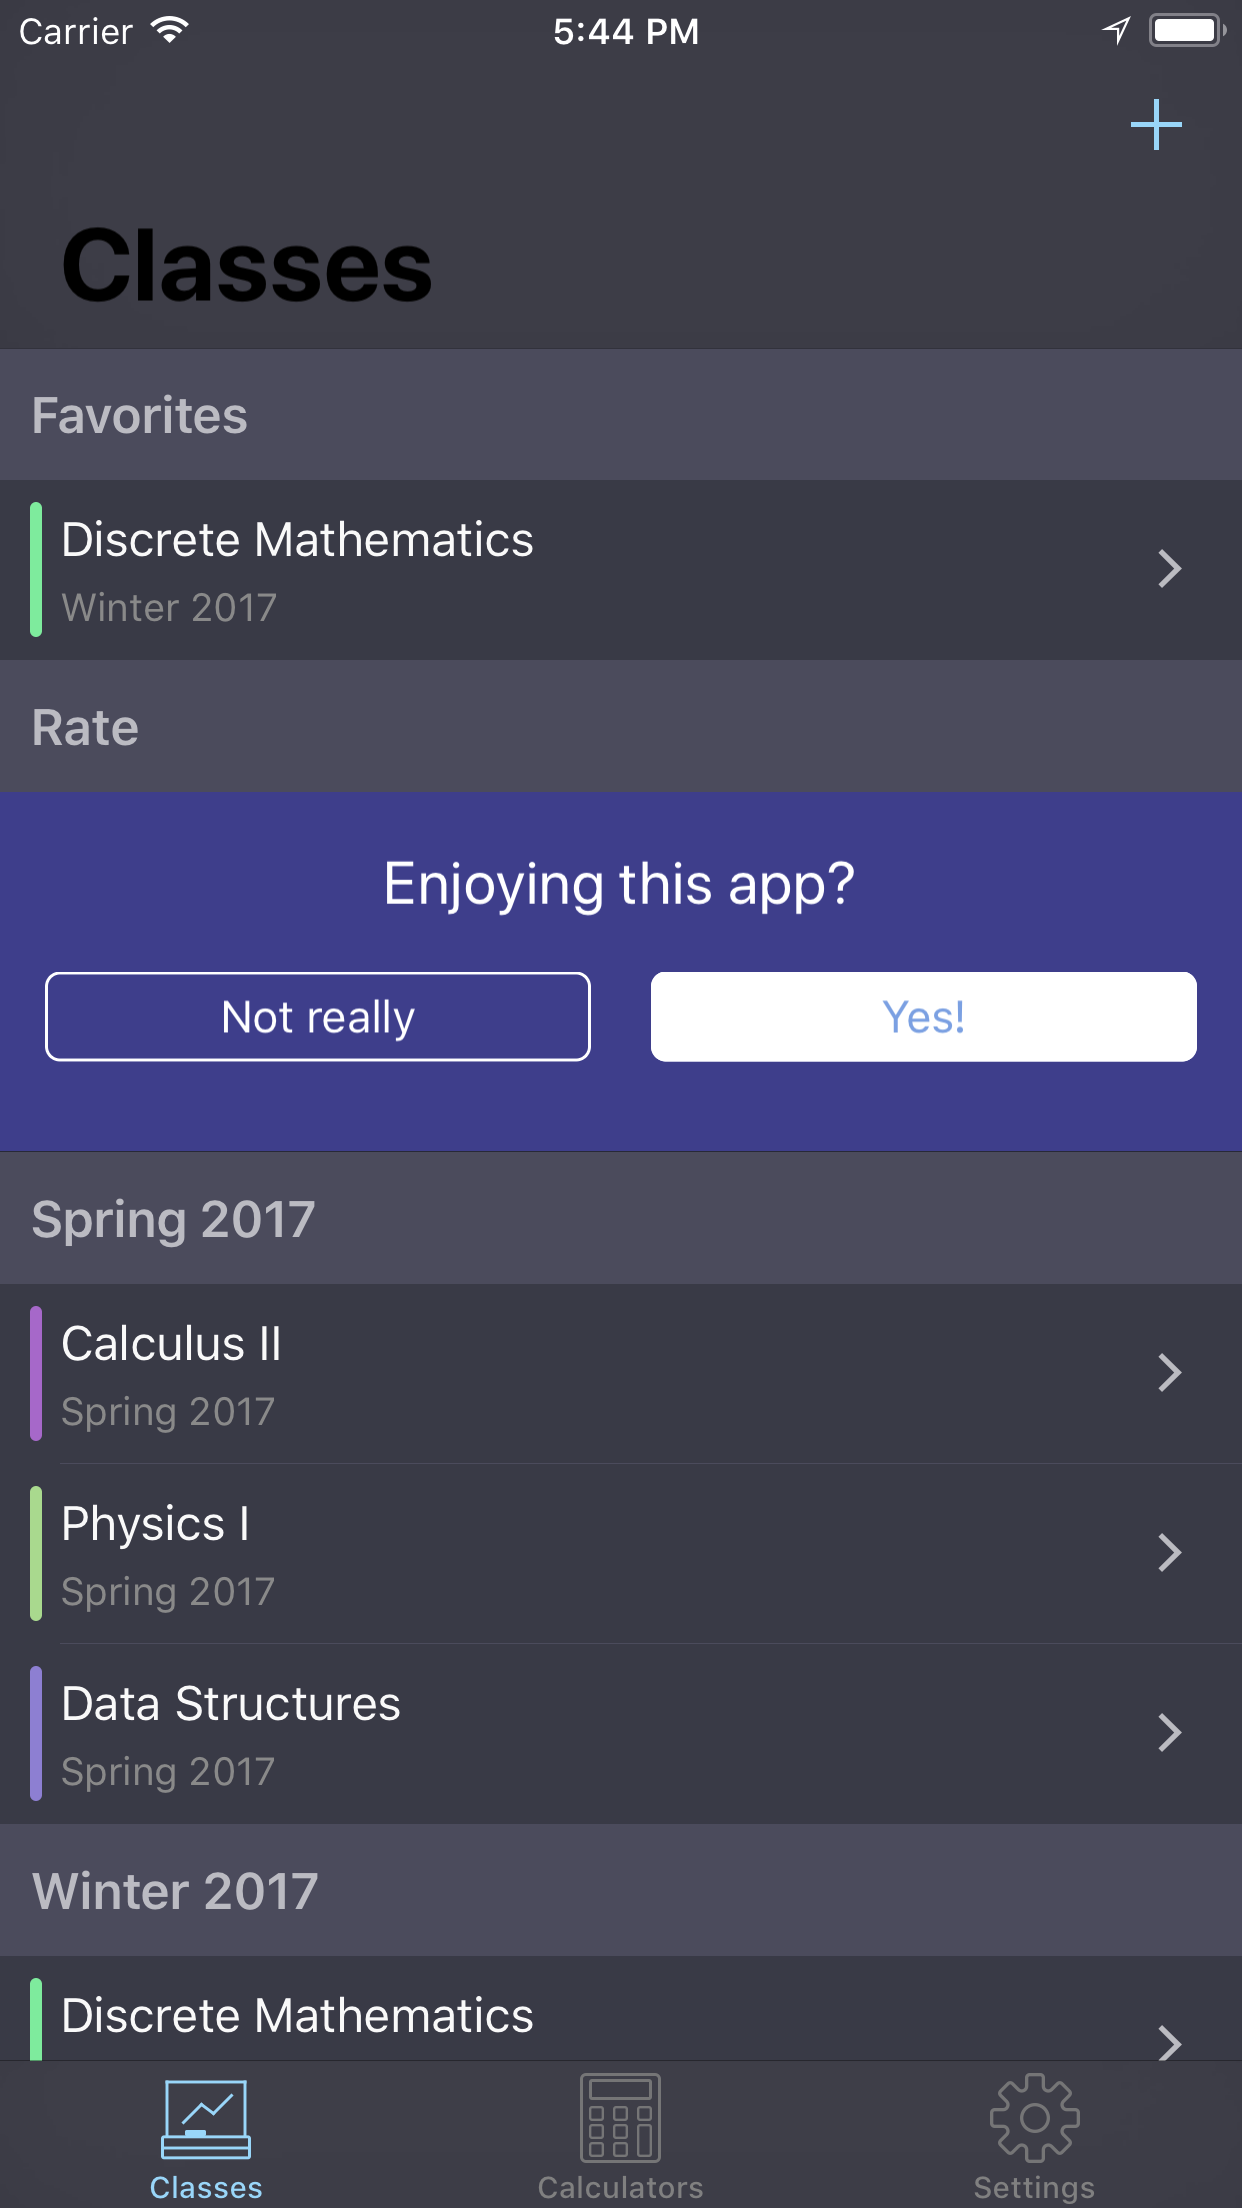
- Easy to use with
UITableView's andUICollectionViews's.
-
Install CocoaPods
-
Add this pod to your
Podfiletarget 'Example' do use_frameworks! pod 'LPIntegratedRating' end
-
Run
pod install -
Open up the
.xcworkspacethat CocoaPods created -
Import
LPIntegratedRatinginto any source file where it's needed
- Simply download the source from here and add it to your Xcode project
To learn how to properly ask users to rate your app, read the wonderful article which inspired this library here.
You must conform to the delegate in order to customize the view.
Here is an example:
extension ViewController: LPRatingViewDelegate {

    func ratingViewDidFinish(with status: LPRatingViewCompletionStatus) {
        switch status {
        case .ratingApproved:
            print("Rating approved")
        case .ratingDenied:
            print("Rating denied")
        case .feedbackApproved:
            print("Feedback approved")
        case .feedbackDenied:
            print("Feedback denied")
        }
    }

    func ratingViewConfiguration(for state: LPRatingViewState) -> LPRatingViewConfiguration? {
        switch state {
        case .initial:
            let title = NSAttributedString(string: "Enjoying this app?",
                                           attributes: [.foregroundColor: UIColor.white])
            let title2 = NSAttributedString(string: "Yes!",
                                            attributes: [.foregroundColor: UIColor(red: 0.376, green: 0.788, blue: 0.773, alpha: 1.00)])
            let title3 = NSAttributedString(string: "Not really",
                                            attributes: [.foregroundColor: UIColor.white])
            return LPRatingViewConfiguration(title: title,
                                             approvalButtonTitle: title2,
                                             rejectionButtonTitle: title3)

        case .approval:
            let title = NSAttributedString(string: "How about rating, then?",
                                           attributes: [.foregroundColor: UIColor.white])
            let title2 = NSAttributedString(string: "Ok, sure",
                                            attributes: [.foregroundColor: UIColor(red: 0.376, green: 0.788, blue: 0.773, alpha: 1.00)])
            let title3 = NSAttributedString(string: "No, thanks",
                                            attributes: [.foregroundColor: UIColor.white])
            return LPRatingViewConfiguration(title: title,
                                             approvalButtonTitle: title2,
                                             rejectionButtonTitle: title3)
        case .rejection:
            let title = NSAttributedString(string: "Would you mind giving us some feedback",
                                           attributes: [.foregroundColor: UIColor.white])
            let title2 = NSAttributedString(string: "Ok, sure",
                                            attributes: [.foregroundColor: UIColor(red: 0.376, green: 0.788, blue: 0.773, alpha: 1.00)])
            let title3 = NSAttributedString(string: "No, thanks",
                                            attributes: [.foregroundColor: UIColor.white])
            return LPRatingViewConfiguration(title: title,
                                             approvalButtonTitle: title2,
                                             rejectionButtonTitle: title3)
        }
    }
}Simply create an instance of LPRatingTableViewCell, assign the delegate and return it!
override func tableView(_ tableView: UITableView, cellForRowAt indexPath: IndexPath) -> UITableViewCell {
	let cell = LPRatingTableViewCell(style: .default, reuseIdentifier: nil)
	cell.delegate = self

	return cell
}First register the class
override func viewDidLoad() {
    super.viewDidLoad()
    // Register class
    collectionView?.register(LPRatingCollectionViewCell.self, forCellWithReuseIdentifier: "testCell")
}
Then simply create an instance of LPRatingCollectionViewCell, assign the delegate and return it
override func collectionView(_ collectionView: UICollectionView, cellForItemAt indexPath: IndexPath) -> UICollectionViewCell {
let cell = collectionView.dequeueReusableCell(withReuseIdentifier: "testCell", for: indexPath) as! LPRatingCollectionViewCell
cell.delegate = self
return cell
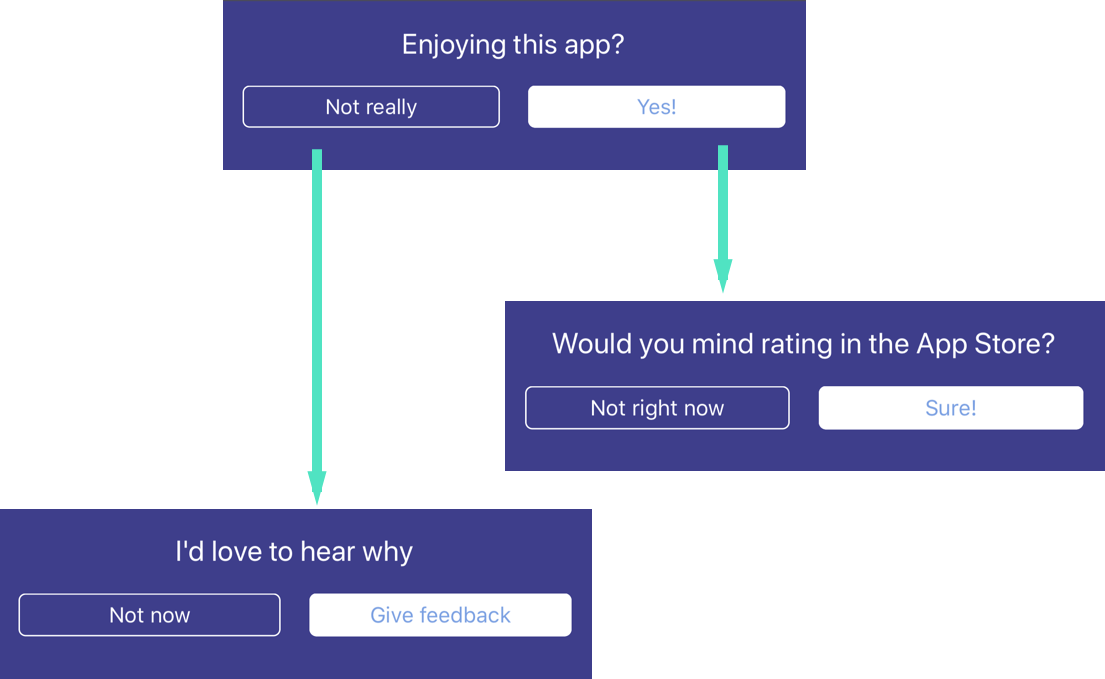
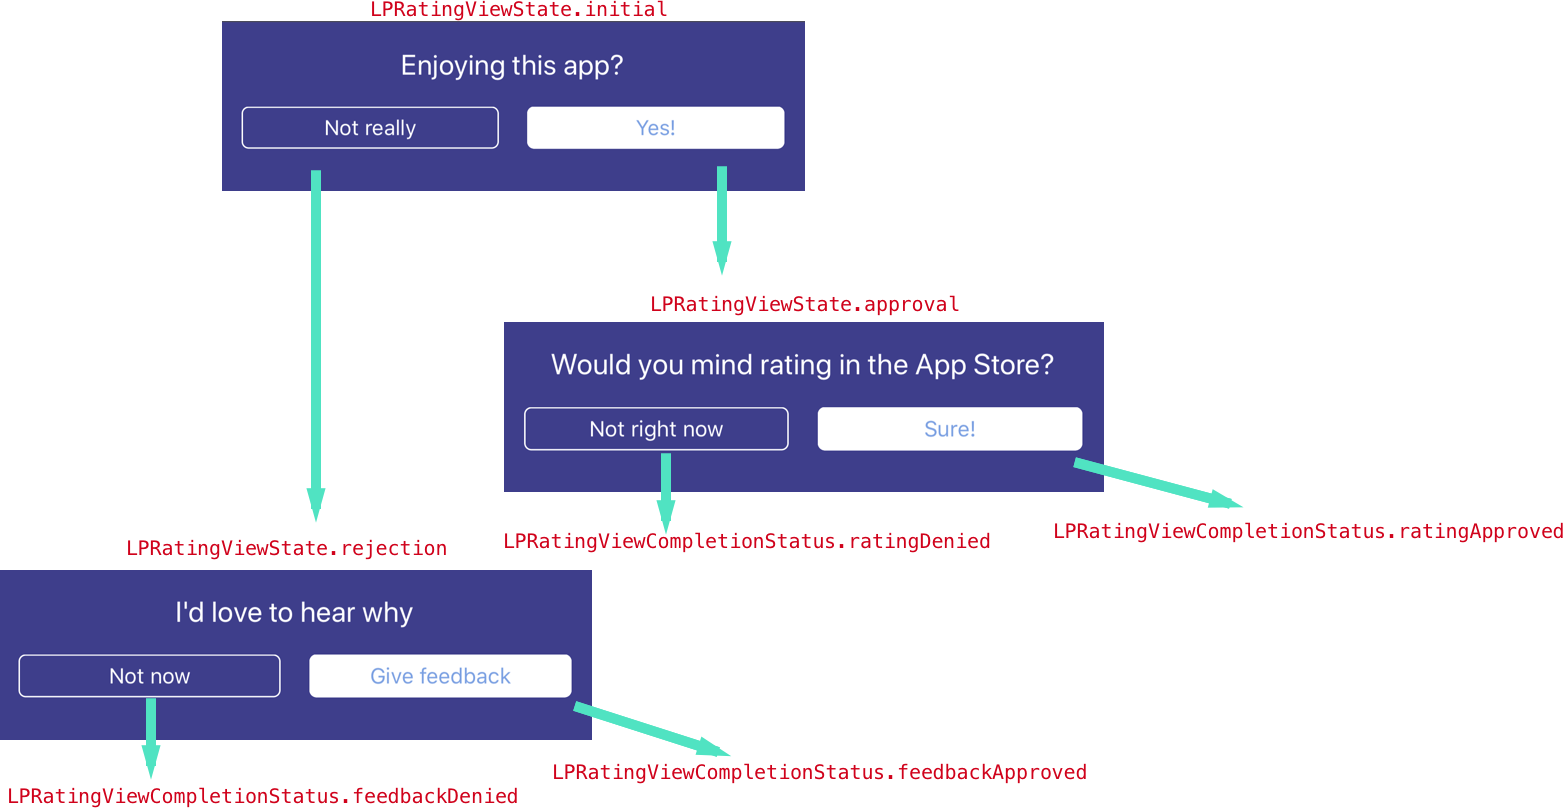
}Here is the flow of the view, and the types of cases that will be passed to the delegate along the way.
Read the full documentation here