How to Filter Photo in Flutter. We have filtered camera captured image in this article.
In this article we will learn how to implement photo filter feature in flutter application. We will implement example in which we will first of all capture image using camera plugin then apply filters on captured image and show ultimate output. There will be around 33 filters in the plugin. you can download the source code and check out each of it. So let’s start implementing it.
camera: ^0.5.4+1 photofilters: ^1.0.5
Step 1: First and basic step to create new application in flutter. If you are a beginner in flutter then you can check my blog Create a first app in Flutter. I have created an app named as “flutter_photo_filter”.
Step 2: Now, We will configure plugins for photo capture and photo filter in pubspec.yaml file.
dependencies:
 flutter:
   sdk: flutter
 camera: ^0.5.4+1
 photofilters: ^1.0.5
Step 3: Now, we will implement a logic to capture image using camera plugin. I have already implemented an app for this one of our previous articles. Take a look at Flutter Camera Overlay. We will start from that app and modify the app to filter the captured image.
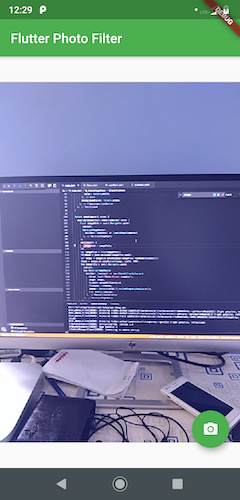
Step 4: In main.dart file we will implement a method which will navigate to filter page when user capture the image using a camera. Following the implementation of that method.
Future openCamera() async {
availableCameras().then((cameras) async {
final imagePath = await Navigator.push(
context,
MaterialPageRoute(
builder: (context) => CameraPage(cameras),
),
);
setState(() {
_imagePath = imagePath;
});
var imageFile = File(imagePath);
fileName = path.basename(imageFile.path);
var image = imageLib.decodeImage(imageFile.readAsBytesSync());
image = imageLib.copyResize(image, width: 600);
Map imagefile = await Navigator.push(
context,
new MaterialPageRoute(
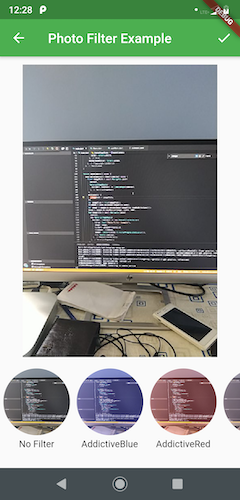
builder: (context) => new PhotoFilterSelector(
title: Text("Photo Filter Example"),
image: image,
filters: presetFiltersList,
filename: fileName,
loader: Center(child: CircularProgressIndicator()),
fit: BoxFit.contain,
),
),
);
if (imagefile != null && imagefile.containsKey('image_filtered')) {
setState(() {
imageFile = imagefile['image_filtered'];
_imagePath = imageFile.path;
});
}
});
}
Hurrey…. Run the app and Test It on emulator/simulator or device :)))
Step 5: Download the full source code which is attached for full working example. You can also refere to my git repository.
We have learnt how to capture images and apply filter on it in flutter application using photo filter plugin.
Git Repo: https://github.com/myvsparth/flutter_photo_filter Reference: https://pub.dev/packages/photofilters