


Welcome to NI's JavaScript and TypeScript linter rules for ESLint.
Install the package for your corresponding language as a development dependency:
-
For JavaScript run:
npm install -D @ni/eslint-config-javascript
Then follow the JavaScript configuration instructions.
-
For TypeScript run:
npm install -D @ni/eslint-config-typescript
Then follow the TypeScript configuration instructions.
-
For Angular run:
npm install -D @ni/eslint-config-angular
Then follow the Angular configuration instructions.
-
For Playwright run:
npm install -D @ni/eslint-config-playwright
Then follow the Playwright configuration instructions.
With npm 7 and up the required peer dependencies will be installed automatically and you can move on to Configuration.
If you are using npm 6 or lower, use the following instructions to manually install the required peer dependencies:
Use npm view to list the correct versions of each peer package to install yourself. For example, with a JavaScript project run:
npm view @ni/eslint-config-javascript peerDependenciesAlternatively, use npx install-peerdeps as a shortcut to install the peer packages for you. For example, with a JavaScript project run:
npx install-peerdeps --dev @ni/eslint-config-javascriptAfter installing the lint configuration packages, follow the configuration instructions for your project language:
Extend @ni/eslint-config-javascript in the ESLint configuration.
{
    extends: '@ni/eslint-config-javascript'
}Extend @ni/eslint-config-typescript and @ni/eslint-config-typescript/requiring-type-checking in the ESLint configuration. Set the parserOptions.project configuration to the project's TypeScript configuration.
{
    extends: [
        '@ni/eslint-config-typescript',
        '@ni/eslint-config-typescript/requiring-type-checking'
    ],
    parserOptions: {
        project: 'tsconfig.json'
    }
}ESLint support for Angular is provided by @angular-eslint. It's recommended to use @angular-eslint/schematics to
configure ESLint for Angular projects.
- For single and multi-project workspaces, add the schematic. Remove the
@angular-eslint,@typescript-eslint, andeslintdependencies frompackage.json.ng add @angular-eslint/schematics
- For multi-project workspaces, configure each project, and then enable future generated projects to be configured as well.
> ng g @angular-eslint/schematics:add-eslint-to-project <PROJECT NAME>
> ng config cli.schematicCollections "[\"@angular-eslint/schematics\"]"
- Extend the NI configured rules for Angular and Angular templates in the ESLint configuration. Set the
parserOptions.projectconfiguration to the project's TypeScript configuration.overrides: [{ files: ['*.ts'], extends: [ '@ni/eslint-config-angular', '@ni/eslint-config-angular/requiring-type-checking' ], parserOptions: { project: 'tsconfig.json' } }, { files: ['*.html'], extends: ['@ni/eslint-config-angular/template'] }]
- Evaluate the project specific rule groups to manually add to your lint configuration. For Angular applications in particular, consider enabling the
[application-prefix]rule group.
Extend @ni/eslint-config-playwright and @ni/eslint-config-playwright/requiring-type-checking in the ESLint configuration. Set the parserOptions.project configuration to the project's TypeScript configuration.
Note: The Playwright configurations extend the TypeScript configurations, so it is not necessary for an application to extend them both.
{
    extends: [
        '@ni/eslint-config-playwright',
        '@ni/eslint-config-playwright/requiring-type-checking'
    ],
    parserOptions: {
        project: 'tsconfig.json'
    }
}After following the above steps to install and configure the linter, you should be able to run it from the command line using npx eslint .
To avoid developers needing to remember tooling-specific commands, each project should add standard aliases to its package.json:
{
  "scripts": {
    "lint": "eslint .",
    "lint:fix": "eslint . --fix",
  }
}
This allows developers to lint using npm run lint and to run the automatic fixer using npm run lint:fix.
Each project's pull request build pipeline should ensure no lint errors can be committed to the repository. Invoke npm run lint from your GitHub Actions or Azure Pipelines YML after installing dependencies and building your application (not shown in the examples).
Ensure npm is present on the agent then run the lint command.
jobs:
  build:
    steps:
      - uses: actions/setup-node@v1
        with:
          node-version: '16'
- run: npm run lintUse the npm task to run the lint command.
  - task: Npm@1
    displayName: 'Lint'
    inputs:
      command: custom
customCommand: 'run lint'New projects should turn on linting before writing any code. It's easier to fix violations as developers add new code than it is to fix large numbers of lint errors across an existing codebase.
Existing projects are likely to have numerous violations even if they already used a different linter (for example, the deprecated TSLint) as this ruleset is more strict than most. The recommended flow for adopting this ruleset in an existing repository is:
- Install the tooling as described above.
- Disable existing lint tooling.
- Fix as many simple violations as possible by running the automated fixer and doing targeted manual fixes.
- If necessary, suppress the remaining violations but fix them as soon as possible in follow up submissions.
Typically steps 1-3 will happen in a single pull request (or a few in quick succession) while step 4 will be split across many subsequent submissions as time permits.
Several sets of rules may be enabled based on requirements of a given project. By default the following sets of rules are in an inert / disabled state, but should be evaluated for your integration.
Text search for the tag associated with a specific rule group in the repository to find the related rules. If enabling a rule group, the rules should be toggled from 'off' to 'error' unless the rule comment says otherwise.
Tag: [application-prefix]
Prefixes are generally added to named objects such as the selector for Components in Angular applications. Projects should consider enabling this rule group so that names can be consistently prefixed making them easier to share between applications and to minimize the chance of conflicts when using shared libraries.
Tag: [strict-null-checks]
When strictNullChecks are enabled the values null and undefined are treated as distinct types by the compiler. For example, with strictNullChecks enabled, the value null could not be directly assigned to a binding of a Cat object, ie const cat: Cat = null would be a compile error. The null value is a distinct type and the binding would have to explicitly state that it can have a null value, ie const cat: Cat | null = null;.
strictNullChecks are a powerful tool for code correctness and give us a way to avoid "The Billion Dollar Mistake". However, it can be impractical to retrofit strictNullChecks configuration into an existing application and requires expanding your mental model for software development for use in new applications.
As such, strictNullChecks are not recommended by default in order to prevent overhead of rule adoption for existing applications.
However, we encourage new applications to leverage strictNullChecks for development. Enabling strictNullChecks is the TypeScript compiler recommendation and it is enabled by default in new Angular applications.
Tag: [accessibility]
There currently isn't an NI organization wide requirement to enforce accessibility in applications. The rule group should be enabled if individual applications prioritize accessibility.
A project should strive to adopt this configuration as fully as possible, but there are valid reasons to disable a rule across a codebase or specific directory:
- As a temporary measure to stage adoption of the tooling.
- As a permanent measure if the rule is incompatible with a project's configuration. The rule configuration files in each package (
packages/eslint-config-*/index.js) contain comments on each rule if it might commonly be disabled. Some examples include:- consider disabling
@angular-eslint/template/i18nif a project will never be localized - consider disabling
func-namesin older JavaScript projects that make use of immediately-invoked function expressions (IIFEs) where providing a name is not useful
- consider disabling
- As a permanent measure for an existing codebase if the Technical Lead determines it is too costly to fix the violations of that rule.
Each disabled rule (or group of similar rules) should include a comment explaining why it is disabled.
To disable a rule globally, modify the rules section of the ESLint configuration:
    rules: {
        // This rule is disabled as an example
        'import/prefer-default-export': 'off'
    }
To disable a rule for a specific file pattern or directory, modify the overrides section of the ESLint configuration:
    overrides: [{
        files: ['*.stories.ts'],
        rules: {
            // This rule is disabled as an example
            'import/no-default-export': 'off'
        }
}]A project should strive to adopt this configuration as fully as possible, but there are valid reasons to disable a rule (also called suppressing a violation) for a specific line, block, or file of code.
The rule configuration files in this package (index.js, typescript.js, etc) contain comments on each rule if it might commonly be disabled.
ESLint offers several ways to disable a rule for a line or file. Suppressions should be as targeted as possible and should include a comment explaining the suppression.
Modern IDEs can be configured to provide live feedback about ESLint errors.
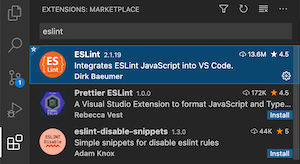
Install the ESLint Extension.
You can configure a repository to prompt developers to install this extension by adding a file called .vscode/extensions.json with the following contents:
{
    "recommendations": [
        "dbaeumer.vscode-eslint",
    ]
}
Follow the @angular-eslint instructions for linting HTML files and inline-templates with Angular.
Follow the instructions in the WebStorm documentation to activate and configure ESLint automatically in the Settings ≫ Preferences dialog.
Increase the heap allocation using the max_old_space_size option.
node --max_old_space_size=8196 ./node_modules/eslint/bin/eslintThis option can be adapted for npm scripts, for example.
"ng": "node --max_old_space_size=8196 ./node_modules/@angular/cli/bin/ng",
"lint": "npm run ng -- lint"@ni/eslint-config/typescript-requiring-type-checking includes rules that require type checking that run slower as they utilize the TypeScript compiler for type information.
If there are situations where the analysis time for enabling the type checked rules is an excessive burden you may consider creating a separate ESLint configuration that avoids extending the type checked rules and omits the parserOptions.project configuration to run in specific scenarios.
See discussion in the performance section of the Getting Started - Linting with Type Information guide.
Deviations from the @angular-eslint schematic, @ni/eslint-config-angular, and the parserOptions.project configurations can result in significant performance degredation. Fully manual configuration is not recommended. Read @angular-eslint's section on performance for information on addressing slow linting processes.