Habanero Bee is a simple AMP-compliant CMS system that makes it easy to create content using Google Sheets.
- Abstract
- Features
- Demo
- Setup Habanero Bee Site
- For developers
- Related Projects
- Habanero Bee uses the power of open source
- Author
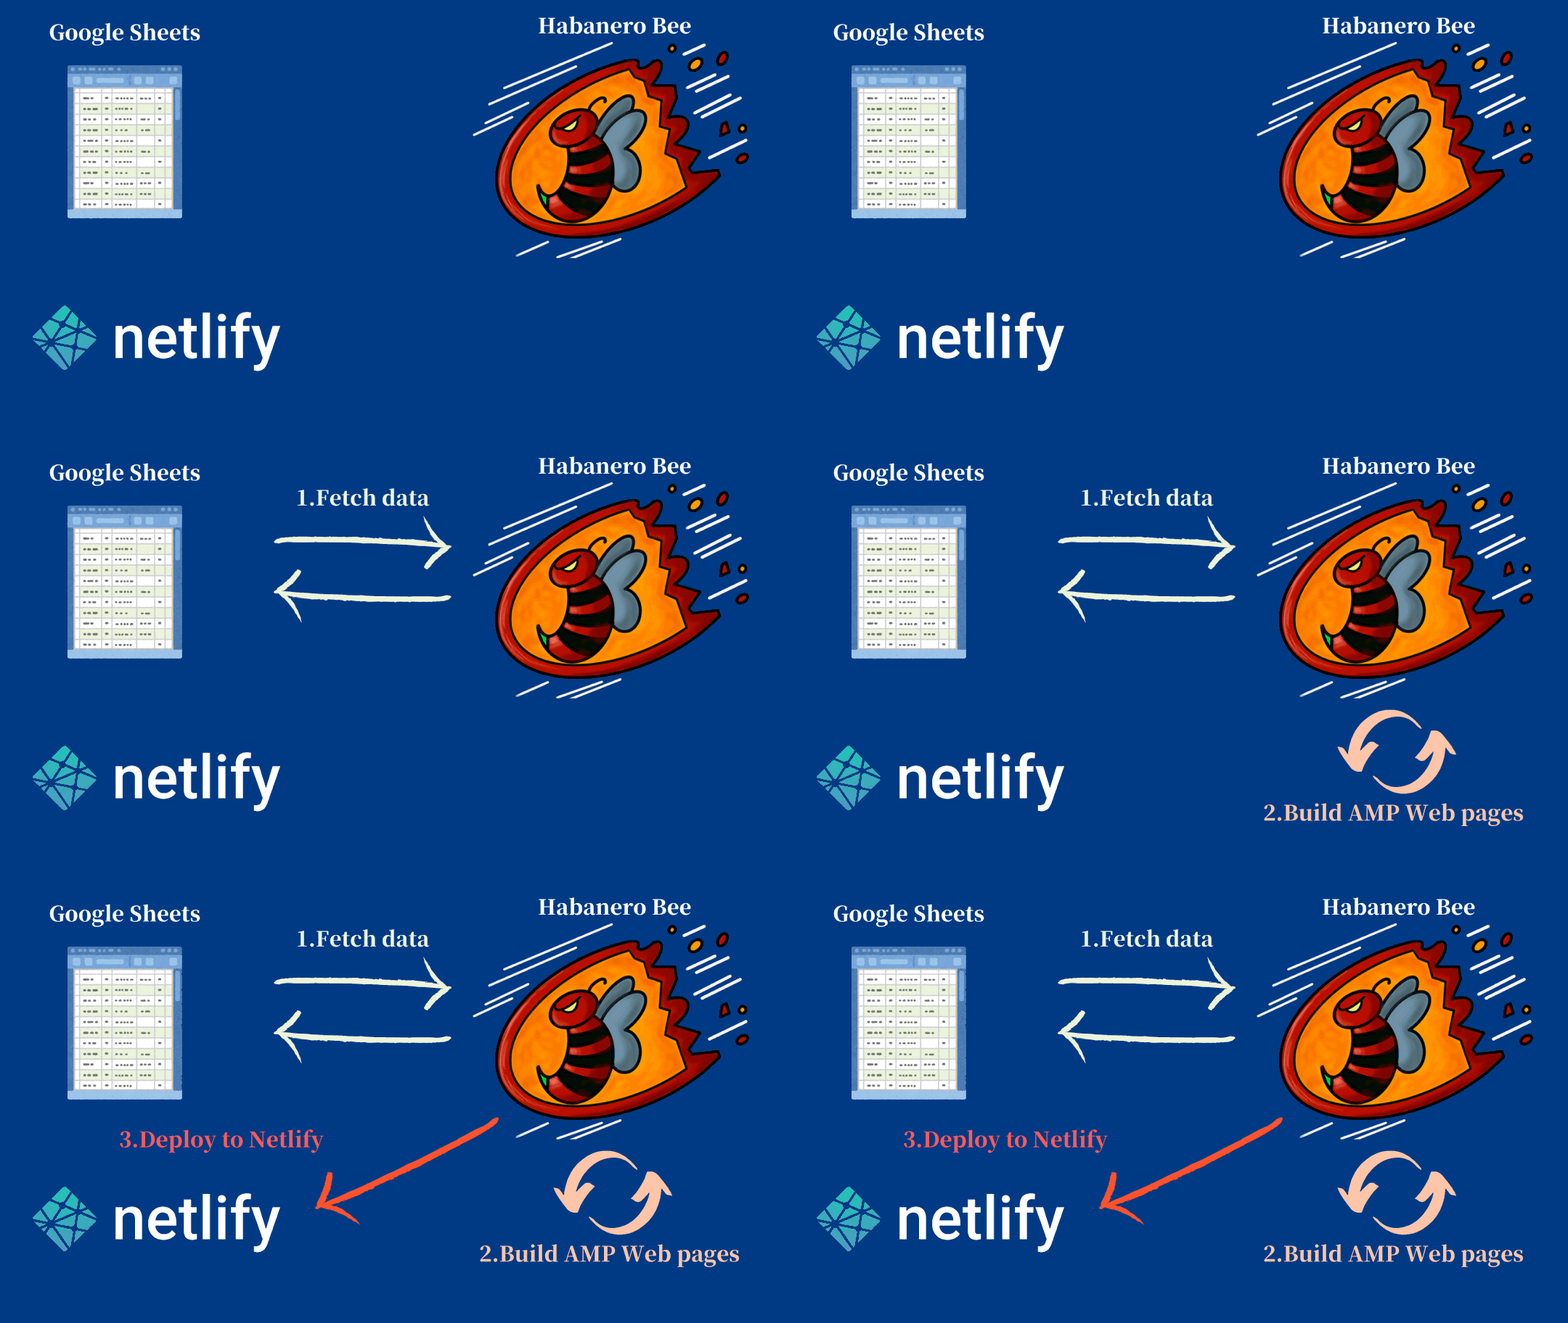
Habanero Bee is a static site generator that generates AMP-compliant sites created based on Next.js. When generating a site, the content can be managed with Google Sheets, and can also be used as a simple CMS system. The tool is designed to be deployed on Netlify and excels at publishing to user content with little effort and time.
Habanero Bee has three "Easy and Fast" features.
- Easy and Fast generating AMP-compliant sites.
- It's easy to create an AMP-enabled site, and being AMP-enabled also ensures that your site will perform well. (This is because being AMP-enabled also means that you are following web best practices.)
- Easy and Fast manage your content on Google Sheets.
- The dashboard required for content management does not use in the Habanero Bee. Everything from setting up your site to managing your content is done on Google Sheets!
- Easy and Fast to publish a site.
- Habanero Bee is designed to be deployed using Netlify. If you already have content on your Google Sheets in place for your site, this section in button will get your site deployed in no time.
Here is a demo site created using Habanero Bee.
First, you need to create content for Habanero Bee in Google Sheets.
Please refer to this document for instructions on how to create it( this page (habanero-bee-google-apps-script) ).
If you just want to see the Habanero Bee in action first, skip this step, as we have prepared demo data for you.
Once content is complete, So simply deploy site on Netlify. Your site will now be available to the world!
When deploy on Netlify, Specify the published URL of Google Sheets you want to use as data.
To deploy, just click the button below!
If the text is not clear enough, a YouTube video of deployment procedure is also available.

If you want to use demo site data, please specify this URL.
https://script.google.com/macros/s/AKfycbzFMeY9SFDVuGj9n0t2UaS2NNcLws03xdQj1Gt-J_JSlPeqmhmupakjzU8nSbpcuFbJmw/exec
If you don't want to use Netlify and want to see how it works on your PC, you can run the following command.
# Clone and Install
git clone https://github.com/shinshin86/habanero-bee.git
cd habanero-bee
yarn install

# Generate Habanero Bee demo site
yarn clean && SHEET_URL=https://script.google.com/macros/s/AKfycbzFMeY9SFDVuGj9n0t2UaS2NNcLws03xdQj1Gt-J_JSlPeqmhmupakjzU8nSbpcuFbJmw/exec yarn deploy && yarn start
Let's open http://localhost:3000 with browser!
If you use Deploy to Netlify button, it will be copied to your GitHub account as a public repository.
So, if you want to manage it as a private repository, you need to clone this repository using the git clone command.
The command for this is written below.
# clone and remove git
git clone https://github.com/shinshin86/habanero-bee.git your-project
cd your-project
rm -rf .git

# initialize
git init
git add .
git commit
Create a private repository on your GitHub and push this project to it.
If you are deploying to Netlify, you will need to log in to your Netlify dashboard and manually configure your site. (Even though it is manual, it is very easy!)
Make sure to set an environment variable called SHEET_URL when deploying and set the Google Sheets public URL there.
Once you have deployed your app, you can change it to the canary version using this method to use the version with the latest features enabled.
Note that the Canary version may behave in unexpected ways.
Habanero Bee shell script of update to latest (Canary version)
The following is the documentation for Habanero Bee's developers.
# Development
SHEET_URL=<google spreadsheet url> yarn dev

# Deploy
SHEET_URL=<google spreadsheet url> yarn deploy
# => Then "yarn start"

# Code format
yarn format
# or short hand alias
yarn fmt

# eslint(All file)
yarn lint .

# Code format and type check and run eslint
yarn allcheckWhen I develop locally, I set up my own commands like this to develop.
diff --git a/package.json b/package.json
index b461d8a..a3625c1 100644
--- a/package.json
+++ b/package.json
@@ -4,9 +4,11 @@
   "description": "Habanero Bee is a simple AMP-compliant CMS system that makes it easy to create content using Google Sheets.",
   "scripts": {
     "dev": "next",
+    "dev2": "SHEET_URL=<Google Sheets published URL> yarn dev",
     "build": "next build",
     "start": "next start",
     "deploy": "yarn favicon && yarn sitemap && next build && next export",
+    "deploy2": "yarn clean && SHEET_URL=<Google Sheets published URL> yarn deploy && yarn start",
     "clean": "rm -rf out/",
     "format": "prettier --write **/*.{js,json,md} src/**/*.{ts,tsx}",
"fmt": "prettier --write **/*.{js,json,md} src/**/*.{ts,tsx}",Be careful not to push it by mistake.
Of course, there is nothing wrong with making that URL public (As long as you don't write any secure information on it.), and archiving the URL will disable it.
Identity by HTML5 UP html5up.net | @ajlkn Free for personal and commercial use under the CCA 3.0 license (html5up.net/license)
LICENCE: HTML5 UP LICENCE
LICENCE: Next.js LICENCE


