


Node.js template, designed to easily create modular Web Extensions, following Manifest Version 3 (MV3). Powered by Webpack, Babel, React.js, and Tailwind CSS.
Report Bug
·
Request Feature
·
Feedback
Table of Contents
This template was made specifically for snipx.io, to create the only web-extension you'll ever need.
It comes pre-configured with Webpack, Babel, React, and Tailwind CSS. It also has a couple npm-scripts that you can completely modify to fit your build pipeline. Of course, everything can be modified.
If you modify the template, please consider contributing. You can start a conversation through discussions.
SnipX is short for Snippet Extension. A web extension that lets you inject CSS and JavaScript into your current browser tab.
Have you ever found yourself writing HTML, CSS, or JavaScript code in the developer tools, then refreshing the page only to lose all of your changes? With SnipX, you can write your code in the extension, and your changes will always be rendered.
Checkout out the demo.
This template requires Node.js and npm.
How to get it, if you don't already have it.
To download and install, visit nodejs.org and download the recommended Long-term Support version.
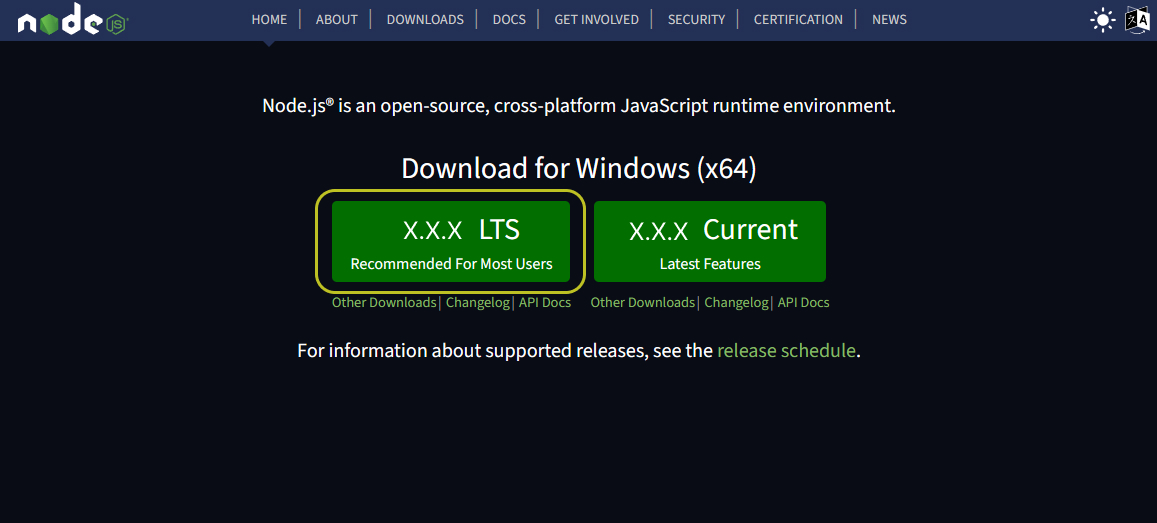
After running the installer, you should have both Node and npm.
Run the following code in the console to check if your machine has Node.js and npm installed.
node -v
npm -v
They should each return a corresponding version number.
The easiest and recommended way of using this template is via GitHub's built-in template repository support.
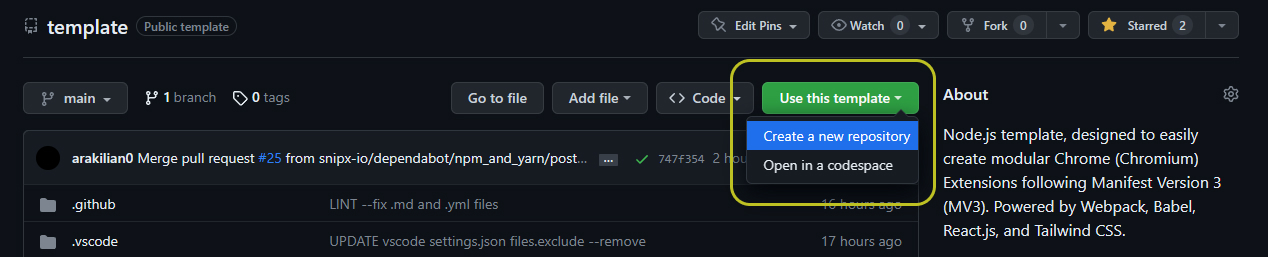
This will prompt you to name your new project and choose it's remote location. After doing so, clone your newly created repo using Git and run npm install to configure dependencies.
git clone https://github.com/[username]/[repository].git
cd [repository]
npm install
Note: run/build.js and run/dev.js merge with webpack.config.js.
The following npm-scripts can be found in the run directory.
Take a look at the package.json file for a list of the available npm-scripts.
scripts: {
	"dev": "node run/dev.js",
	"build": "node run/build.js",
	"lint": "node run/lint.js"
}
Accepts no options/arguments. Uses Webpack compiler.watch.
npm run dev // Watch/build extension for development
Accepts 1 of 3 options at a time. Uses Webpack compiler.run.
npm run build                 // Build extension for production
npm run build --manifest      // Build only manifest.json
npm run build --webpack       // Build only webpack
npm run build --zip           // Build extension for production then .zip
Accepts 1 option, and multiple file-paths as input. Not configured to work with Webpack.
npm run lint                   // Run ESLint and Prettier on extension
npm run lint [file]            // Run ESLint and Prettier on a specific file
npm run lint [file1] [file2]   // Run ESLint and Prettier on each given file
npm run lint --fix             // Fix and format extension using ESLint and Prettier
The utility-scripts assist our npm-scripts to orchestrate a build pipeline:
- run/lib/hotreload.js
- Reload extension on change (dev only).
- Included in run/dev.js.
- run/lib/manifest.js
- Build the manifest.json file.
- Uses package.json to fill in
name,version, anddescription. Enforces Manifest Version 3, and uses webpack_entry from run/lib/path.js asdefualt_popup. - Additionally, you can provide a development and production
keyin a.envfile:MANIFEST_DEVELOPMENT_KEY="123" # used in run/dev.js MANIFEST_PRODUCTION_KEY="321" # used in run/build.js - Merges data (from above), with manifest.json. All defaults can be overwritten using manifest.json.
- Included in run/dev.js and run/build.js.
- run/lib/path.js
- Hard-coded paths are avoided as much as possible, in favor of this "config" file.
- Included in run/lib/manifest.js, run/lib/zip.js, and webpack.config.js.
- run/lib/zip.js
- Archives (.zip) output from run/lib/path.js.
- Included in run/build.js.
Visit chrome://extensions. Make sure you have Developer mode active, then use Load unpacked to install your build.

How to publish in the Chrome Web Store.
- Support Chromium
- Support Firefox
- Webpack Plugin (manifest)
- Webpack Plugin (zip)
- Improve Watcher
- Improve Logger
- Extension Starter Files
- Improve Documentation
- Examples
See the open issues for a full list of proposed features (and known issues).
Contributions are what make the open source community such an amazing place to learn, inspire, and create. Any contributions you make are greatly appreciated.
If you have a suggestion that would make this better, please fork the repo and create a pull request. You can also simply open an issue with the tag "feat". Don't forget to give the project a star! Thanks again!
- Fork the Project
- Create your Feature Branch (
git checkout -b feature/feature_name) - Commit your Changes (
git commit -m 'type(scope): add AmazingFeature') - Push to the Branch (
git push origin feature/AmazingFeature) - Open a Pull Request
Distributed under the MIT License. See LICENSE for more information.
Email: help@snipx.io
Project Link: github.com/snipx-io/template