Zigbee Scenes
Zigbee Scenes is a feature in Zigbee networks that enables the user to set predefined states for a specific device or group of devices using a single command.
Consider the scenario of wanting to activate a scene with five lights, each with specific brightness and color settings.
-
Home Assistant Scene: In this scenario, Home Assistant would send approximately 15 commands to the Zigbee network, comprising of Turn On, Set Brightness, and Set Color for each of the five lights. This could potentially result in network overload/flooding and may lead to the scene not being fully applied, with some lights remaining off or having incorrect brightness and color settings.
-
Zigbee Scene: On the other hand, Home Assistant would only send a single command to the Zigbee network, which would activate the desired scene in a specific Zigbee group. This method is less resource-intensive and reduces the possibility of network issues, making it a more reliable and efficient solution for controlling multiple devices.
The ZHA (Zigbee Home Automation) integration currently lacks a user interface for the implementation of Zigbee Scenes. As a result, the service dev tool must be used. (explanation below)
In order to utilize Zigbee Scenes, you will have to create a Zigbee Group first.
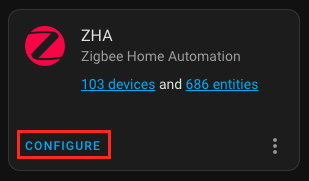
- Go to Settings -> Devices & Services and Press Configure on your ZHA Integration:
- Choose Groups on Top:

- Press Create Group button on the bottom right corner:

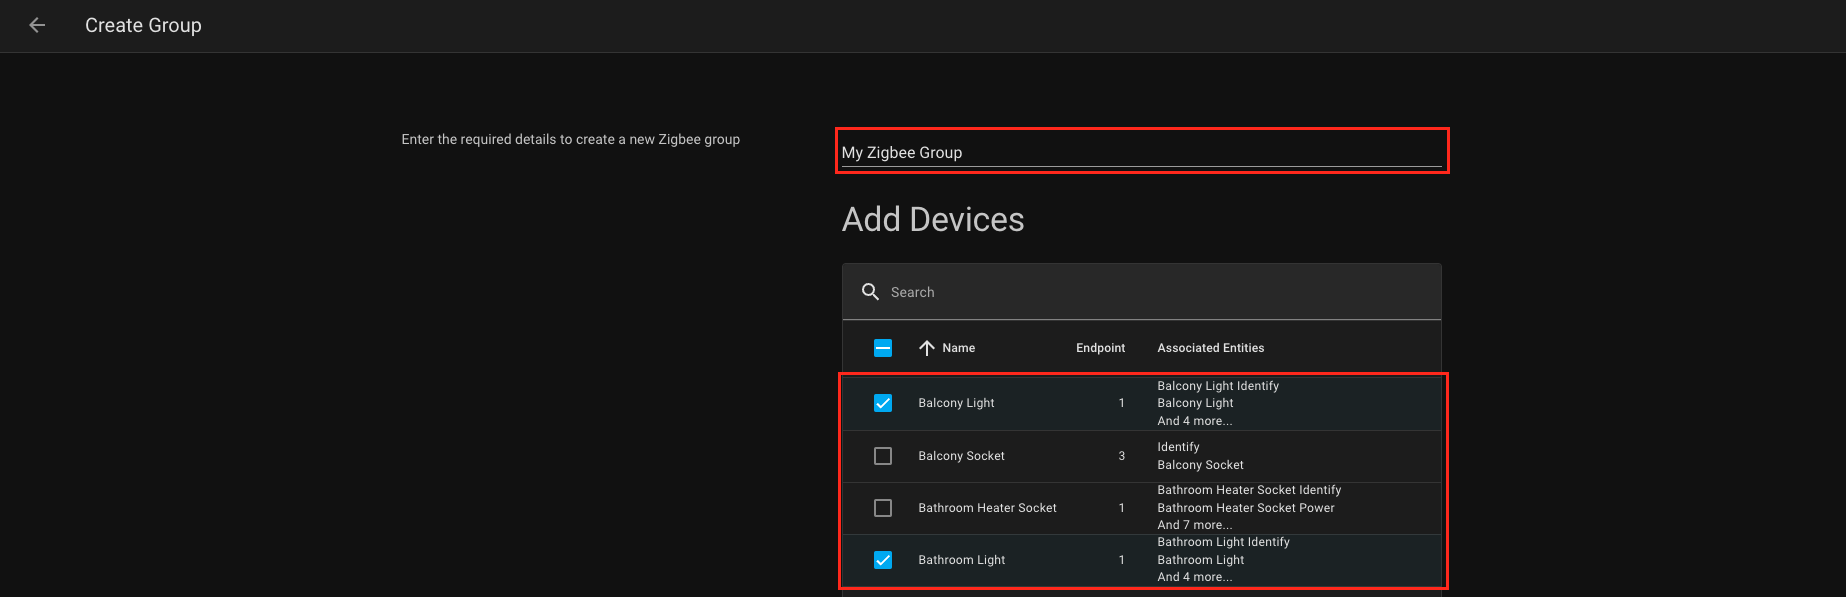
- Enter the group name and select the devices that should be part of the group:
- Press Create Group button on the bottom of the page:

- The Group is successfully created:
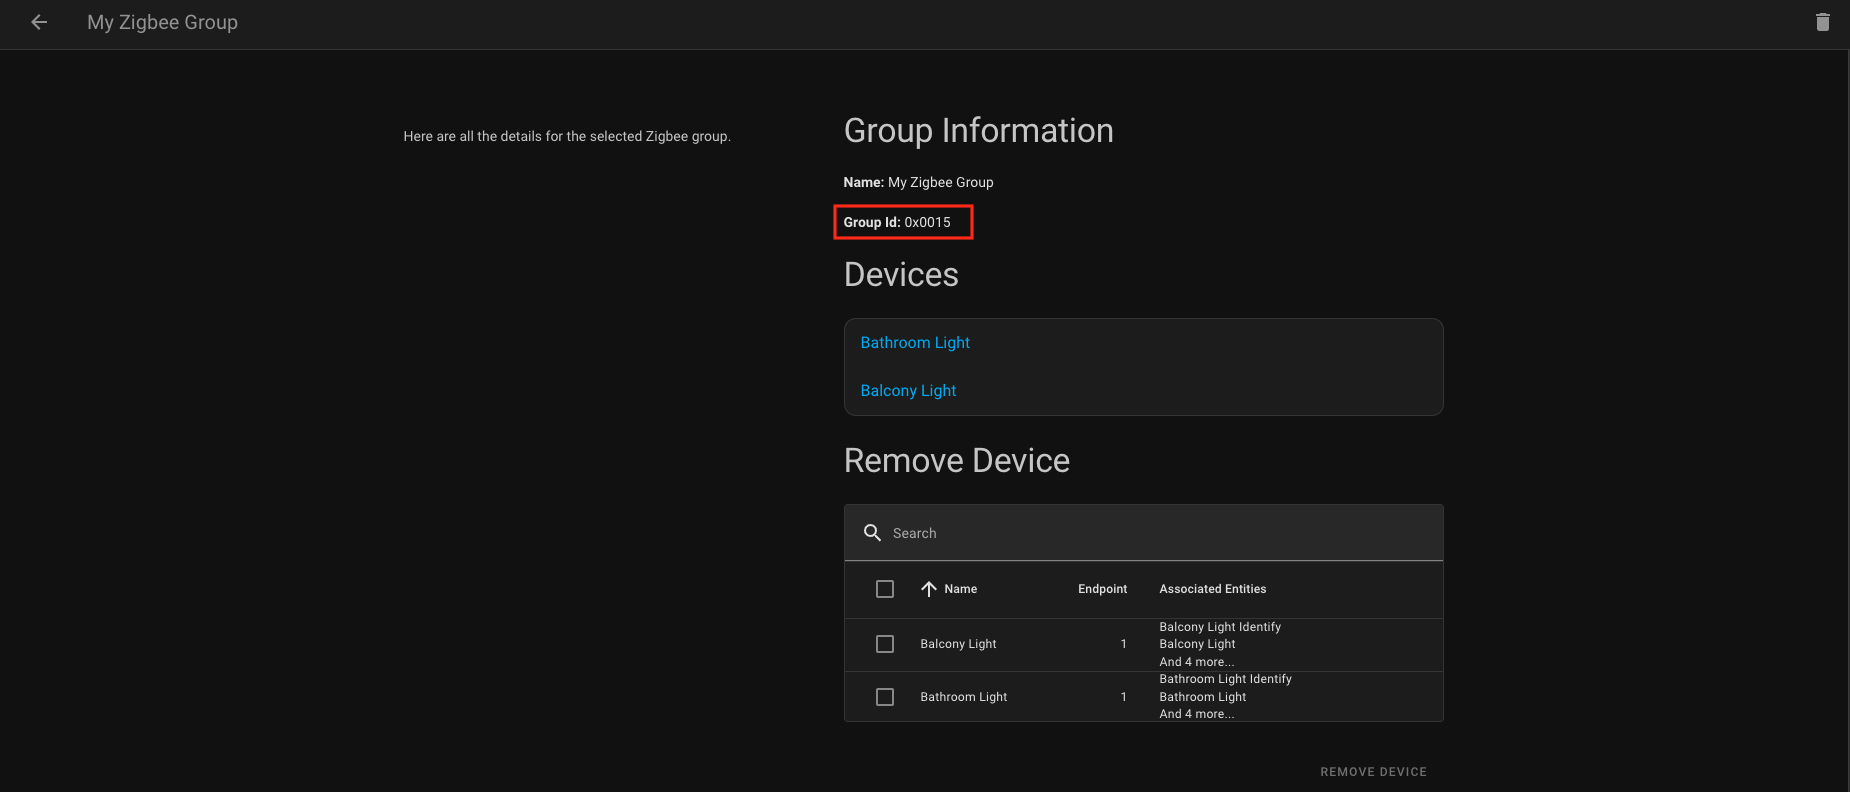
Save the Group Id, you will need it for the Zigbee Scene.
Before creating the Zigbee Scene you need to set your devices in the Group to the desired state.
For example:
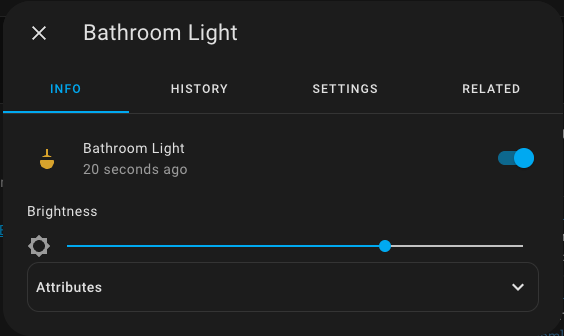
We want Bathroom Light to be On with 70% brightness:
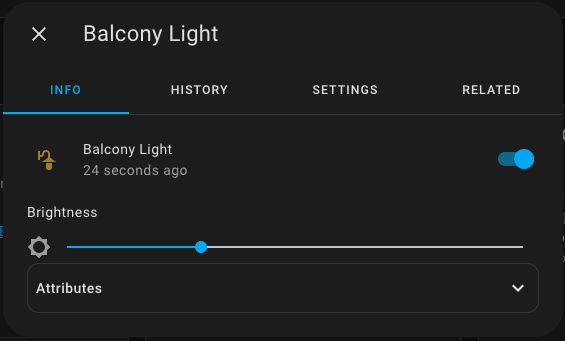
And Balcony Light to be On with 30% brightness:
Once desired states are set, you can move to the scene creation.
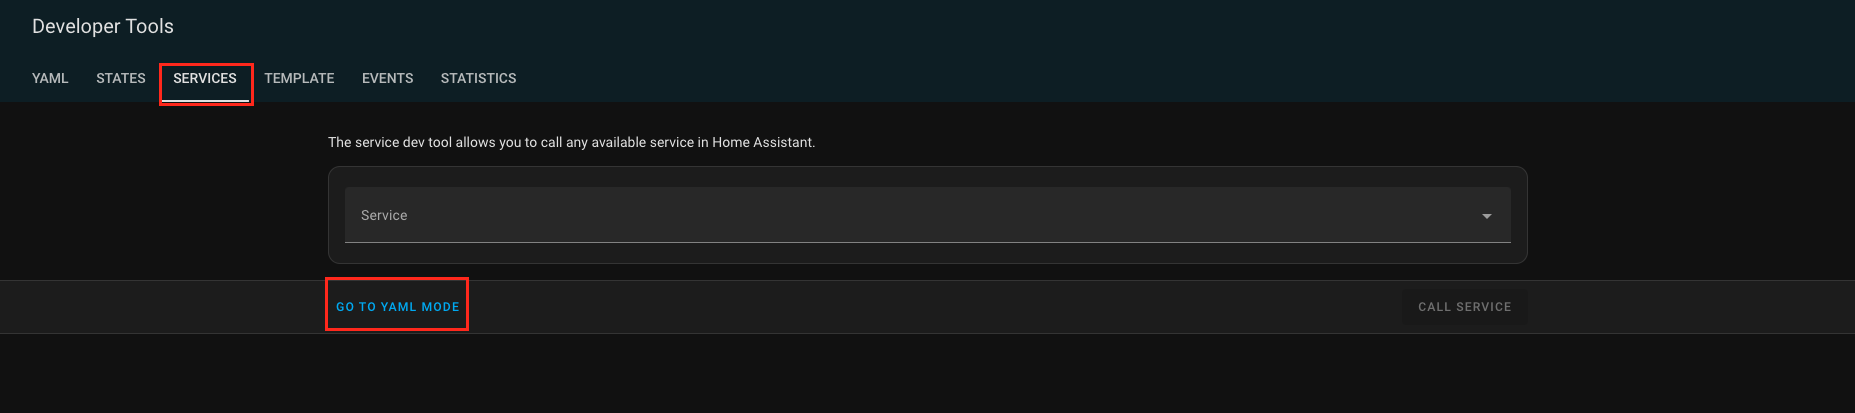
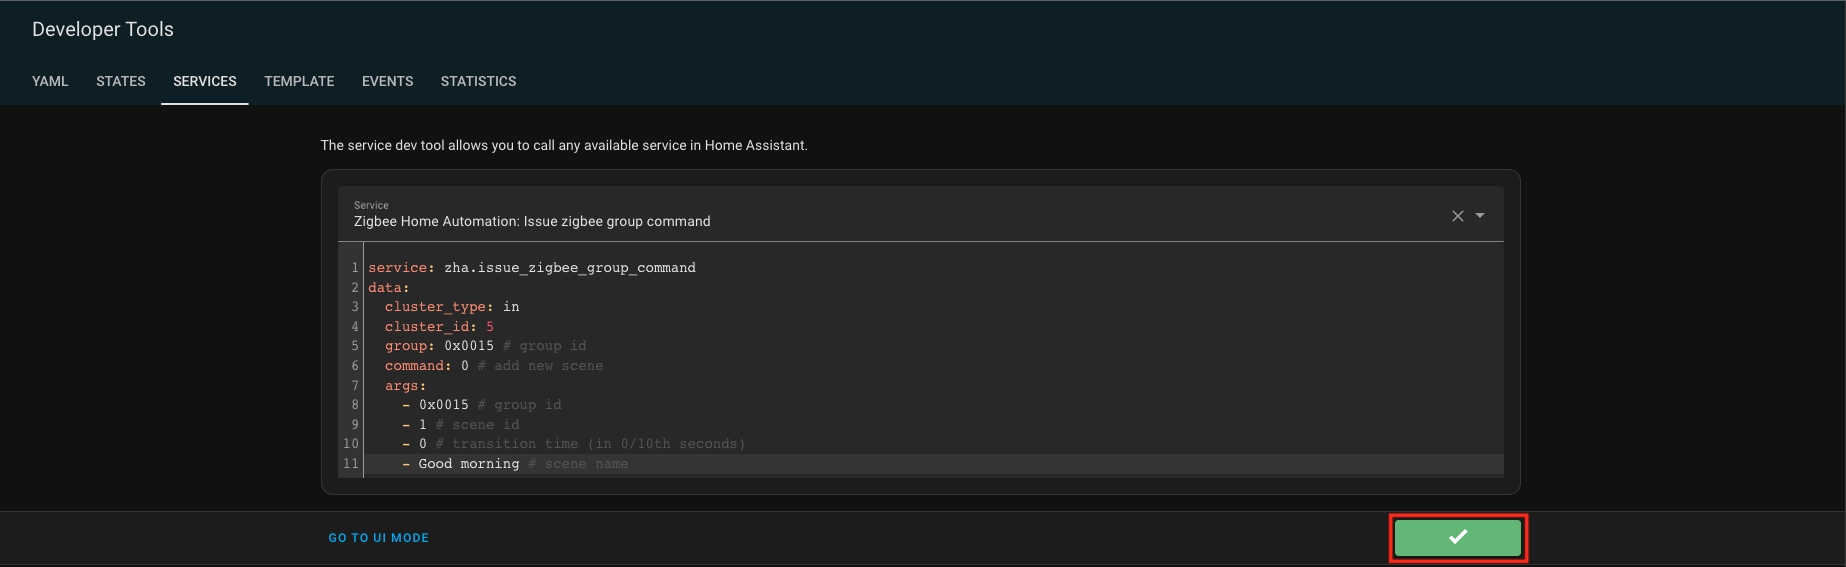
To create a Zigbee Scene, go to Developer Tools -> Services and press Go To YAML Mode button:
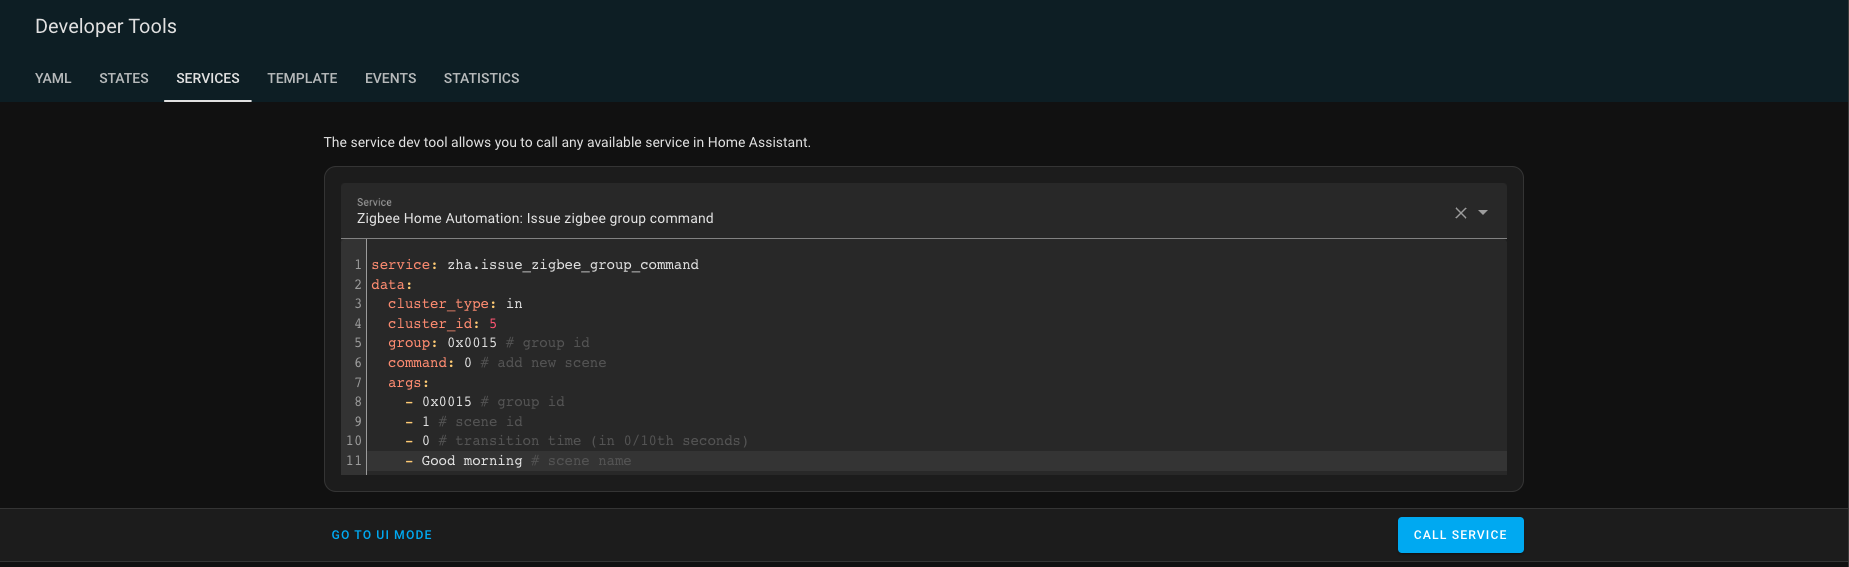
Copy this code to the Call Service editor:
service: zha.issue_zigbee_group_command
data:
  cluster_type: in
  cluster_id: 5
  group: 0x0015 # group id
  command: 0 # add new scene
  args:
    - 0x0015 # group id
    - 1 # scene id
    - 0 # transition time (in 0/10th seconds)
    - Good morning # scene name
It should look something like this:
Update the payload according to your configuration, you have to modify the following group and args:
- group id - in my case 0x0015, the group that I've created previously.
- scene id - must be a unique number for each scene in each Zigbee Group.
- transition time - in seconds between 0 and 10.
- scene name - string value.
Press Call Service button, if your command is succeeded you should see a green check mark:
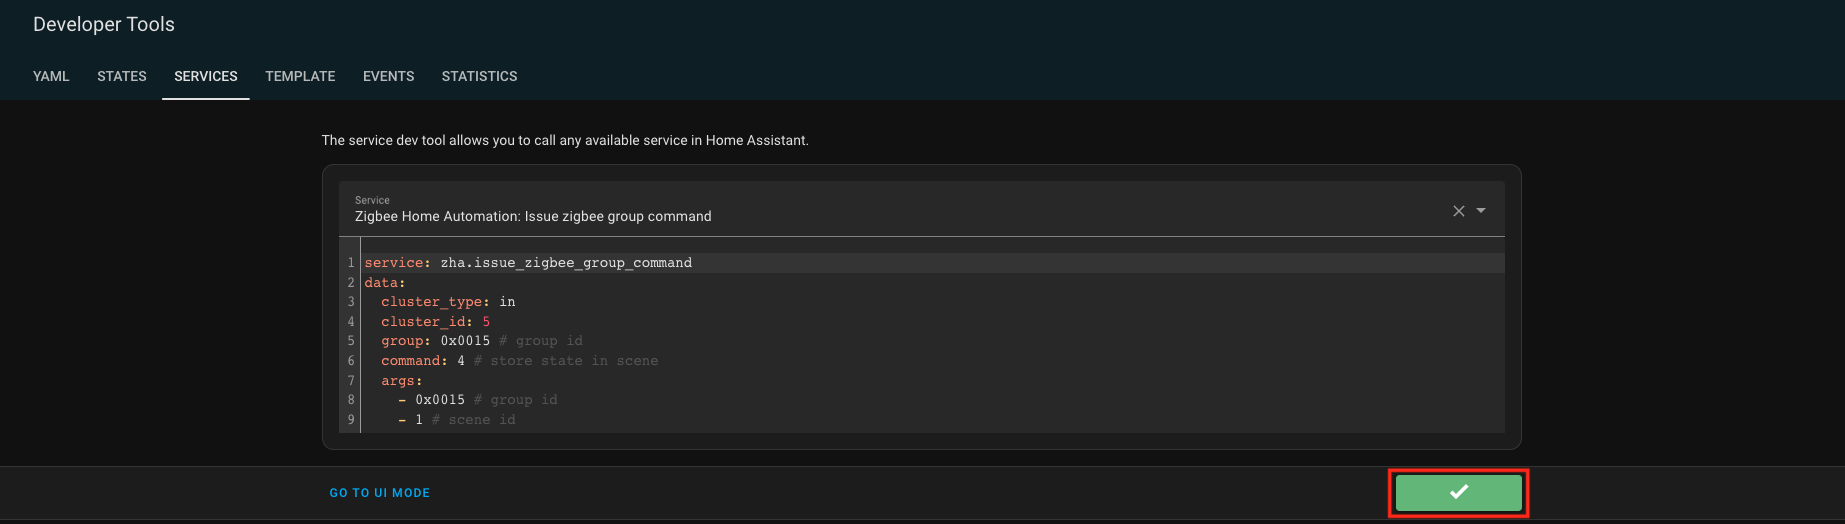
After scene creation, you need to save the state of the devices in the group to the scene.
For this you have to use this command:
Update group id and scene id according to your configuration.
service: zha.issue_zigbee_group_command
data:
  cluster_type: in
  cluster_id: 5
  group: 0x0015 # group id
  command: 4 # store state in scene
  args:
    - 0x0015 # group id
    - 1 # scene id
Press Call Service button, if your command is succeeded you should see a green check mark:
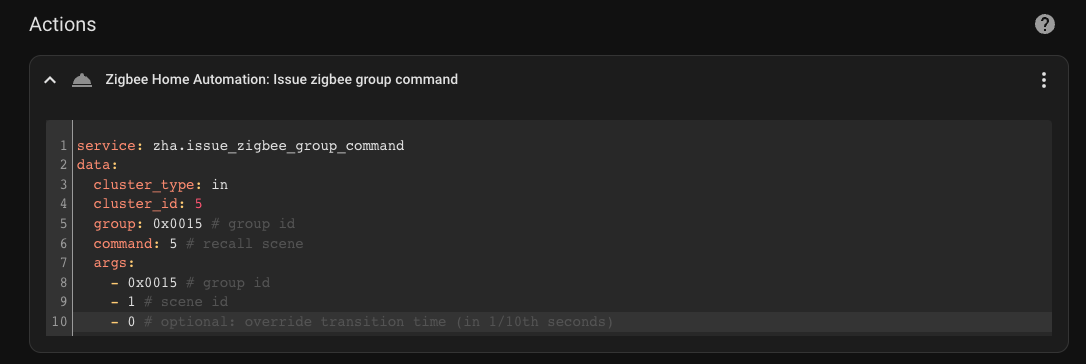
If you want to check if your scene is working, use the Recall command.
Update group id and scene id according to your configuration.
service: zha.issue_zigbee_group_command
data:
cluster_type: in
cluster_id: 5
group: 0x0015 # group id
command: 5 # recall scene
args:
- 0x0015 # group id
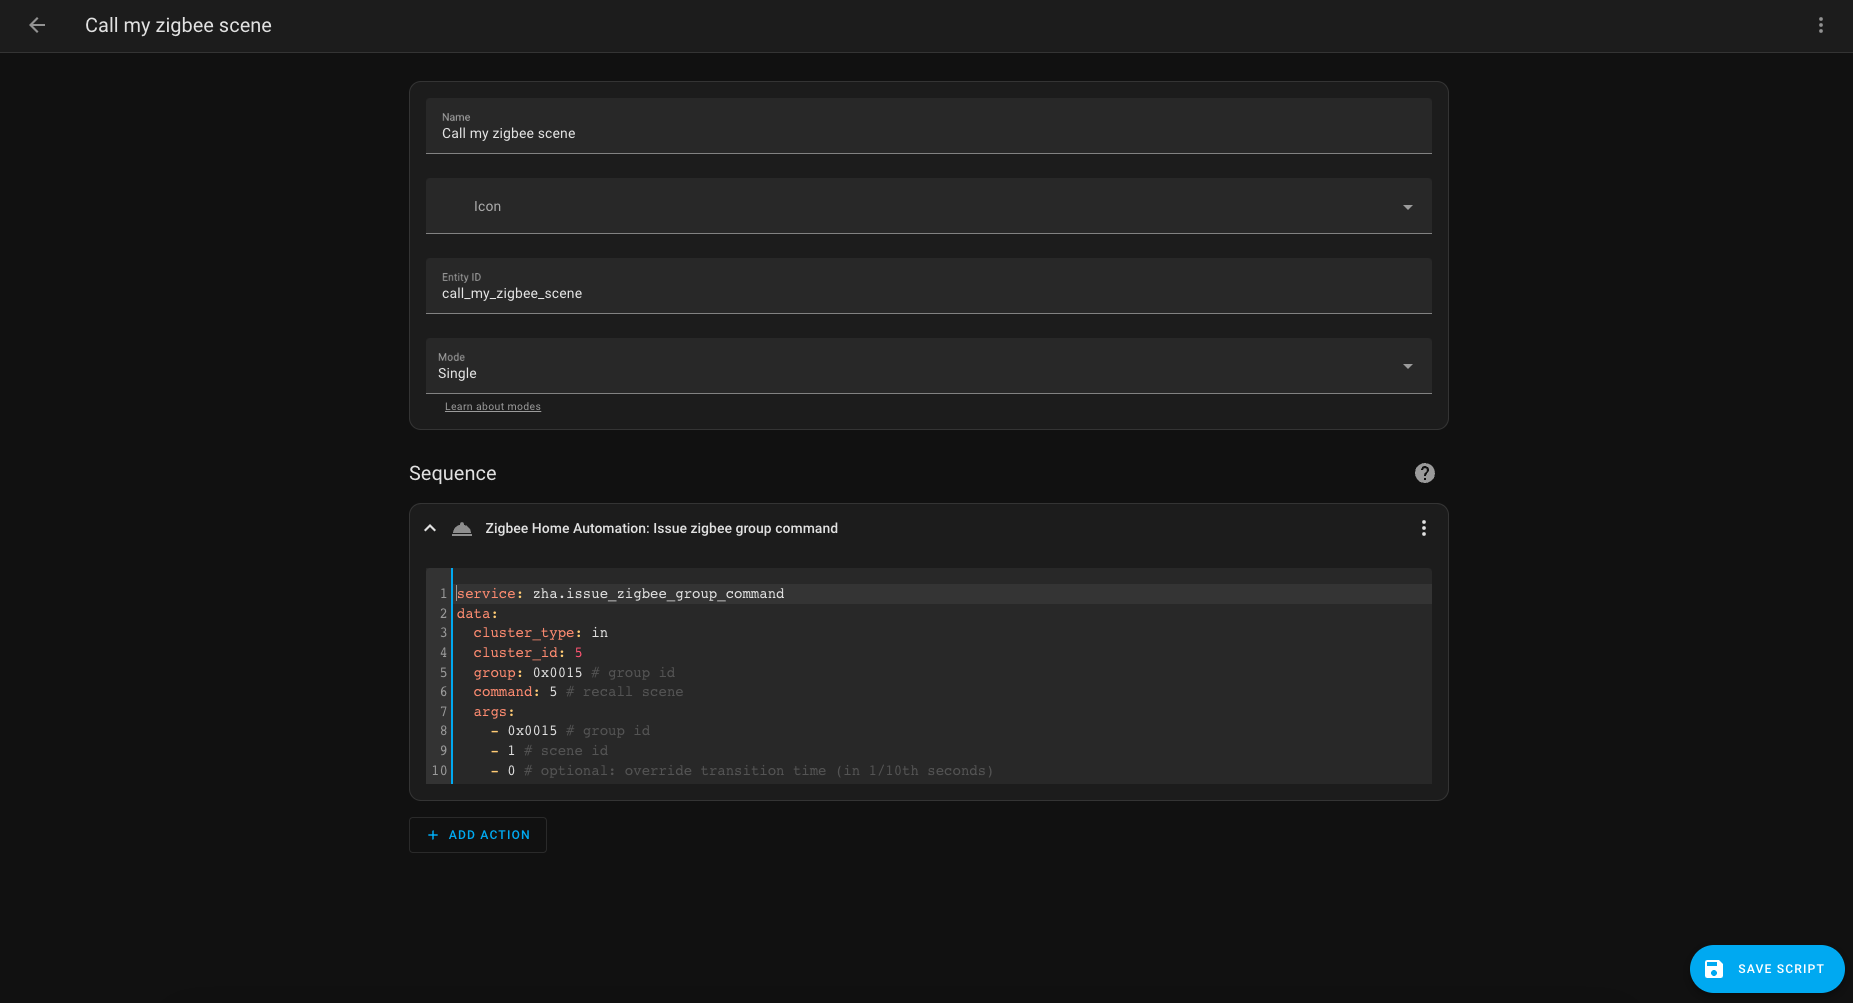
- 1 # scene id
- 0 # optional: override transition time (in 1/10th seconds)If you want to delete the specific scene use the remove command.
Update group id and scene id according to your configuration.
service: zha.issue_zigbee_group_command
data:
  cluster_type: in
  cluster_id: 5
  group: 0x0015 # group id
  command: 2 # remove scene
  args:
    - 0x0015 # group id
    - 1 # scene id
If you want to delete all scenes use the remove all command.
Update group id and scene id according to your configuration.
service: zha.issue_zigbee_group_command
data:
  cluster_type: in
  cluster_id: 5
  group: 0x0015 # group id
  command: 3 # remove all scenes
  args:
- 0x0015 # group idThere are at least two options to recall the Zigbee Scenes.
- Using Automation
- Using Script
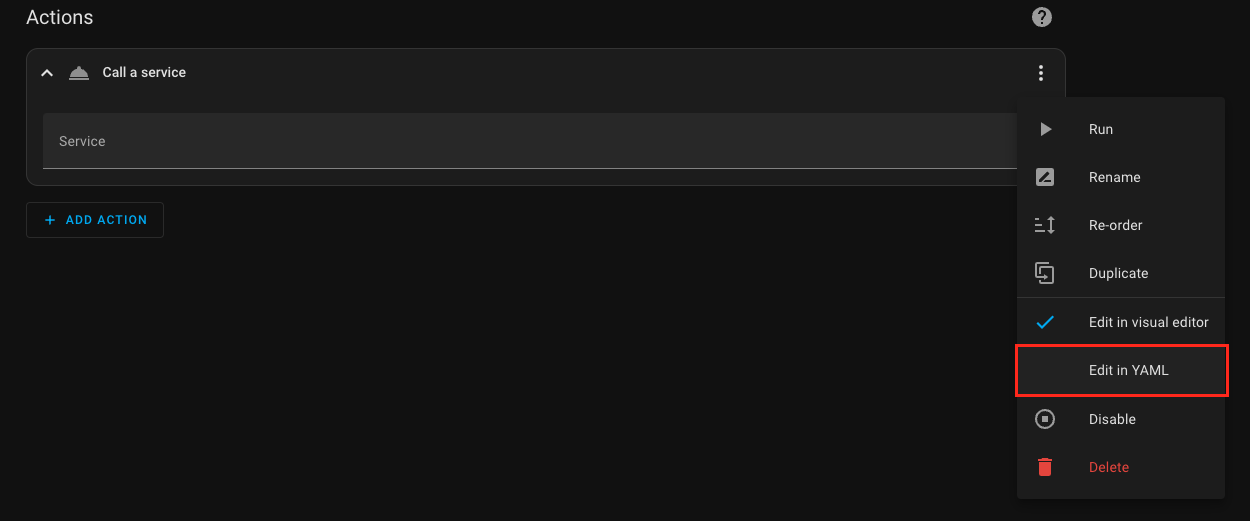
Go to Settings -> Automation & Scenes, select Automations tab and press Create Automation button.
Choose what should be your trigger and in Actions choose Call a service and switch to Edit in YAML:
Enter the Recall Scene code from the example above and press Save button.
Go to Settings -> Automation & Scenes, select Scripts tab and press Create script button.
Enter Name, and keep Mode as Single. In Actions choose Call a service and switch to Edit in YAML.
Enter the Recall Scene code from the example above and press Save Script button.