Walkthrough DigitalOcean Hosting Guide
This page is a step-by-step guide for setting up and configuring the entire Team Finder application in DigitalOcean and MongoDB Atlas.
The front end of the website and the database can be hosted for free, so following this guide will let you set up a version of the app for ~$5 USD/month.
-
Create a Github account
- You'll need this to fork and personalise the Team Finder
-
Create a DigitalOcean account
- This is the website you'll pay to host your Team Finder app components
-
Create a Discord Application
- Your application is what the 'Login with Discord' logic uses
-
Fork the Team Finder project
- This creates a copy of the Team Finder project in your GitHub profile, which you can customise for your project.
- Make any changes you want to the UI (see our quick guide to customising your Team Finder UI).
- Click this link to Create a new Discord Application.
- Under the
OAuth2section in the sidebar, copy the client ID and client secret.
- We'll need these values later when setting up the API
- Make a note of the 'Redirects' section on this page - we'll come back to it after we've created the API
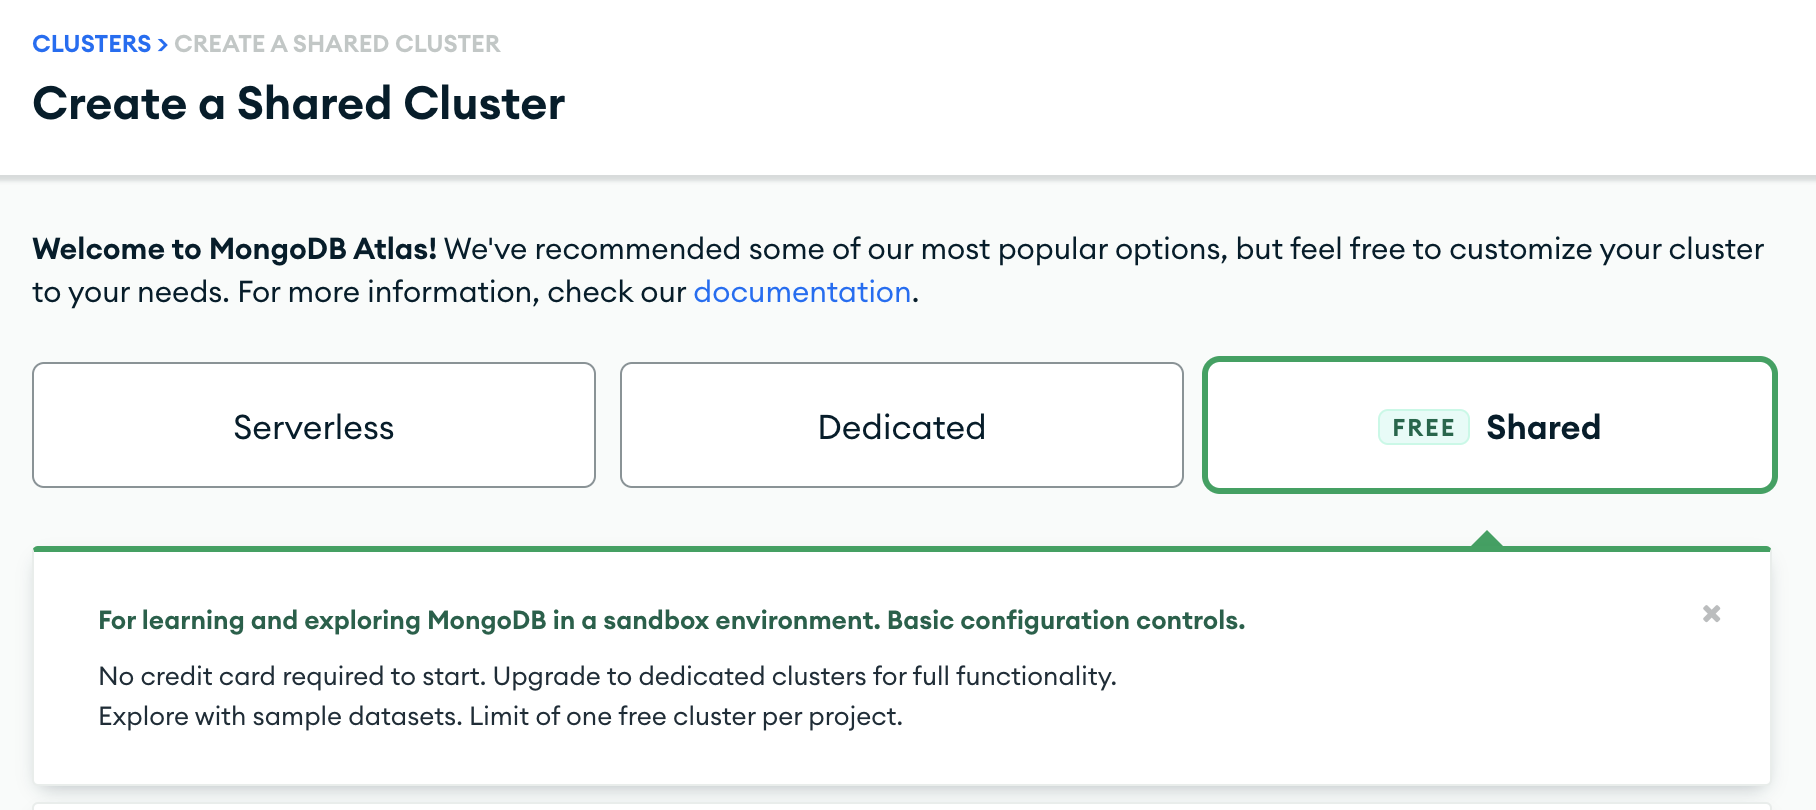
To create a free MongoDB database you can use MongoDB Atlas.
Sign up to the website, and create a cluster on their free tier - in the pictures below, called 'shared':
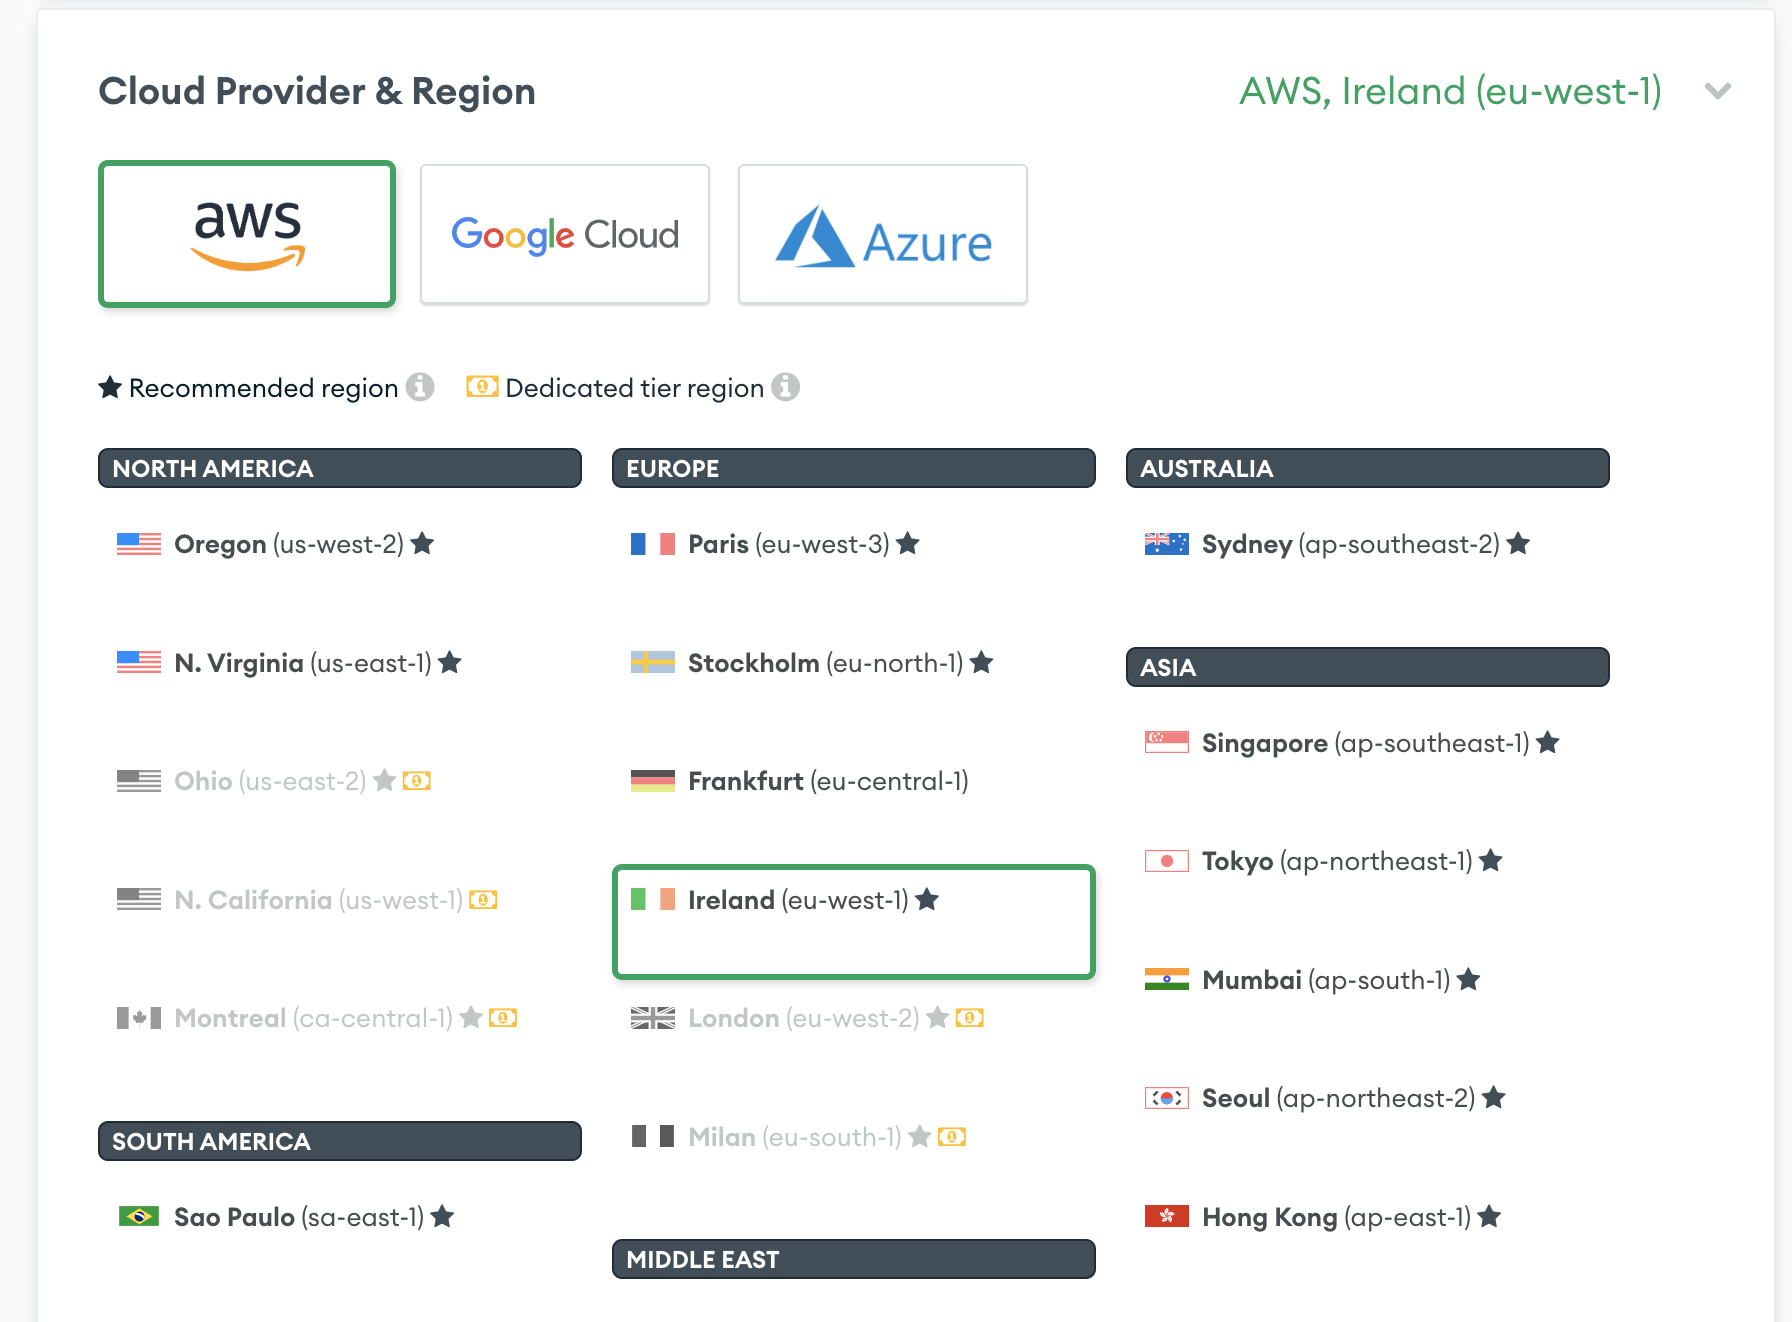
The cloud provider won't make an enormous difference, but the closer geographically your apps are hosted together (and to the users), the faster the site will run.
The lowest cluster tier MongoDB Atlas offers is the free 'M0 Sandbox', which runs with fairly minimal hardware. Luckily, the Team Finder is a very lightweight application, so this shouldn't have any real impact on your website.
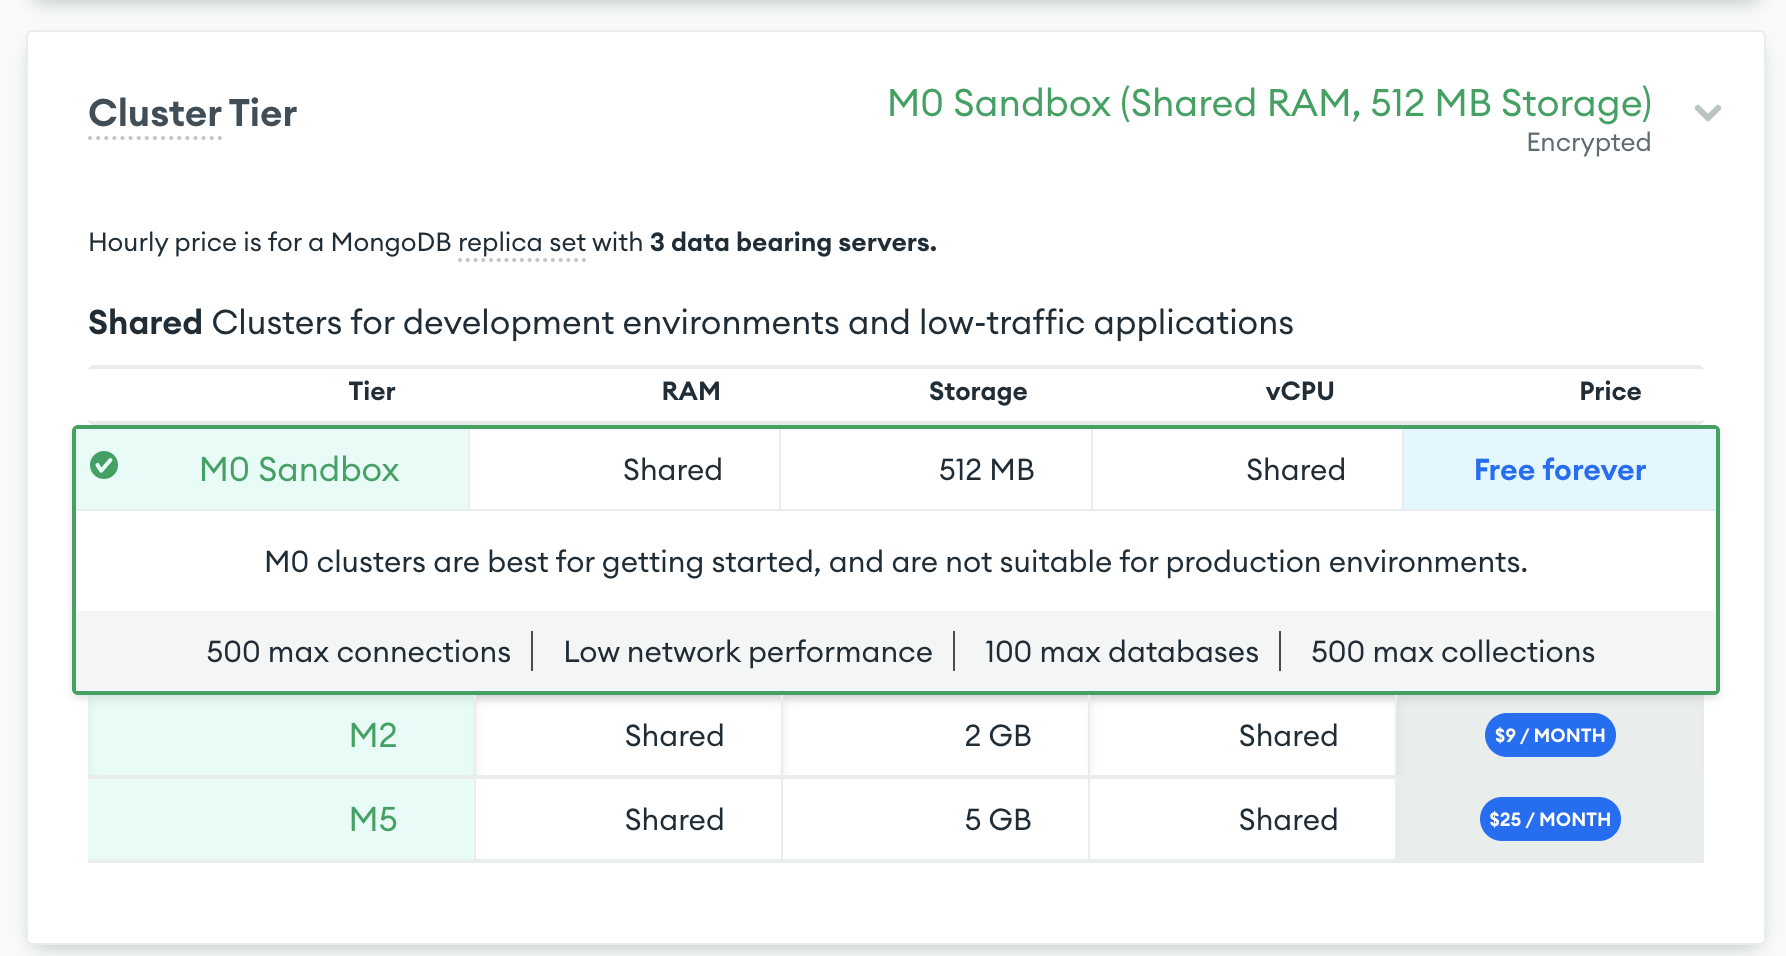
Just make sure to confirm you're paying for the free tier when you click 'Create Cluster'!

You'll need to create a database and user - MongoDB Atlas will guide you through this. For simplicity, use a username/password to login. Make sure you take a note of these, as you'll need them later!
MongoDB Atlas limits who can access your database by their IP address. DigitalOcean doesn't give you a single IP address for your apps, because they can change without warning.
However, you can whitelist a larger block of IP addresses in order to try and limit your access to allow all DigitalOcean apps to access your database, without opening your database to the world. This isn't a concrete solution, please contact the author of this page if this does not work for you.
Set your allowed IP address range to the CIDR 104.16.0.0/16 - if this doesn't work, try 104.0.0.0/8 instead. Ideally we don't want to allow access to any IP address, as this will make your database more vulnerable to outside attack.

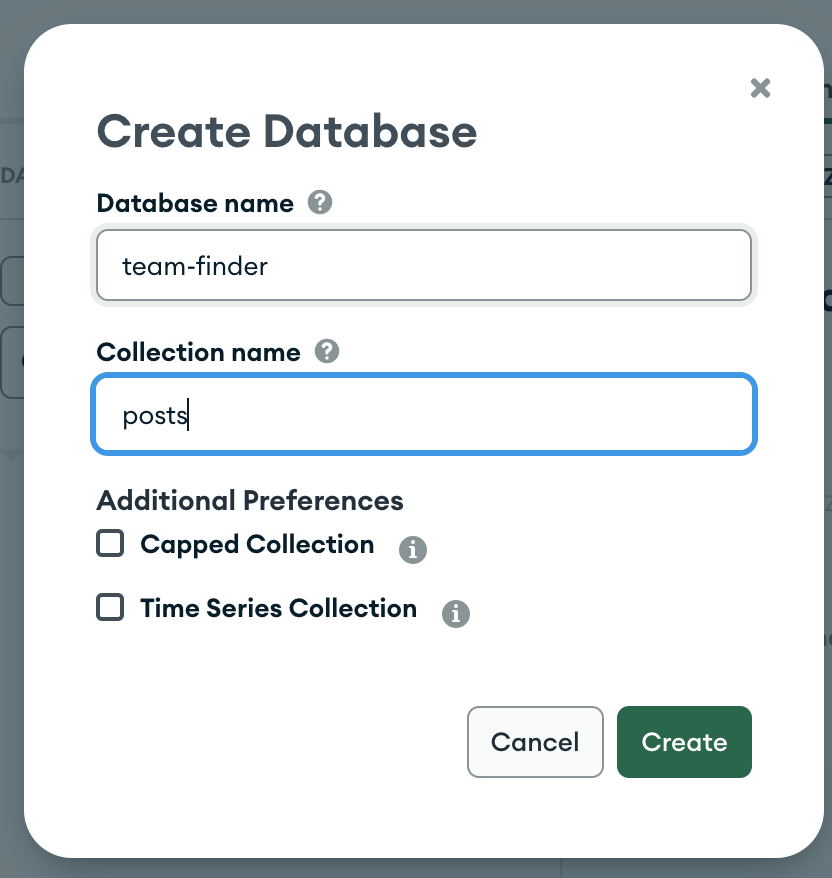
Once your database is set up, create your database ready for your API to connect later on:
We need to get the connection URL for the database. Find your database, and click 'Connect':
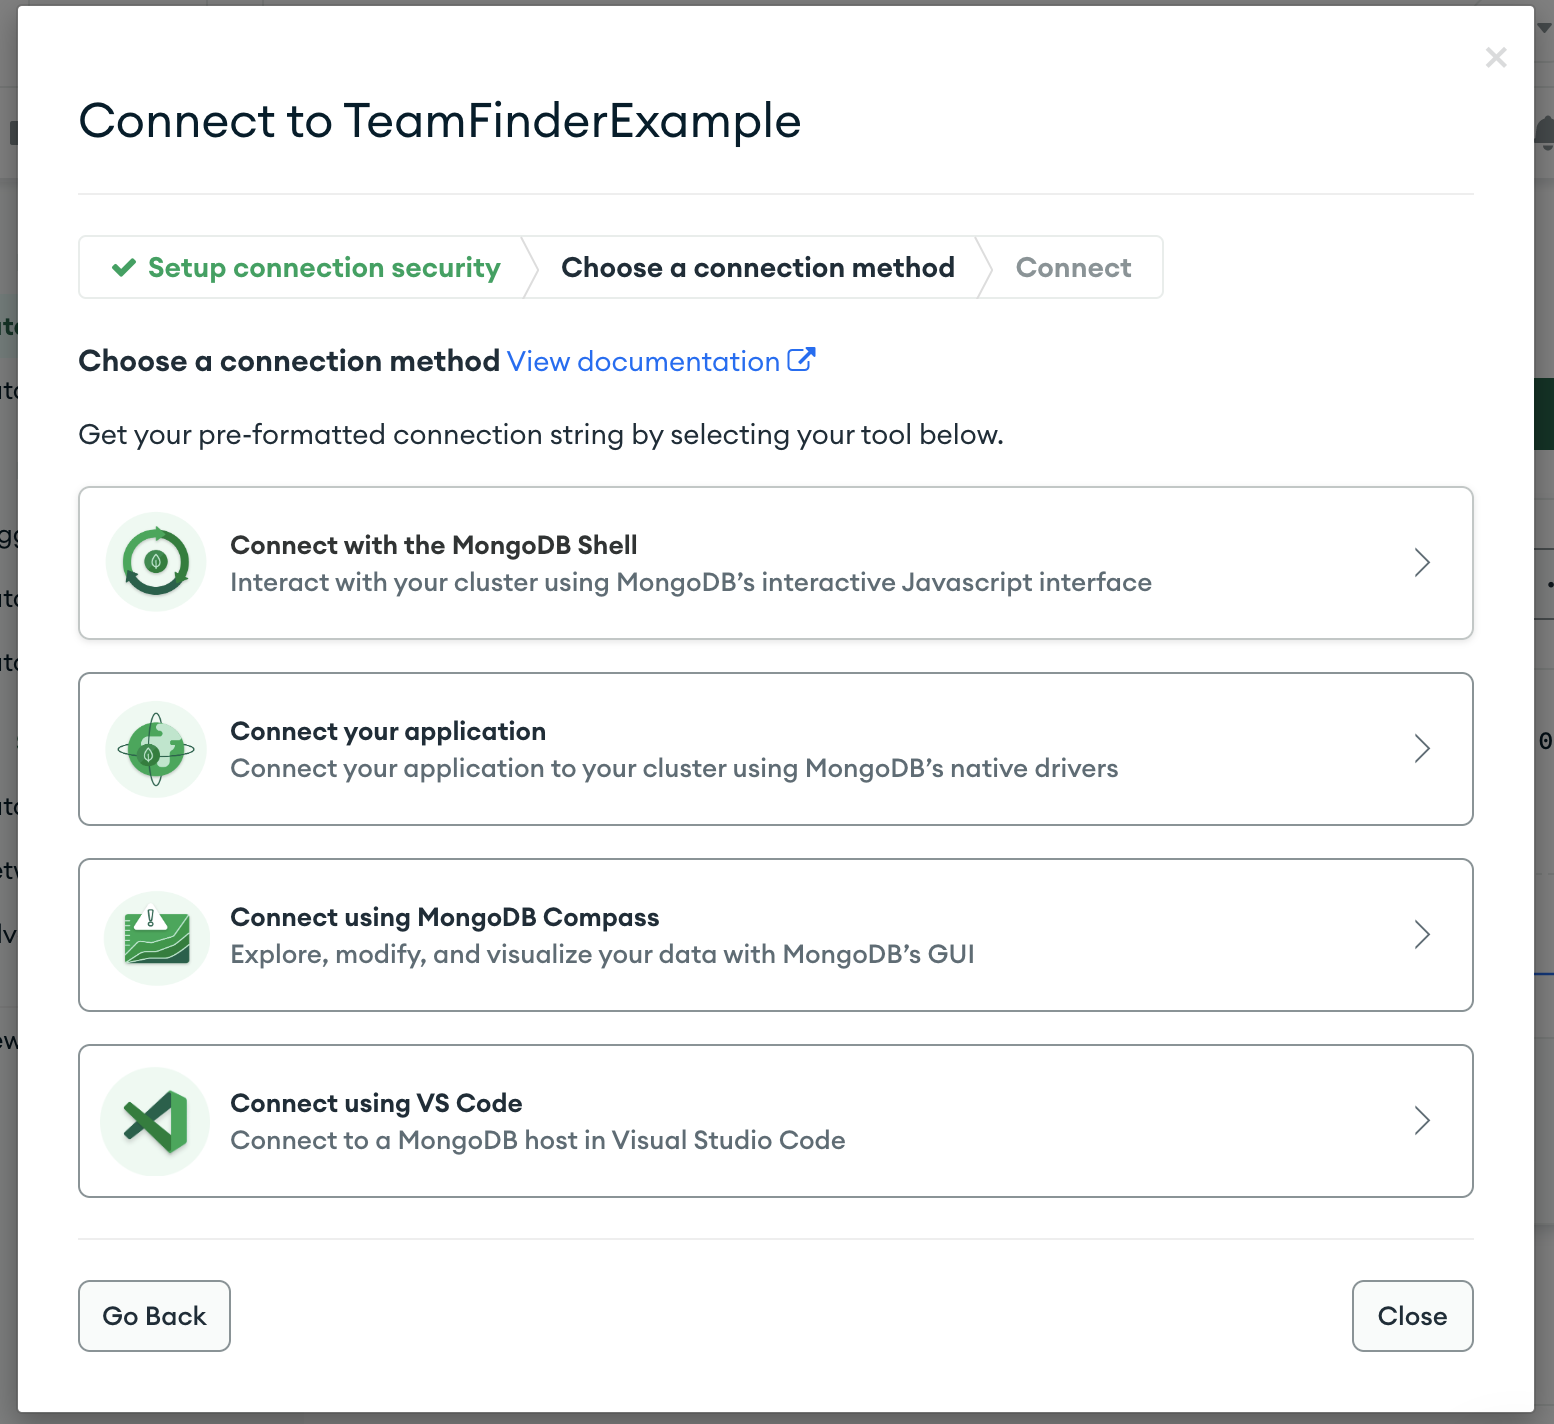
Choose 'Connect your application', and set the settings to Java and whatever the latest version is:
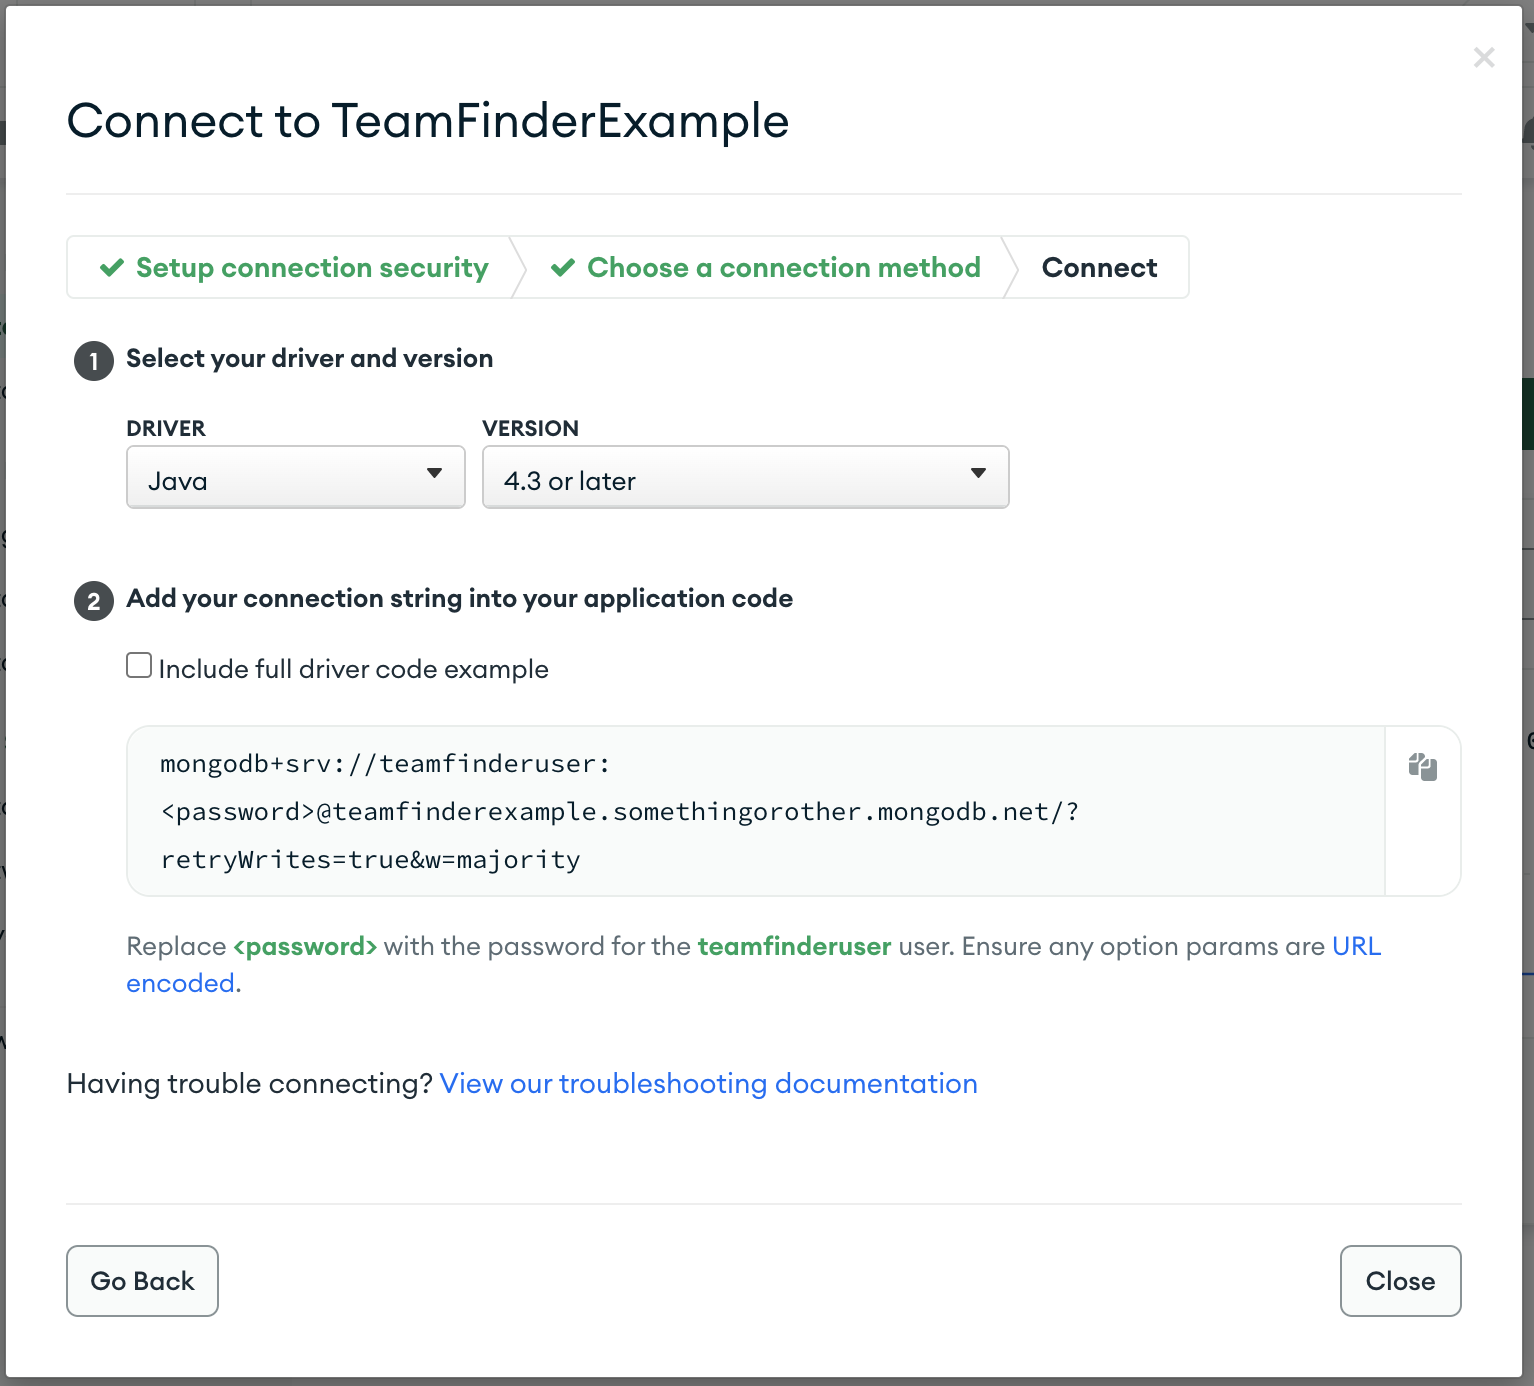
Copy this value somewhere - once you've set the username and password for your DB user, this is your DATABASE_URL which you'll need later.
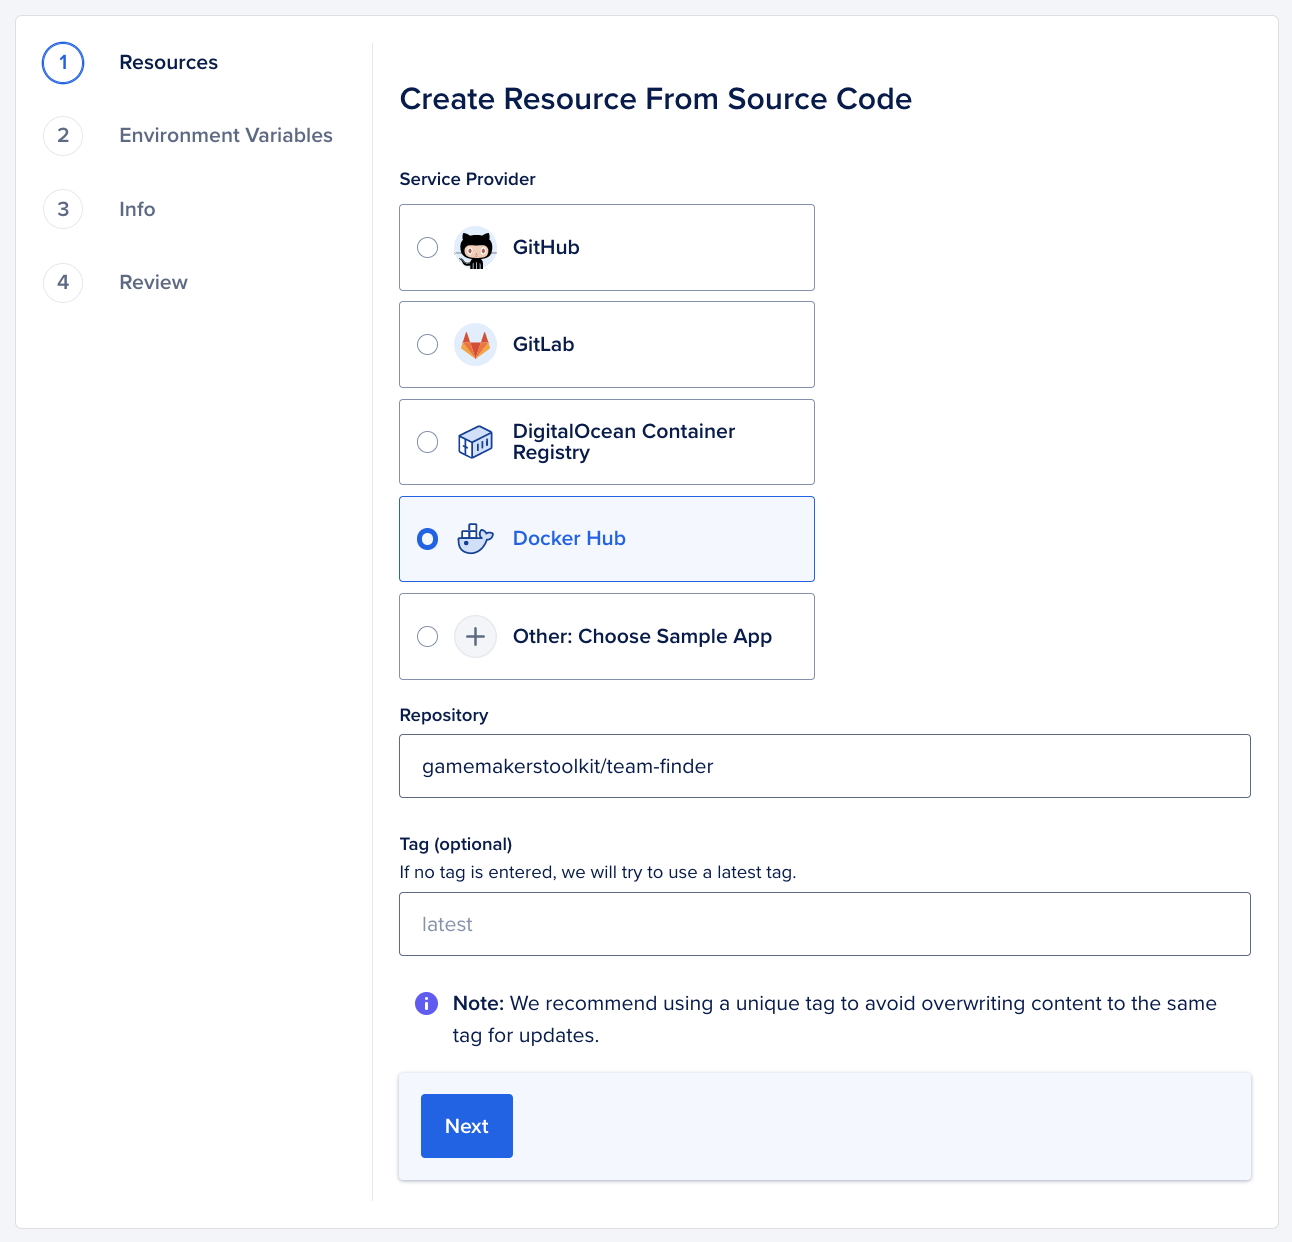
We provide a Docker image of the API for you to use, to simplify setup slightly. Create a resource from Docker Hub, and use the repository gamemakerstoolkit/team-finder:
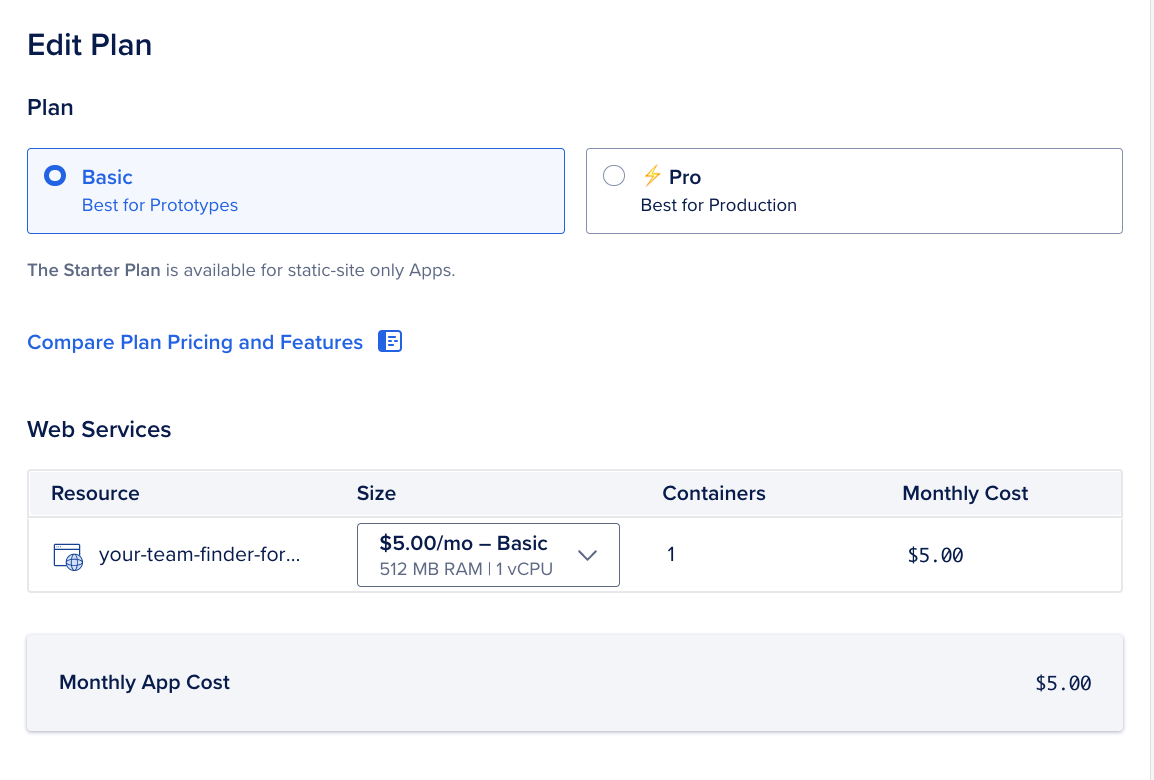
By default, DigitalOcean will use a more powerful server for Web Service applications, so click 'Edit Plan' and pick a cheaper option:
Choose the most basic option, you don't need much:
Go to your App Settings to add the environment variables for the API. You won't know all of them for now, so for the API and UI URLs we're going to put in a dummy value which we'll change later.
You'll need to add:
API_URL=http://api.example.com
UI_URL=http://ui.example.com
DATABASE_URL=mongodb+srv://...
ADMIN_DISCORD_IDS=comma-separated-list-id-discord-ids
DISCORD_CLIENT_ID=your-discord-app-client-id
DISCORD_CLIENT_SECRET=your-discord-app-client-secret
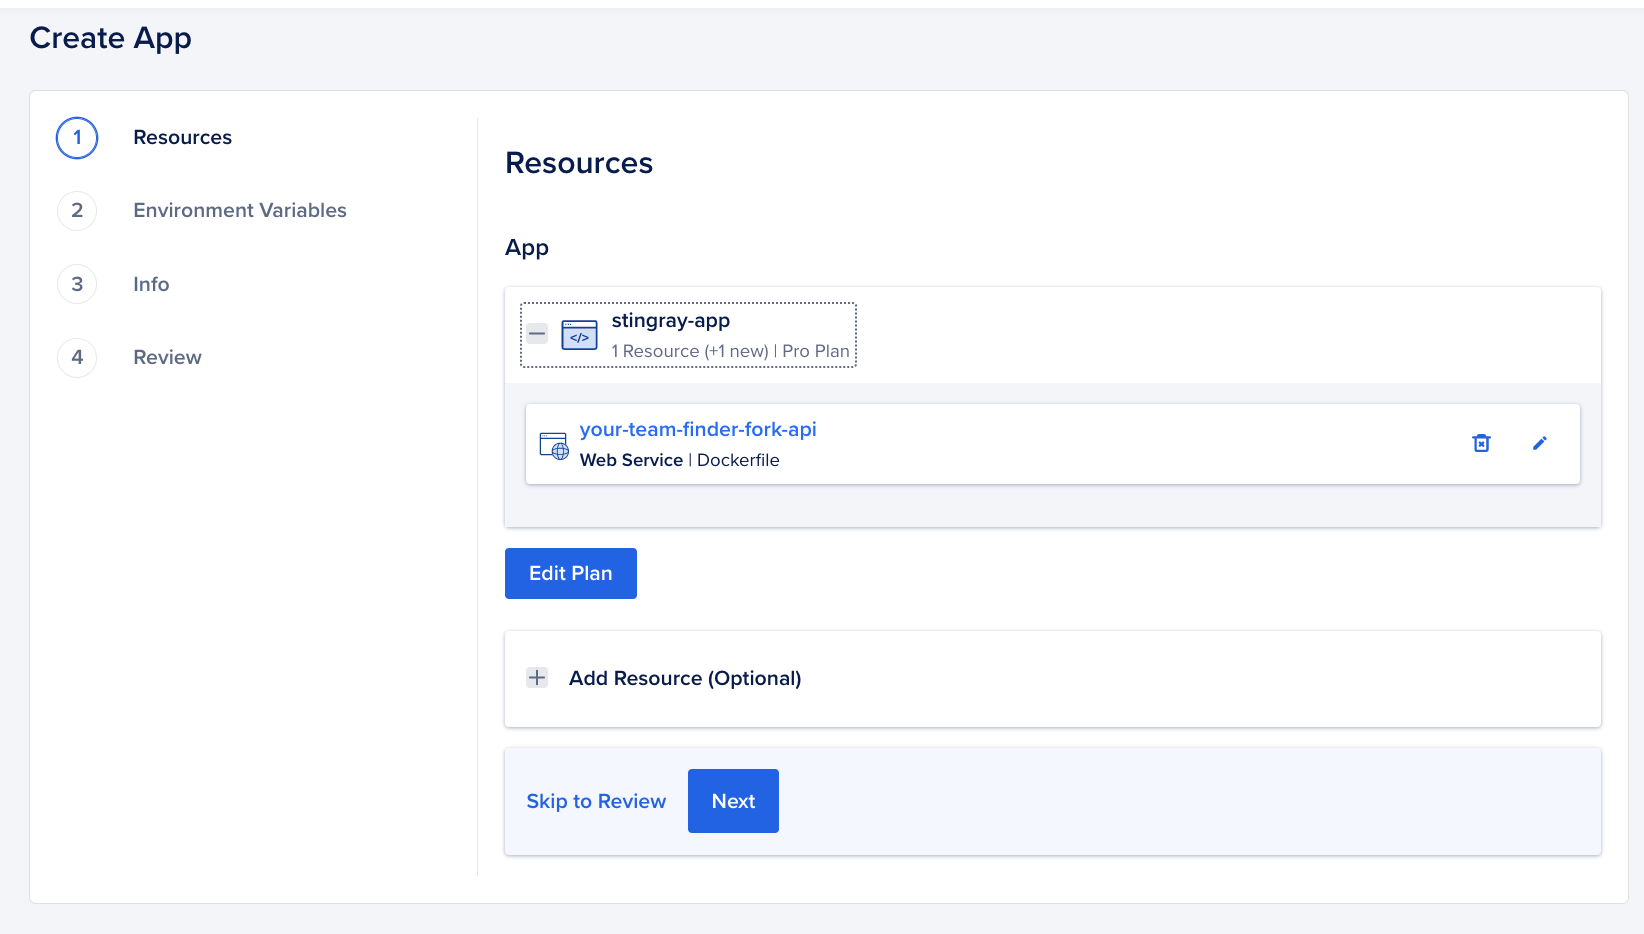
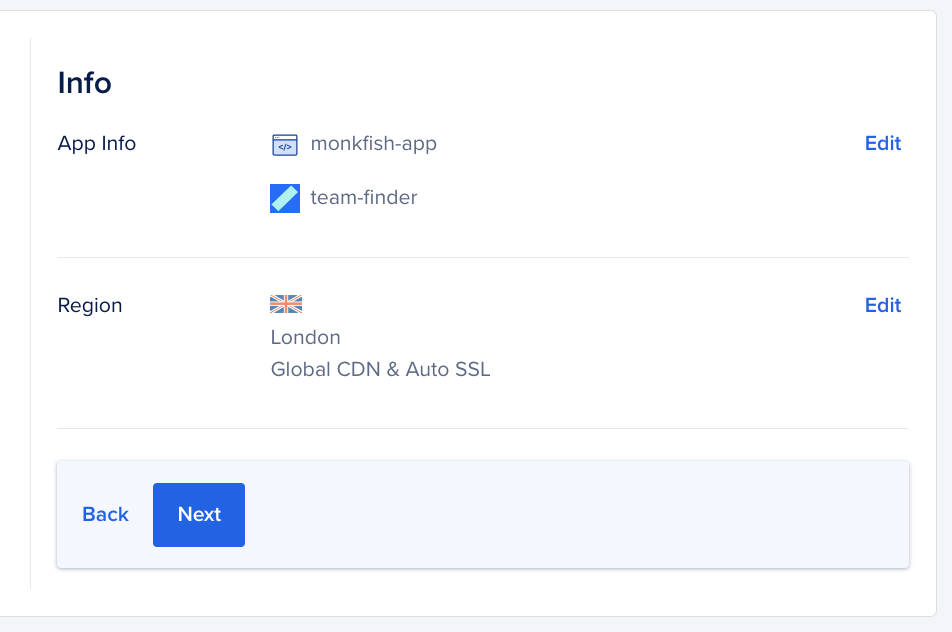
The App Info section shows you the setup of your app, including the randomly generated app name ('monkfish-app' in this picture). Click 'Edit' and rename it to something useful like 'team-finder-api':
There's no getting around the fact that the API will host money to host. Hopefully $5/month is enough that you/your community can make it work!
If your monthly cost is higher than this, it's likely that you're on the wrong plan or using a more powerful server - go back to the Create Resource stage to amend this. You really don't need anything more powerful than the basic box, unless you're expecting a huge amount of traffic (and you can always add more power to the machines after you've created them anyway!)
Once the app has finished building, you'll get a URL for the API along the lines of https://team-finder-api-akf001.ondigitalocean.app. Go back to the environment variables and update the API_URL with this value.
Secondly, you need the allowlist the IP address of your API in your database, in order for the API to be allowed to connect. Using your domain, open a terminal and run the following command:
ping your-team-finder-domain.ondigitalocean.app
You'll see something like 64 bytes from x.y.z.wL icmp_seq=... - the four numbers are the IP address of your API. Copy this, and go back to MongoDB Atlas to update the allowed IP addresses under 'Network Access'.
Finally, go back to your Discord Application page and add https://your-team-finder-domain.ondigitalocean.app/callback to the OAuth2 redirects section - this is what allows your users to login with your website.
Navigate to the 'Apps' section in the sidebar, and click the 'Create'. You should see a screen like this:
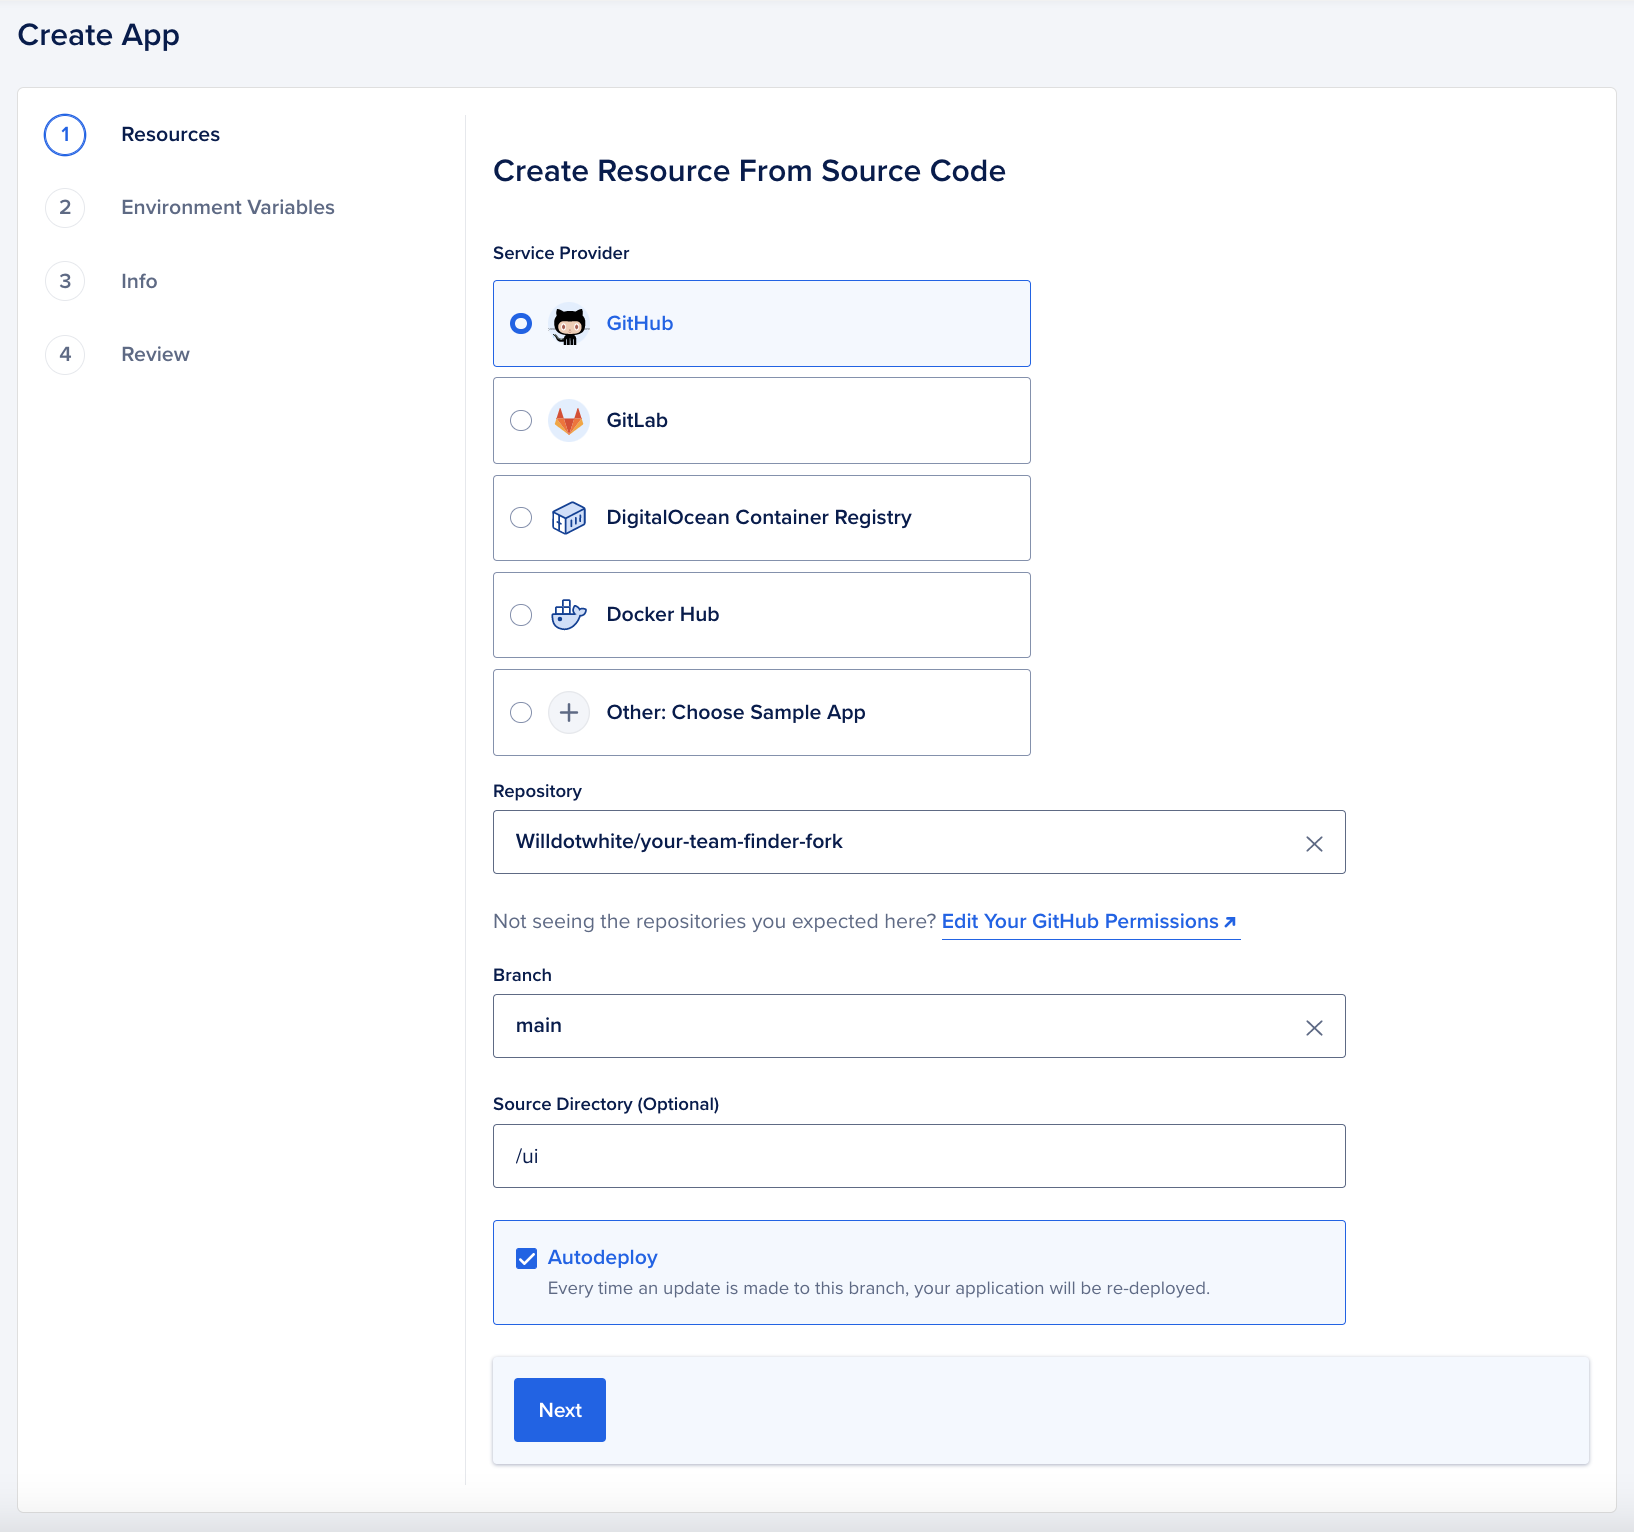
Fill in the details as above - the source directory of /ui is important!
(If you can't see your Team Finder fork in the Repository drop down, click the 'Edit Your GitHub Permissions' link and follow the instructions on the website.)
Click Next.
You'll now see a review screen like this:
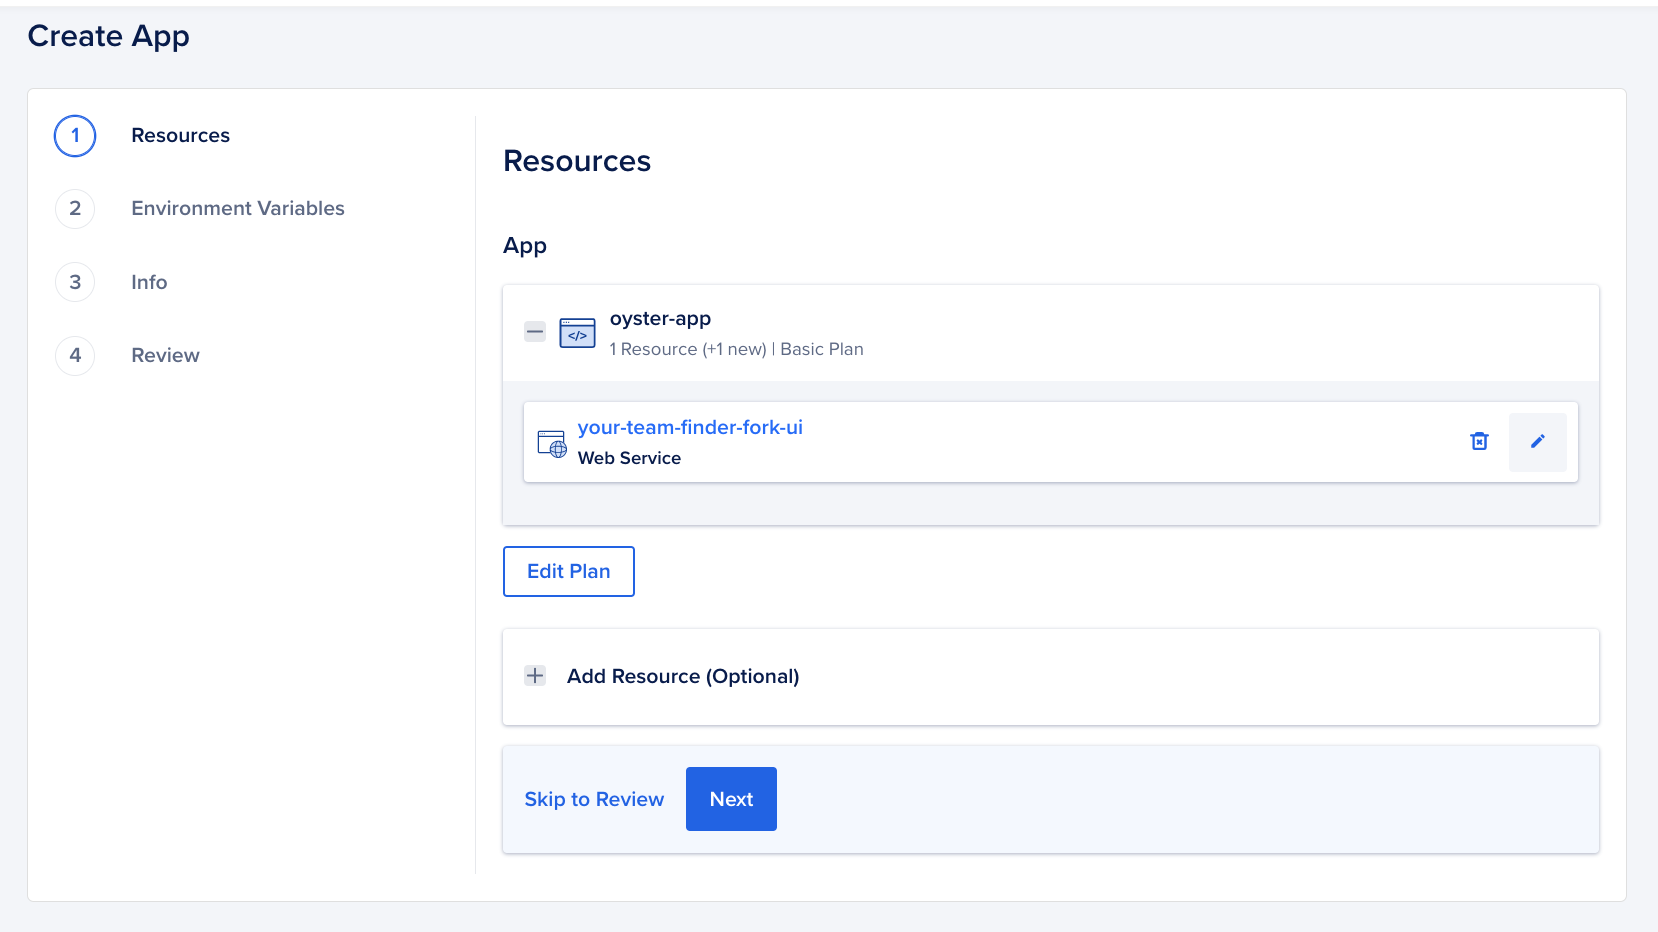
The default application type costs money to run - we need to change this to be a free static site! Click the pencil icon (middle-right of the screenshot above) to edit the app type.
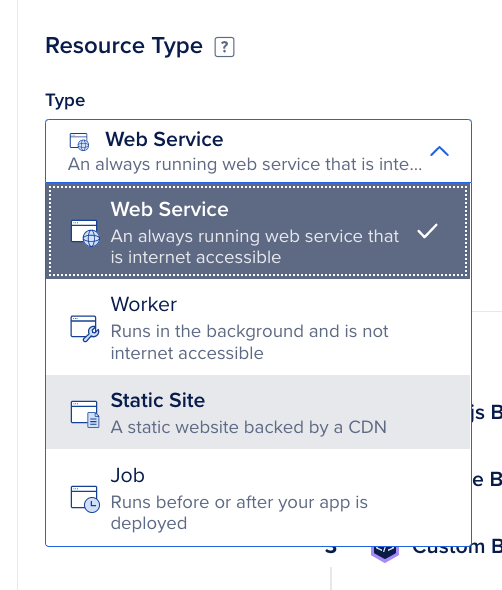
The Edit view will have a section called 'Resource Type' (pictured below):
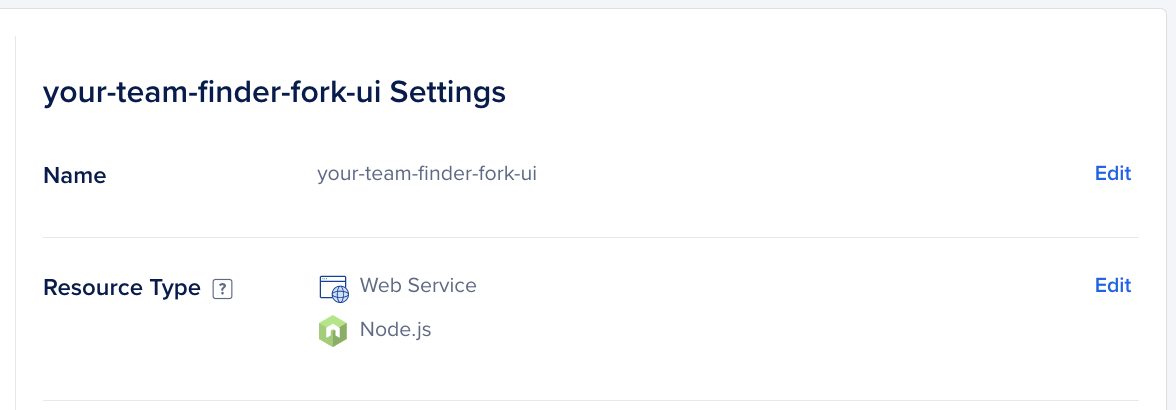
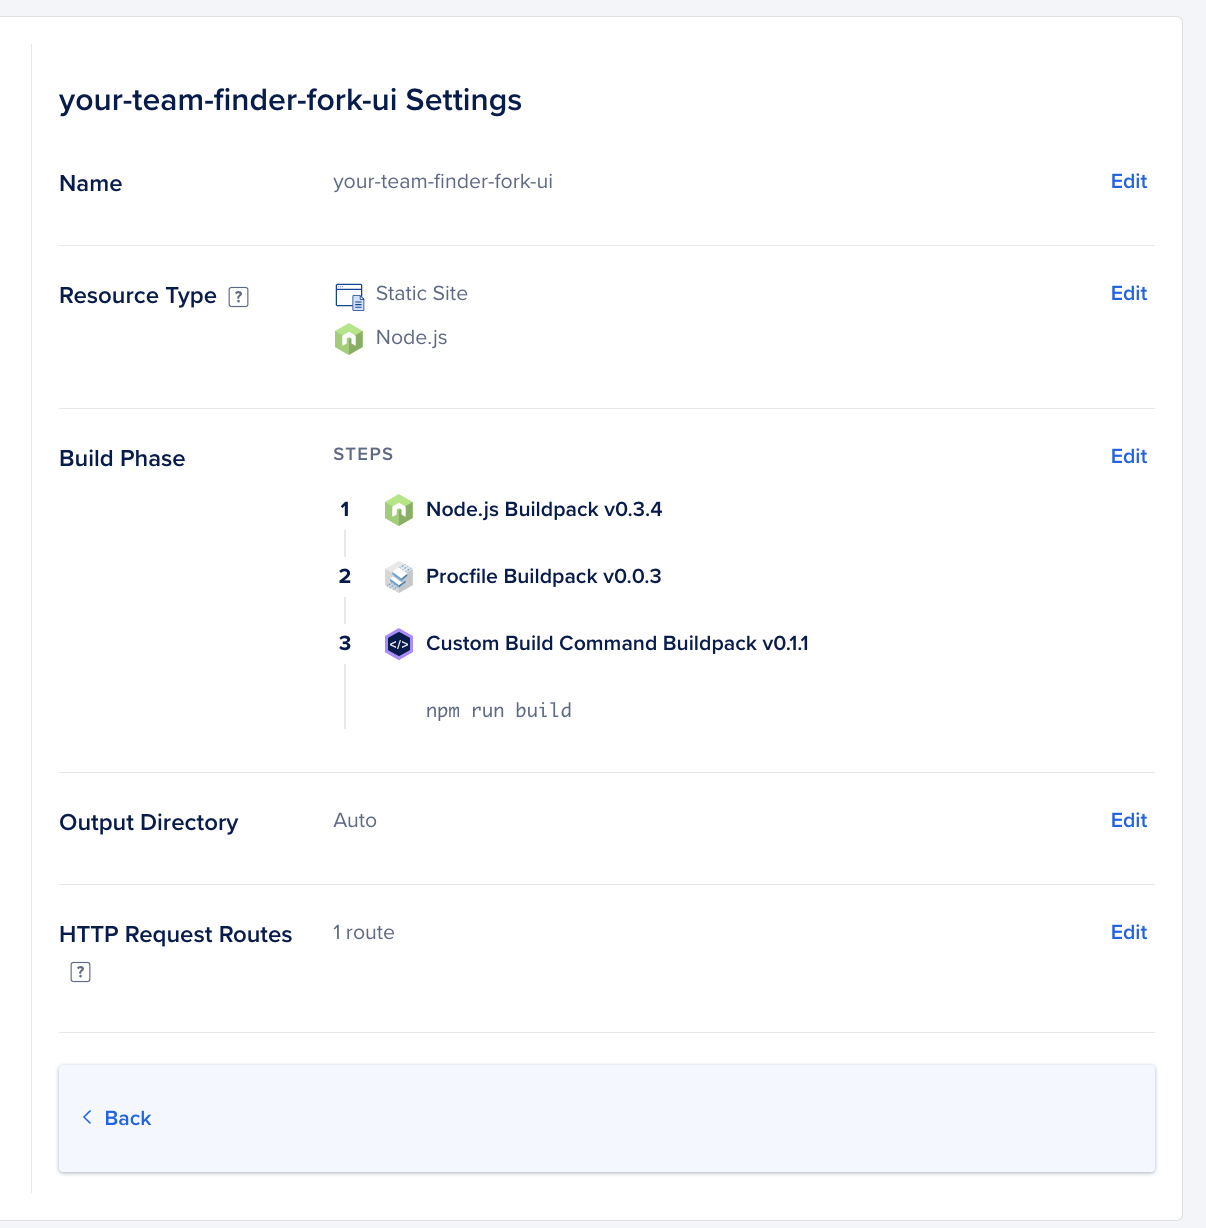
Click 'Edit' and change the Resource Type to Static Site:
All the other defaults will be absolutely fine, so you can leave them alone. Your resource should look something like this:
Click 'Back' and progress to the next step.
Go to your App Settings to add the environment variables for the UI. You'll need to add:
VITE_API_URL=https://team-finder-api-url-from-above.ondigitalocean.app
VITE_DISCORD_NAME='Your Discord Community Name'
VITE_DISCORD_INVITE_URL=https://discord.gg/your-discord-invite-url
VITE_JAM_NAME='Name Of Your Game Jam'
VITE_JAM_URL=https://itch.io/jam/...
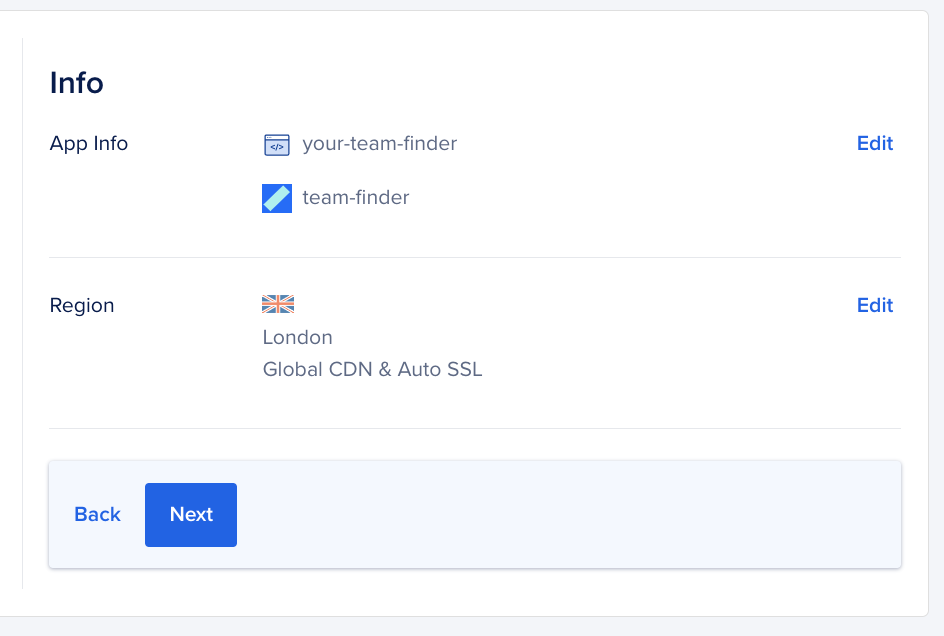
This page allows you to rename the app from whatever default DigitalOcean has given it. Give it a useful name, as the domain DigitalOcean will give you is based off of this name.
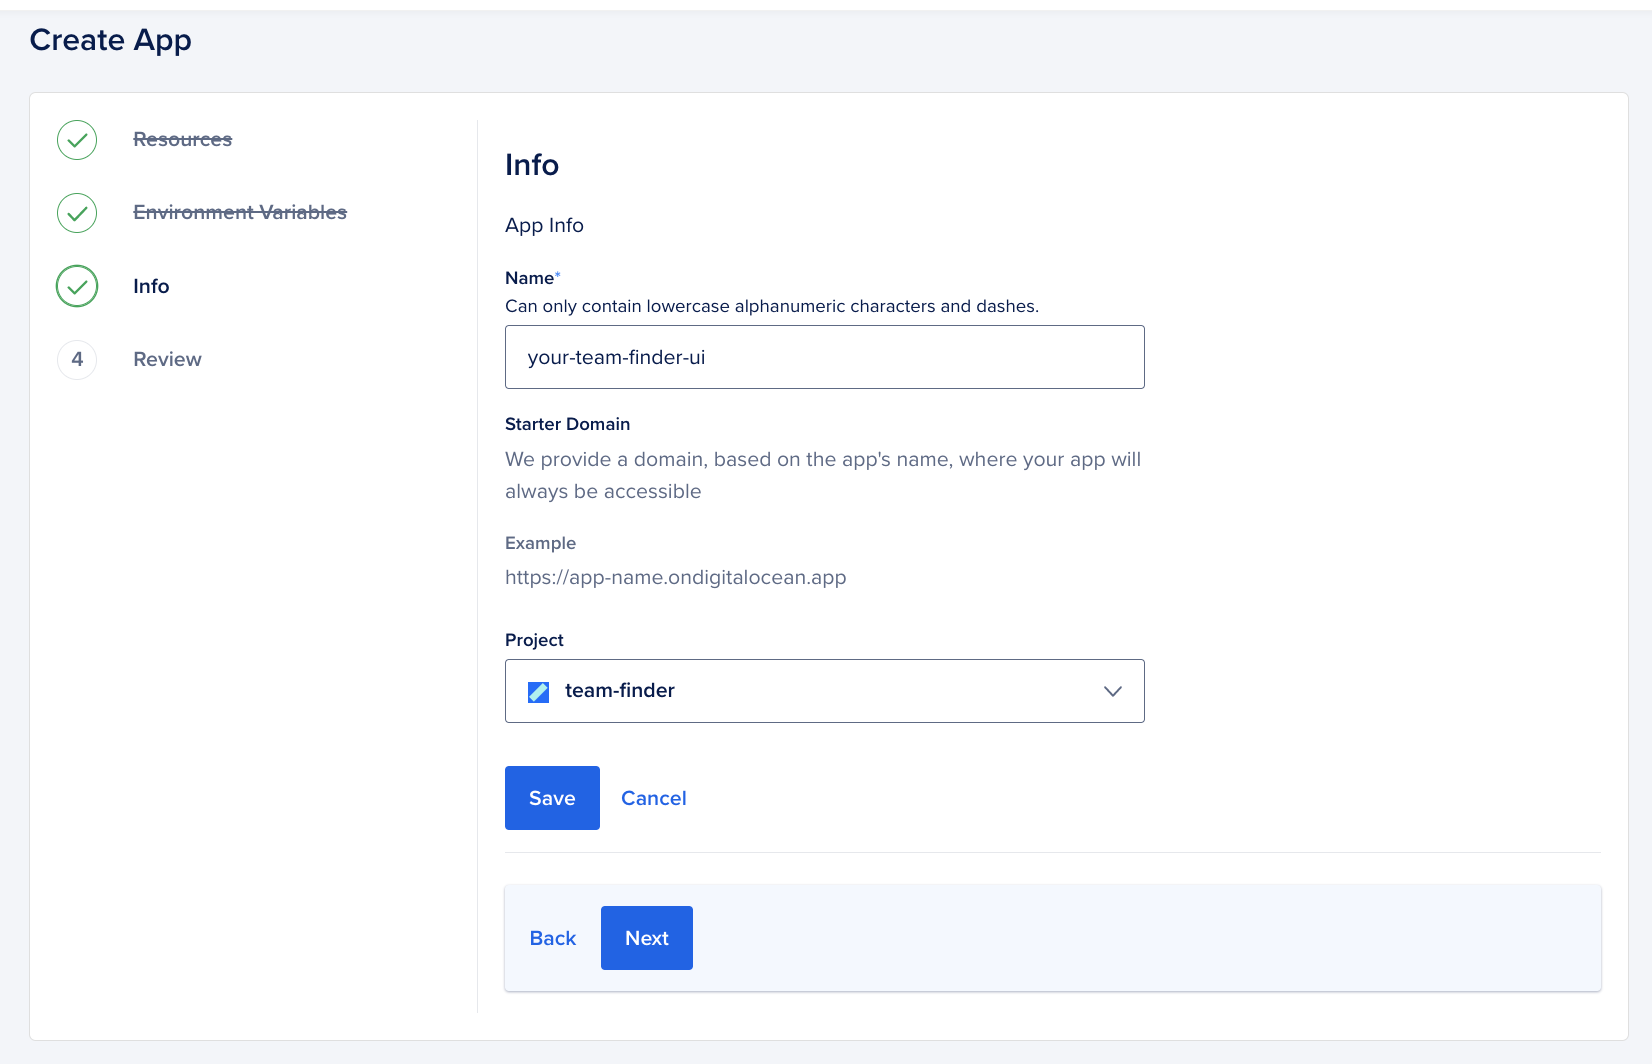
Ideally you'll set up the nice domain/subdomain to give your Team Finder a nice URL, but if not this DigitalOcean one will be fine - if you're not using your own domain, make sure to include the name of your jam in the app name!
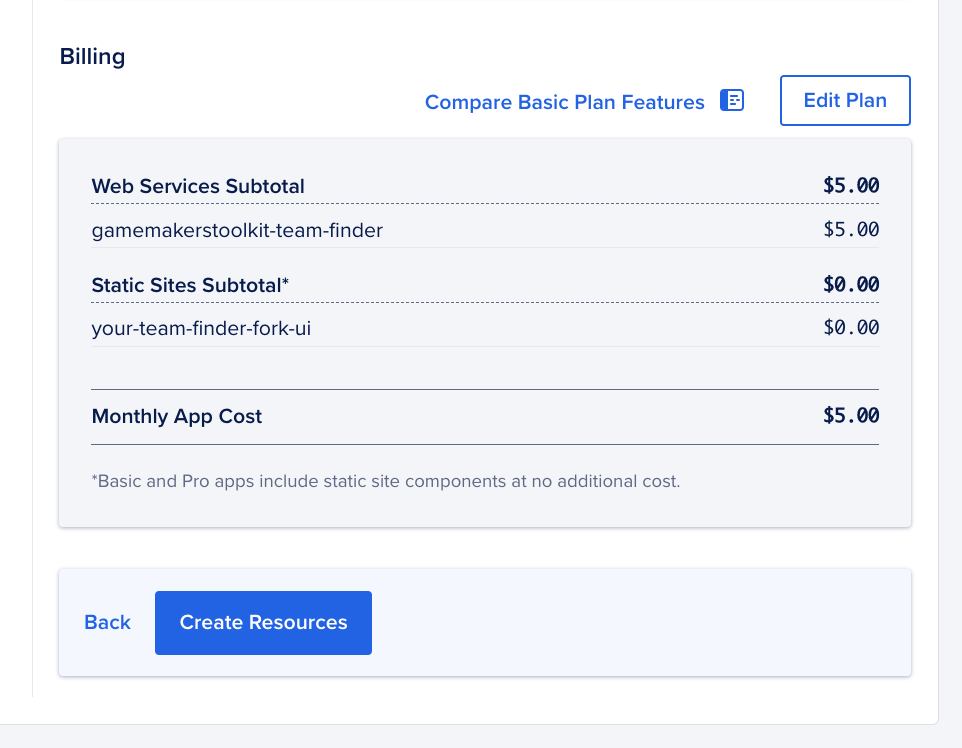
This page allows you to review all of the changes you've made above. The most important part of this page is that the monthly cost should be $0.00.
When you're ready, click 'Create Resources'.
The first time DigitalOcean builds your apps it'll take a little while to build - it's normal to take up to ~5 minutes. That's nothing to worry about.
When the app has built, you can view your page! You'll have another https://some-nonsense-here.ondigitalocean.app URL for your UI, like the API did. Go back to the API and update the value of UI_URL to this new value!