Creating a screenshot
There are three ways in which we can easily take screenshots and get it on the computer
If you are running Oppia on an emulator running on Android Studio, you can directly take a screenshot from the sidebar of the emulator.

Also, you can create a video/gif file from emulator by following these steps:
- Click on three dots present at the bottom on emulator side bar.
- In the extended menu click on
Record and Playback. - Click on
Start Recording. This will only record the emulator screen. - Once finished, click on
Stop Recording. - You can save this file in
WEBMorGIFformat.
The default location for the screenshot, video and gif would be on Desktop.
If you are running Oppia on a local Android device, you can take a screenshot using the Logcat window of Android Studio.
- Go to Tools > Windows > Logcat. You will see the Logcat window open up at the bottom.
- On the left hand side there is a column of icons, hover on the expand icon at the bottom and you will see a camera icon:
 .
.
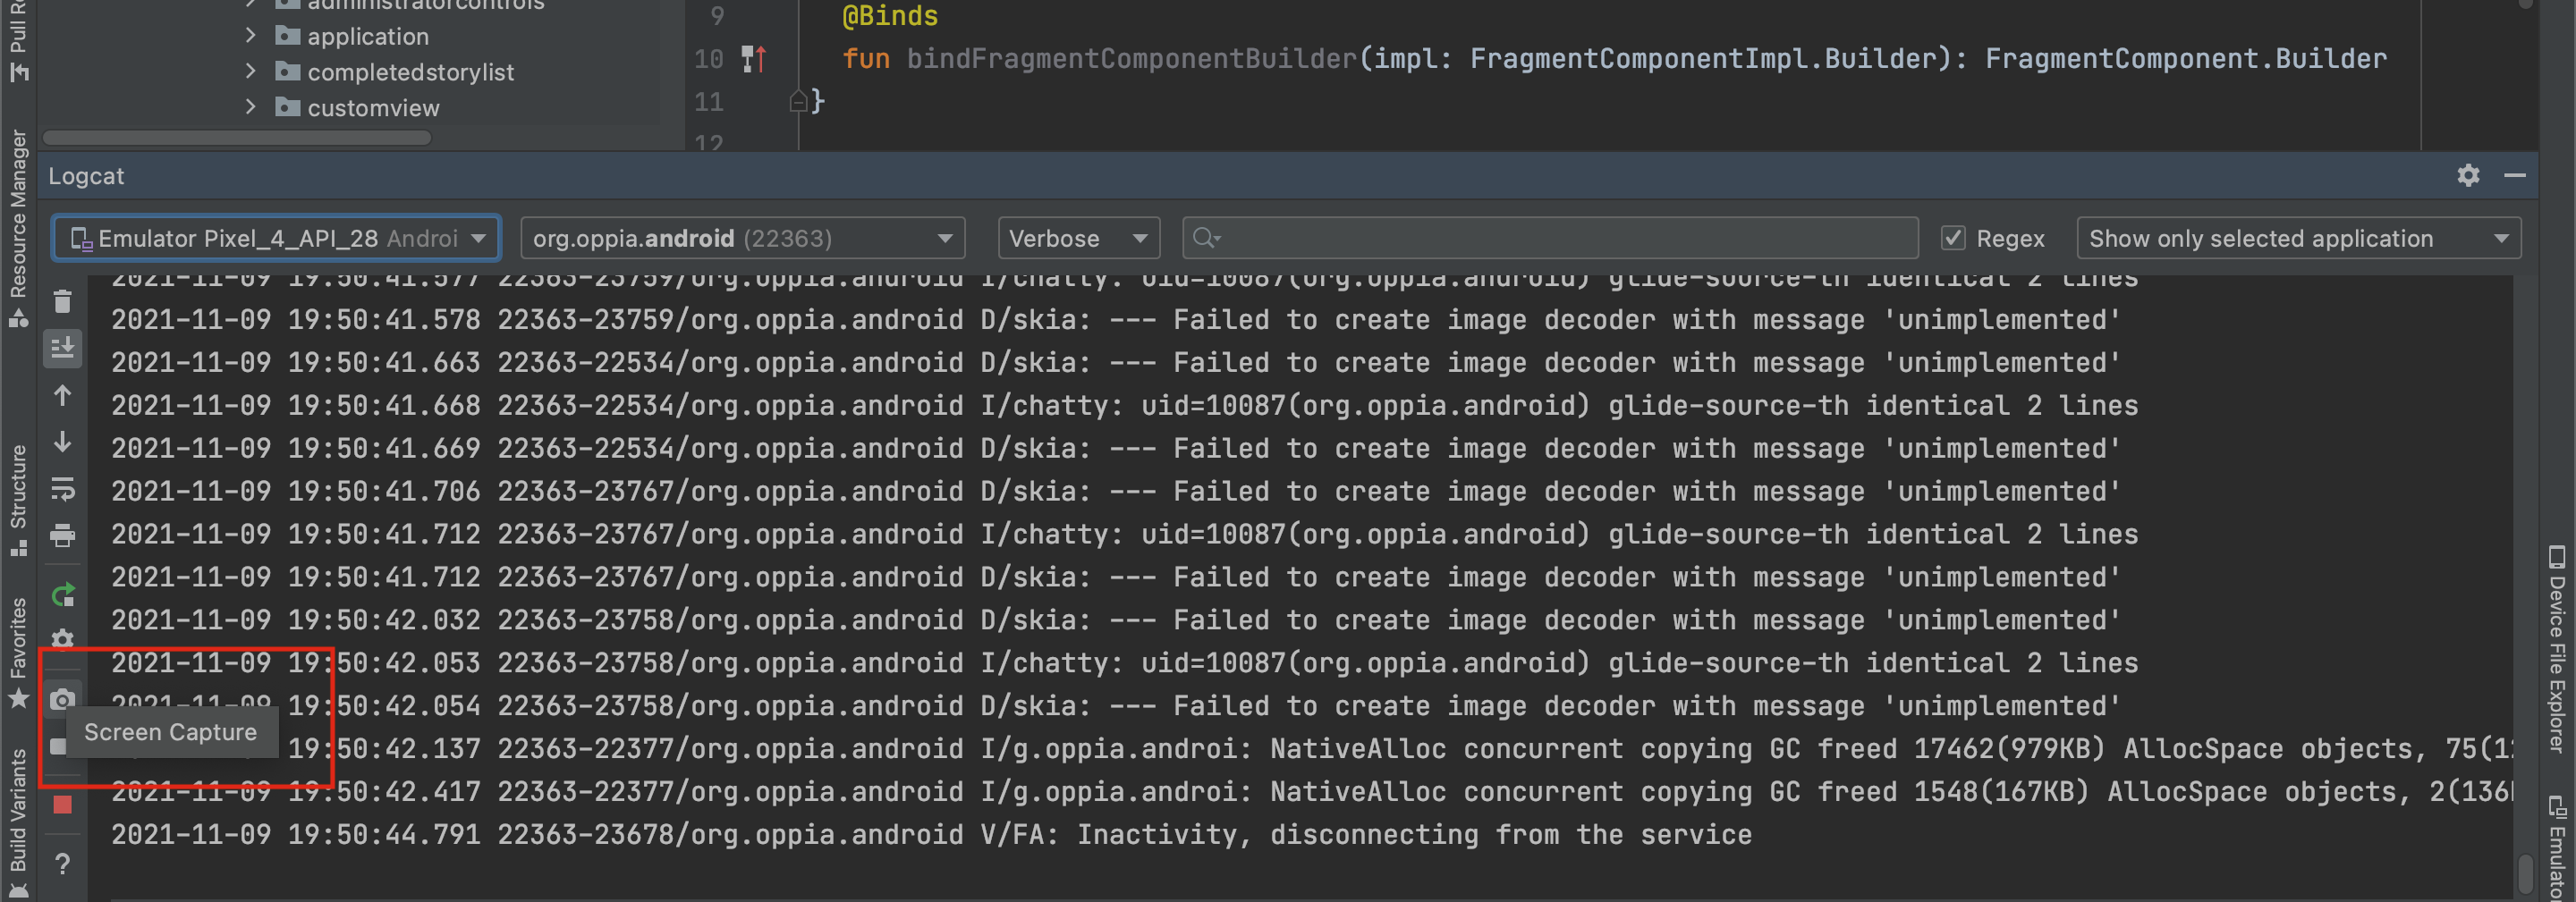
- Click on that and Android studio will take a screenshot and open up a Screenshot Editor.
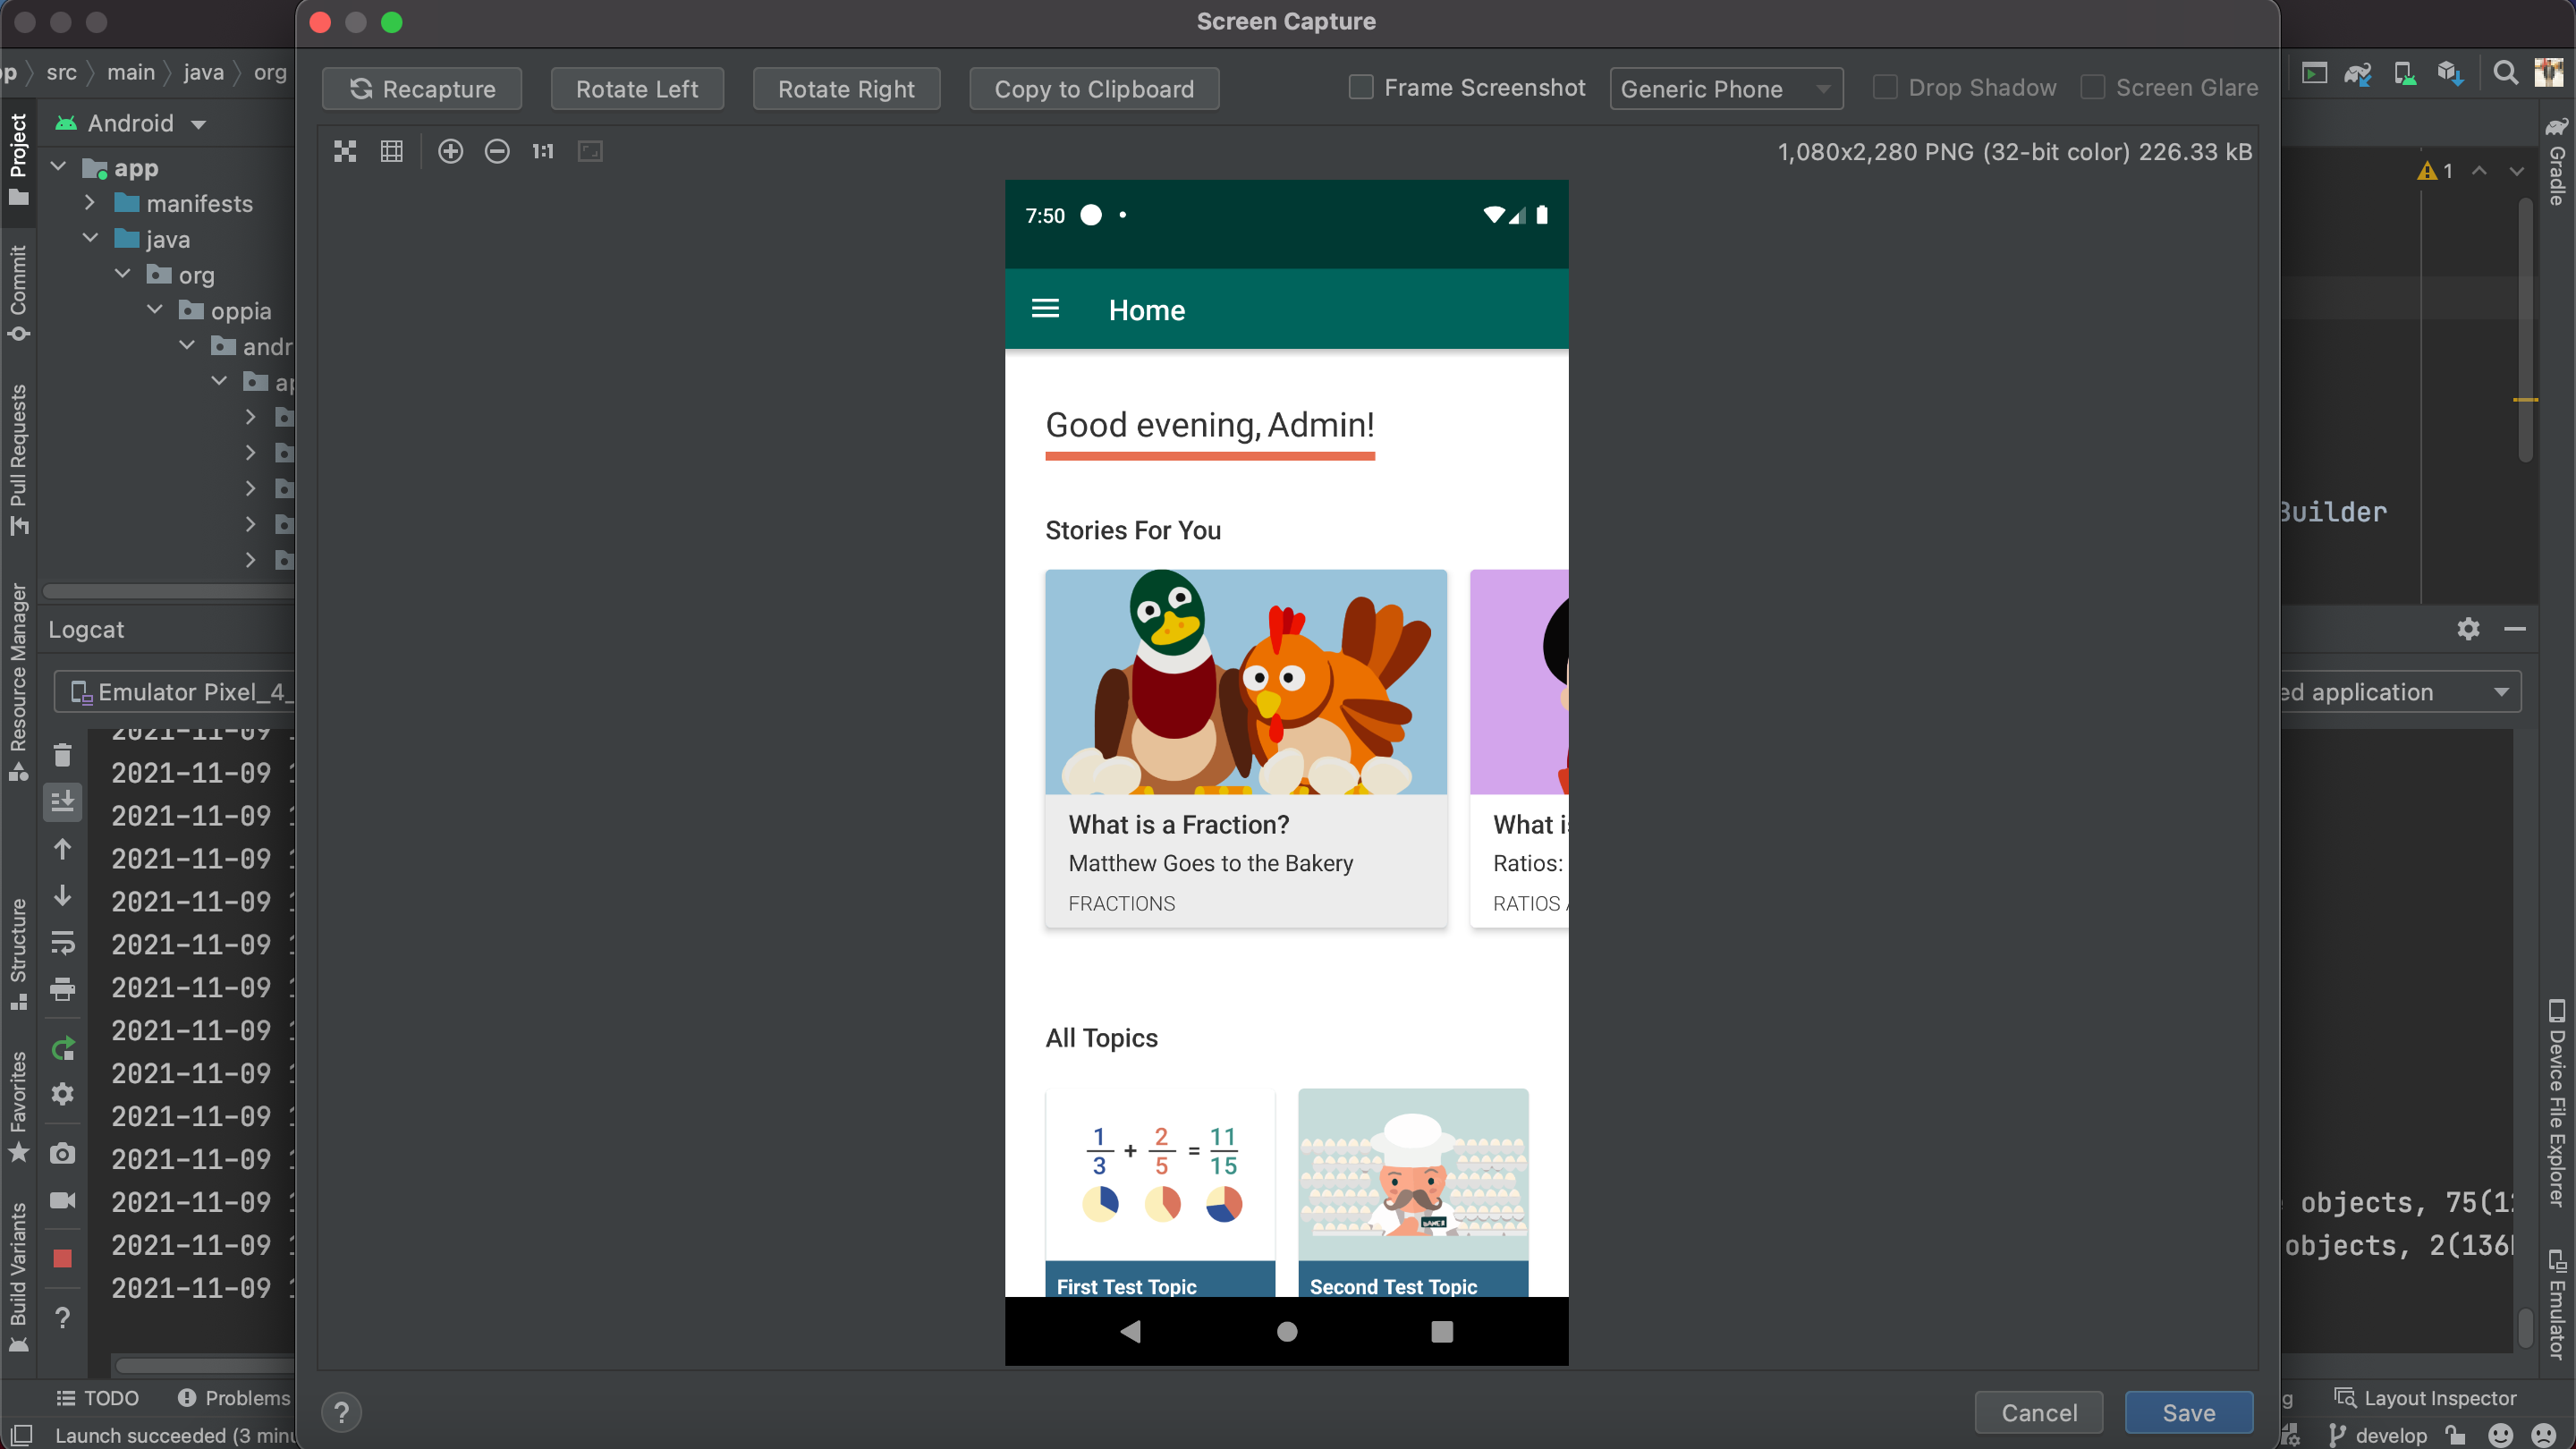
- Optionally change the image:
- Recapture: Take a new screenshot.
- Rotate Left: Rotate the image 90 degrees counter-clockwise.
- Rotate Right: Rotate the image 90 degrees clockwise.
- Frame Screenshot: Choose a device to wrap your screenshot with real device artwork.
- Click Save, specify the location and filename, and then click OK to save the screenshot.
For more details, see the Android documentation
If you would like to take a screenshot but cannot use Android Studio, you can instead capture a screenshot using an ADB command.
- Run the following command:
adb shell screencap -p /sdcard/screenshot.png - This creates a screenshot called screenshot.png and stores it on your Android device.
- To pull it on to your computer, you can run
adb pull /sdcard/screenshot.png. This will copy the image from the device to your local machine (on the path in which you ran the command). - You can now upload the image on to Github.