Oppia Android Testing
- Overview
- Learning how to write good tests
- Guidelines for testing
- Oppia project organization for tests
- Testing RecyclerViews at Specific Positions
- Tips to run test cases in both Espresso and Robolectric
Testing the app is an integral part of an app development process. By running tests against the app consistently, you can verify your app's correctness, functional behavior, and usability before you release it publicly.
In Oppia we are considering:
- Robolectric testing
- JUnit testing
- Integration/Screenshot tests using Espresso
- Performance tests
- LeakCanary
- Hermetic end-to-end testing using Espresso + some way to run the Oppia developer backend (or maybe better: drive using UIAutomator using a real production Oppia backend set up for testing purposes)
This presentation provides an overview on testing as a whole, and explains what makes a good test. We suggest that you familiarize yourself with the concepts introduced in that presentation before writing any tests in Oppia Android.
Test names should read like a sentence, and be consistent with other nearby test names to facilitate easily coming up with new tests. Consider using a format similar to the following for naming test functions:
testAction_withOneCondition_withSecondCondition_hasExpectedOutcome
where testAction, withCondition and hasExpectedOutcome are replaced with appropriate descriptions in camelCase. Put the outcome at the end of the name, so that you and others can easily compare consecutive tests of the same method that have slightly different conditions with divergent outcomes.
For Example:
testProfileChooserFragment_initializeProfiles_checkProfilesAreShowntestSplashActivity_initialOpen_routesToHomeActivity
Use assertThat() instead of assertEqual(), assertTrue() / assertFalse()
The first benefit is that assertThat() is more readable than the other assert methods. For example, take a look at the following assertEquals():
assertEquals(expected, actual)In the assertEquals(), you can easily get confused and interchange the actual and expected argument position.
assertThat(actual).isEqualTo(expected)The first thing to notice is that it’s the other way around (actual first, expected second), which is a big advantage. It also reads more like a sentence: “Assert that the actual value is equal to the expected value.” As another, better example of readability, compare how to check for not equals, first the old way:
assertFalse(expected.equals(actual))
Since there is no assertNotEquals (unless it’s custom coded) we have to use assertFalse and do an equals on the two variables. Here’s the much more readable new way with assertThat():
assertThat(actual).isNotEqualTo(expected)If we want to verify that two values are not equal, we have to write our assertion by invoking the isNotEqualTo() method.
Some simple methods exist for truth testing:
assertThat(logicalCondition).isTrue()
assertThat(logicalCondition).isFalse()
Hence assertThat should be the preferred method over the other methods.
Tests should only be written to verify the behaviour of public methods/functions. Private functions should not be used in behavioural tests. Here are some suggestions for what to do in specific cases (if this doesn't help for your particular case and you're not sure what to do, please talk to @BenHenning):
- If you want to test code execution of a private method/function, test it through the public interface, or move it to a utility (if it's general-purpose) where it becomes public. Avoid testing private APIs since that may lead to brittle test in unexpected situations (such as when the implementation of the API changes, but the behaviour remains the same).
- If you’re trying to access hidden information, consider getting that information from one level below instead (e.g. datastore).
The following is the default directory structure for Oppia application and test code:
- app/src/main/java- for the source code of the Oppia application build
- app/src/test/java- for any unit test which can run on the JVM
- app/src/androidTest/java- for any test which should run on an Android device
If you follow this conversion, the Android build system runs your tests on the correct target (JVM or Android device).
With Robolectric you can write tests like this:
@RunWith(AndroidJUnit4.class)
public class MyActivityTest {

  @Test
  public void clickingButton_shouldChangeResultsViewText() throws Exception {
    Activity activity = Robolectric.setupActivity(MyActivity.class);

    Button button = (Button) activity.findViewById(R.id.press_me_button);
    TextView results = (TextView) activity.findViewById(R.id.results_text_view);

    button.performClick();
    assertThat(results.getText().toString()).isEqualTo("Testing!"));
  }
}-
Go to Edit Configuration in Android Studio (Bumblebee | 2021.1.1 Patch 3)
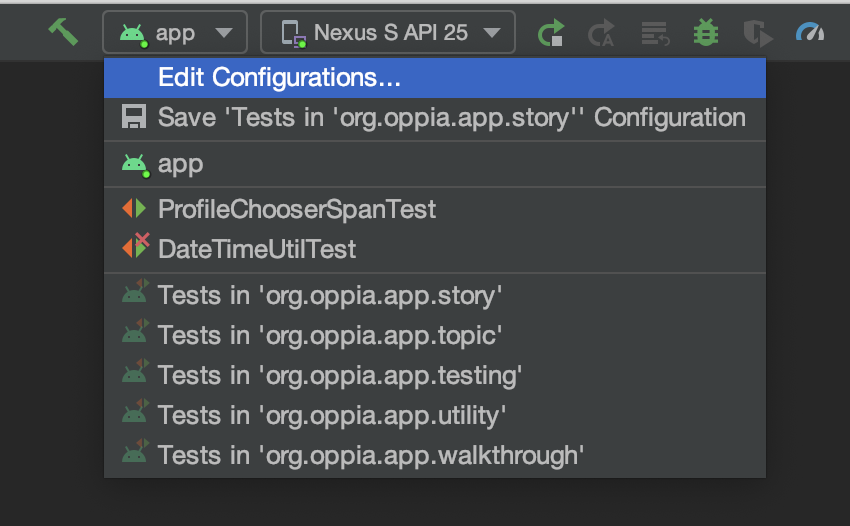
-
Click on Add(+) -> JUnit

-
Enter following information:
- a) Name of test. Example: In my case "SplashActivityTest"
- b) Make sure select "java 11" and oppia-android.app [Note: For "app module test" select
oppia-android.appsimilarly for "utility tests" selectoppia-android.utility, for "domain test" selectoppia-android.domain, for "model test" selectoppia-android.model, for "testing" selectoppia-android.testing] - c) Class path of Test class. Example: In my case "org.oppia.android.app.splash. SplashActivityTest"
- d) Press
OKto select the test.
-
Click on "Run" button to run robolectric test. (In my case "SplashActivityTest")

Use Espresso to write concise, beautiful, and reliable Android UI tests. Example JUnit4 test using Rules:
@RunWith(AndroidJUnit4::class)
class PinPasswordActivityTest {

 @Before
 fun setUp() {
   Intents.init()
 }

  @Test
  fun testPinPasswordActivityWithAdmin_inputCorrectPin_checkOpensHomeActivity() {
    ActivityScenario.launch<PinPasswordActivity>(
      PinPasswordActivity.createPinPasswordActivityIntent(
        context,
        adminPin,
        adminId
      )
    ).use {
      testCoroutineDispatchers.runCurrent()
      onView(withId(R.id.input_pin)).perform(editTextInputAction.appendText("12345"))
      testCoroutineDispatchers.runCurrent()
      intended(hasComponent(HomeActivity::class.java.name))
    }
  }

 @After
 fun tearDown() {
   Intents.release()
 }
}
Important note: When running the Espresso tests, ensure that you are using the API 28 emulator. If you use e.g. API 30, you may get a message saying "0 tests passed" when trying to run the tests.
Espresso has many ViewMatcher options which are very effective in uniquely locate UI element. You can also combine and create a combination of View Matchers to find element uniquely.
The View Matcher is written like onView(ViewMatcher) which are commonly used. There are two types of actions that can be performed on View those are -
onView(ViewMatcher).perform(ViewAction)
onView(ViewMatcher).check(ViewAssertion)
// frequently used matchers
// using resource id
onView(withId(R.id.my_view))
// using visible text
onView(withText("Done"))
// using content description
onView(withContentDescription("profile"));
//using Hint Text
onView(withHint("Sample_text"))
//return TextView with links
onView(hasLinks())

// UI property matchers are mostly used in combination
// withId(R.id.my_view) is a ViewMatcher
// click() is a ViewAction
// matches(isDisplayed()) is a ViewAssertion
onView(withId(R.id.my_view))
    .perform(click())
    .check(matches(isDisplayed()))

onView(withId(R.id.profile_edit_name)).check(matches(withText("Sean")))

onView(withId(R.id.test_number_input_interaction_view)).check(matches(isDisplayed())).check(matches(withText("9")))

onView(withText(R.string.home_activity_back_dialog_exit)).perform(click())
onView(withId(R.id.story_chapter_list)).perform(
 scrollToPosition<RecyclerView.ViewHolder>(
   1
 )
)
onView(withId(R.id.story_chapter_list)).check(hasItemCount(4))
A test case can never be called complete without assertions and hence it is important to know View Assertions provided by Espresso to complete your test cases.
- isCompletelyDisplayed : Returns a matcher which only accepts a view whose height and width fit perfectly within the currently displayed region of this view.
- There exist views (such as ScrollViews) whose height and width are larger than the physical device screen by design. Such views will never be completely displayed.
- isDisplayed : Returns a matcher that matches {@link View}s that are currently displayed on the screen to the user.
- Note: isDisplayed will select views that are partially displayed (eg: the full height/width of the view is greater than the height/width of the visible rectangle). If you wish to ensure the entire rectangle this view draws is displayed to the user use isCompletelyDisplayed
- Espresso release contains new left and right swiping actions: swipeLeft() and swipeRight(). They both are really useful when you'd like to swipe between activity fragments, tab layouts or any other UI elements.
- At times, GeneralSwipeAction can become unreliable because of its calculation varies on different screen size or density, so it may not be suitable for ViewPager. Instead, we can use to scroll with ViewPagerActions
@Test
fun testOnboardingFragment_checkSlide1Description_isCorrect() {
   launch(OnboardingActivity::class.java).use {
       onView(withId(R.id.onboarding_slide_view_pager)).perform(scrollToPage(1))
       onView(
           allOf(
              withId(R.id.slide_description_text_view),
               isCompletelyDisplayed()
             )
        ).check(matches(withText(R.string.onboarding_slide_1_description)))
}The espresso-contrib library provides a RecyclerViewActions class that offers a way to click on a specific position in a RecyclerView (see instructions on configuring espress-contrib).
Using the RecyclerViewMatcher under package ‘org.oppia.app.recyclerview’, you can perform actions on an item at a specific position in a RecyclerView, and also check that some content is contained within a descendant of a specific item.
@Test
fun testHomeActivity_recyclerViewIndex3_clickTopicSummary_opensTopicActivity() {
 launch(HomeActivity::class.java).use {
   onView(withId(R.id.home_recycler_view)).perform(
     scrollToPosition<RecyclerView.ViewHolder>(3)
   )
   onView(atPosition(R.id.home_recycler_view, 3)).perform(click())
   intended(hasComponent(TopicActivity::class.java.name))
   intended(hasExtra(TopicActivity.TOPIC_ACTIVITY_TOPIC_ID_ARGUMENT_KEY, TEST_TOPIC_ID_0))
 }
}

@Test
fun testHomeActivity_recyclerViewIndex1_promotedCard_storyNameIsCorrect() {
 launch(HomeActivity::class.java).use {
   onView(withId(R.id.home_recycler_view)).perform(scrollToPosition<RecyclerView.ViewHolder>(1))
   onView(atPositionOnView(R.id.home_recycler_view, 1, R.id.story_name_text_view)).check(
     matches(
       withText(containsString("Matthew Goes to the Bakery"))
     )
   )
 }
}The project contains two kinds of tests, unit tests using Robolectric and instrumentation tests using Espresso.
Both frameworks can create the same kinds of tests, the difference is how they’re executed. Robolectric tests are run on a standard JVM, which makes them very fast to run, but there are some limitations on what can be tested. Espresso tests are run on a device (either actual or virtual) so they more closely resemble the actual running system, but they are a lot slower to run.
Espresso test might execute some checks while the app is doing some operations in the background threads, due to which the test may have no much content to interact with, therefore it throws an exception.
While writing espresso test cases we should never use Thread.sleep(period) as this approach, we might end up having inflexible and slow tests.
Sometimes it may happen that test cases pass in Espresso but fail in Robolectric. Direct dependencies on Robolectric causes build failures when trying to build the test with Espresso.
In order to solve this in a clean and effective manner, we have created a TestCoroutineDispatchers using which we can provide test cases required delay weather on robolectric or espresso, both has its own implementation.
- TestCoroutineDispatchersEspressoImpl - Here, we are using the real-time-clock and hooking the idling resources to monitor background coroutines.
- TestCoroutineDispatchersRobolectricImpl - Here, we had implemented a way using which we can run test cases in a coordinated, deterministic, and thread-safe way.
Following are the different ways you can try to pass the test cases.
androidx.test.espresso.PerformException: Error performing 'single click' on view 'with id: org.oppia.app:id/profile_progress_list'.

Caused by: java.lang.RuntimeException: Action will not be performed because the target view does not match one or more of the following constraints:
at least 90 percent of the view's area is displayed to the user.-
Make ScrollView as a parent in XML file and use scrollTo() while performing click() in the test.
Example:
onView(withId(R.id.walkthrough_welcome_next_button)).perform(scrollTo(), click()) -
Sometimes the test is rejected on small screen devices. Use Robolectric
qualifiersproperty that sets up the Android simulation environment with a corresponding configuration. The system’s Configuration, Display and DisplayMetrics objects will all reflect the specified configuration, the locale will be set, and appropriate resources will be selected.Apply the
@Config(qualifiers = "port-xxhdpi")annotation to your test package/class/method reference. -
Along with the qualifiers, we are using our own application class rather than depending on the main application class which in our codebase is
OppiaApplication.@Config(application = ExplorationActivityTest.TestApplication::class) -
We can inject
TestCoroutineDispatchersand provide a delay as per the requirement.
 @Inject
  lateinit var testCoroutineDispatchers: TestCoroutineDispatchers
@Test
@Config(application = ProfileProgressActivityTest.TestApplication::class , qualifiers = "port-xxhdpi")
fun testProfileProgressActivity_recyclerViewIndex0_clickViewAll_opensRecentlyPlayedActivity() {
launch<ProfileProgressActivity>(createProfileProgressActivityIntent(internalProfileId)).use {
testCoroutineDispatchers.runCurrent()
onView(atPositionOnView(R.id.profile_progress_list, 0, R.id.view_all_text_view)).check(
matches(
withText("View All")
)
).perform(click())
intended(hasComponent(RecentlyPlayedActivity::class.java.name))
intended(
hasExtra(
RecentlyPlayedActivity.RECENTLY_PLAYED_ACTIVITY_INTERNAL_PROFILE_ID_KEY,
internalProfileId
)
)
}
}- Unlike on a real device, Robolectric shares a single thread for both UI operations and Test code. By default, Robolectric will execute tasks posted to Loopers synchronously inline. This causes Robolectric to execute tasks earlier than they would be on a real device.
-
Robolectric’s default behavior is to process posted code synchronously and immediately, so the assertion fails with [before, after, between], which is clearly incorrect.
-
Apply the LooperMode(PAUSED) annotation to your test package/class/method reference.
@LooperMode(LooperMode.Mode.PAUSED)
  @Test
  fun testAdministratorControlsFragment_clickOkButtonInLogoutDialog_opensProfileActivity() {
    ActivityScenario.launch<AdministratorControlsActivity>(createAdministratorControlsActivityIntent(0)).use {
      onView(withId(R.id.administrator_controls_list)).perform(scrollToPosition<RecyclerView.ViewHolder>(4))
      onView(withId(R.id.log_out_text_view)).perform(click())
      onView(withText(R.string.log_out_dialog_message)).inRoot(isDialog())
        .check(matches(isDisplayed()))
      onView(withText(R.string.log_out_dialog_okay_button)).perform(click())
      intended(hasComponent(ProfileActivity::class.java.name))
    }
}- Choosing the right matcher to check your view.
- The doesNotExist() view assertion checks if a view exists in the current view hierarchy.
onView(withId(R.id.made_up_view_id)).check(doesNotExist())- We may have to test if the view is Visible or Gone and if
isDisplayed()doesn't work, we make use ofwithEffectiveVisibility(ViewMatchers.Visibility.VISIBLE)). This matcher checks how the visibility of a view is set in the code.
onView(allOf(withId(R.id.ivPlayPauseAudio),withEffectiveVisibility(ViewMatchers.Visibility.VISIBLE)))