Working on UI
Oppia-Android app mocks have been prepared on AdobeXD and the mocks have a version associated with them which is displayed on the bottom right corner of the "SplashScreen" page in mocks. Before working on any UI issue make sure that you have latest link of the mock associated with that UI.
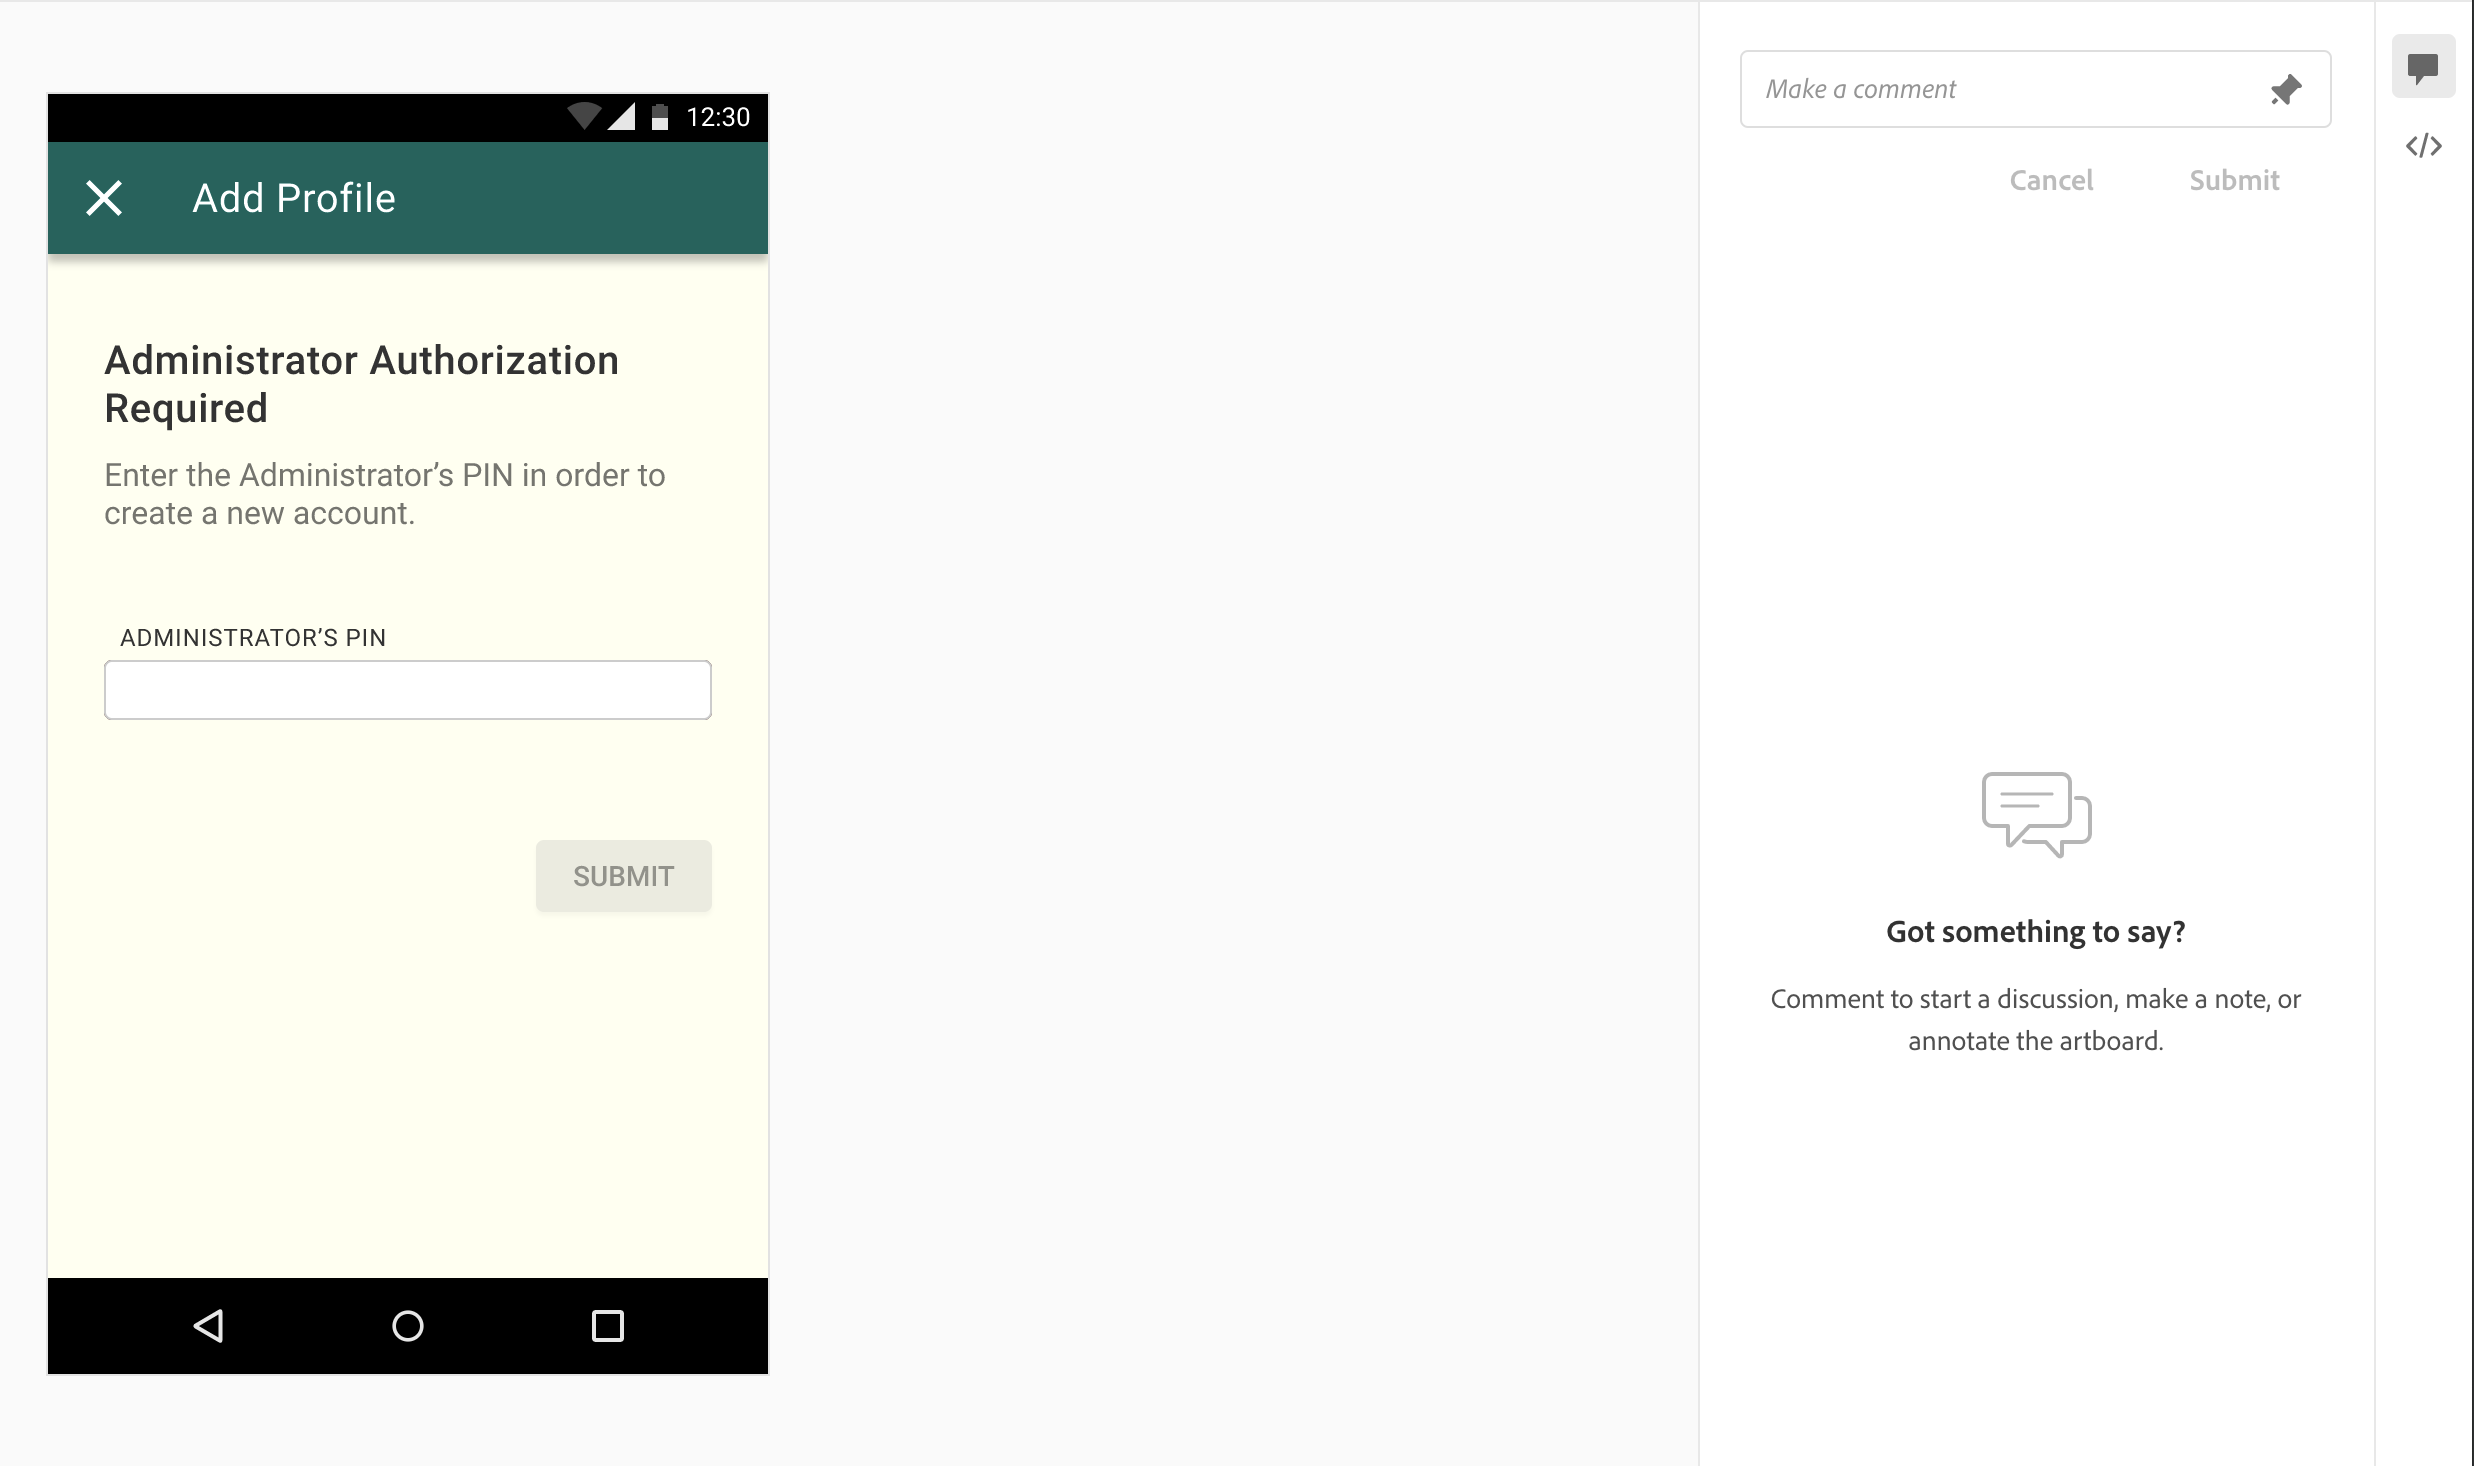
For understanding the mocks let's take one example. Open Admin Auth Mock Link
In the below image you can see that there are two icons on left side of the screen. First icon is for comment, using which you can comment on the mock and second icon is for screen details which provide detailed information about the UI.
Once you have selected the second icon, you will see a menu on right as below:
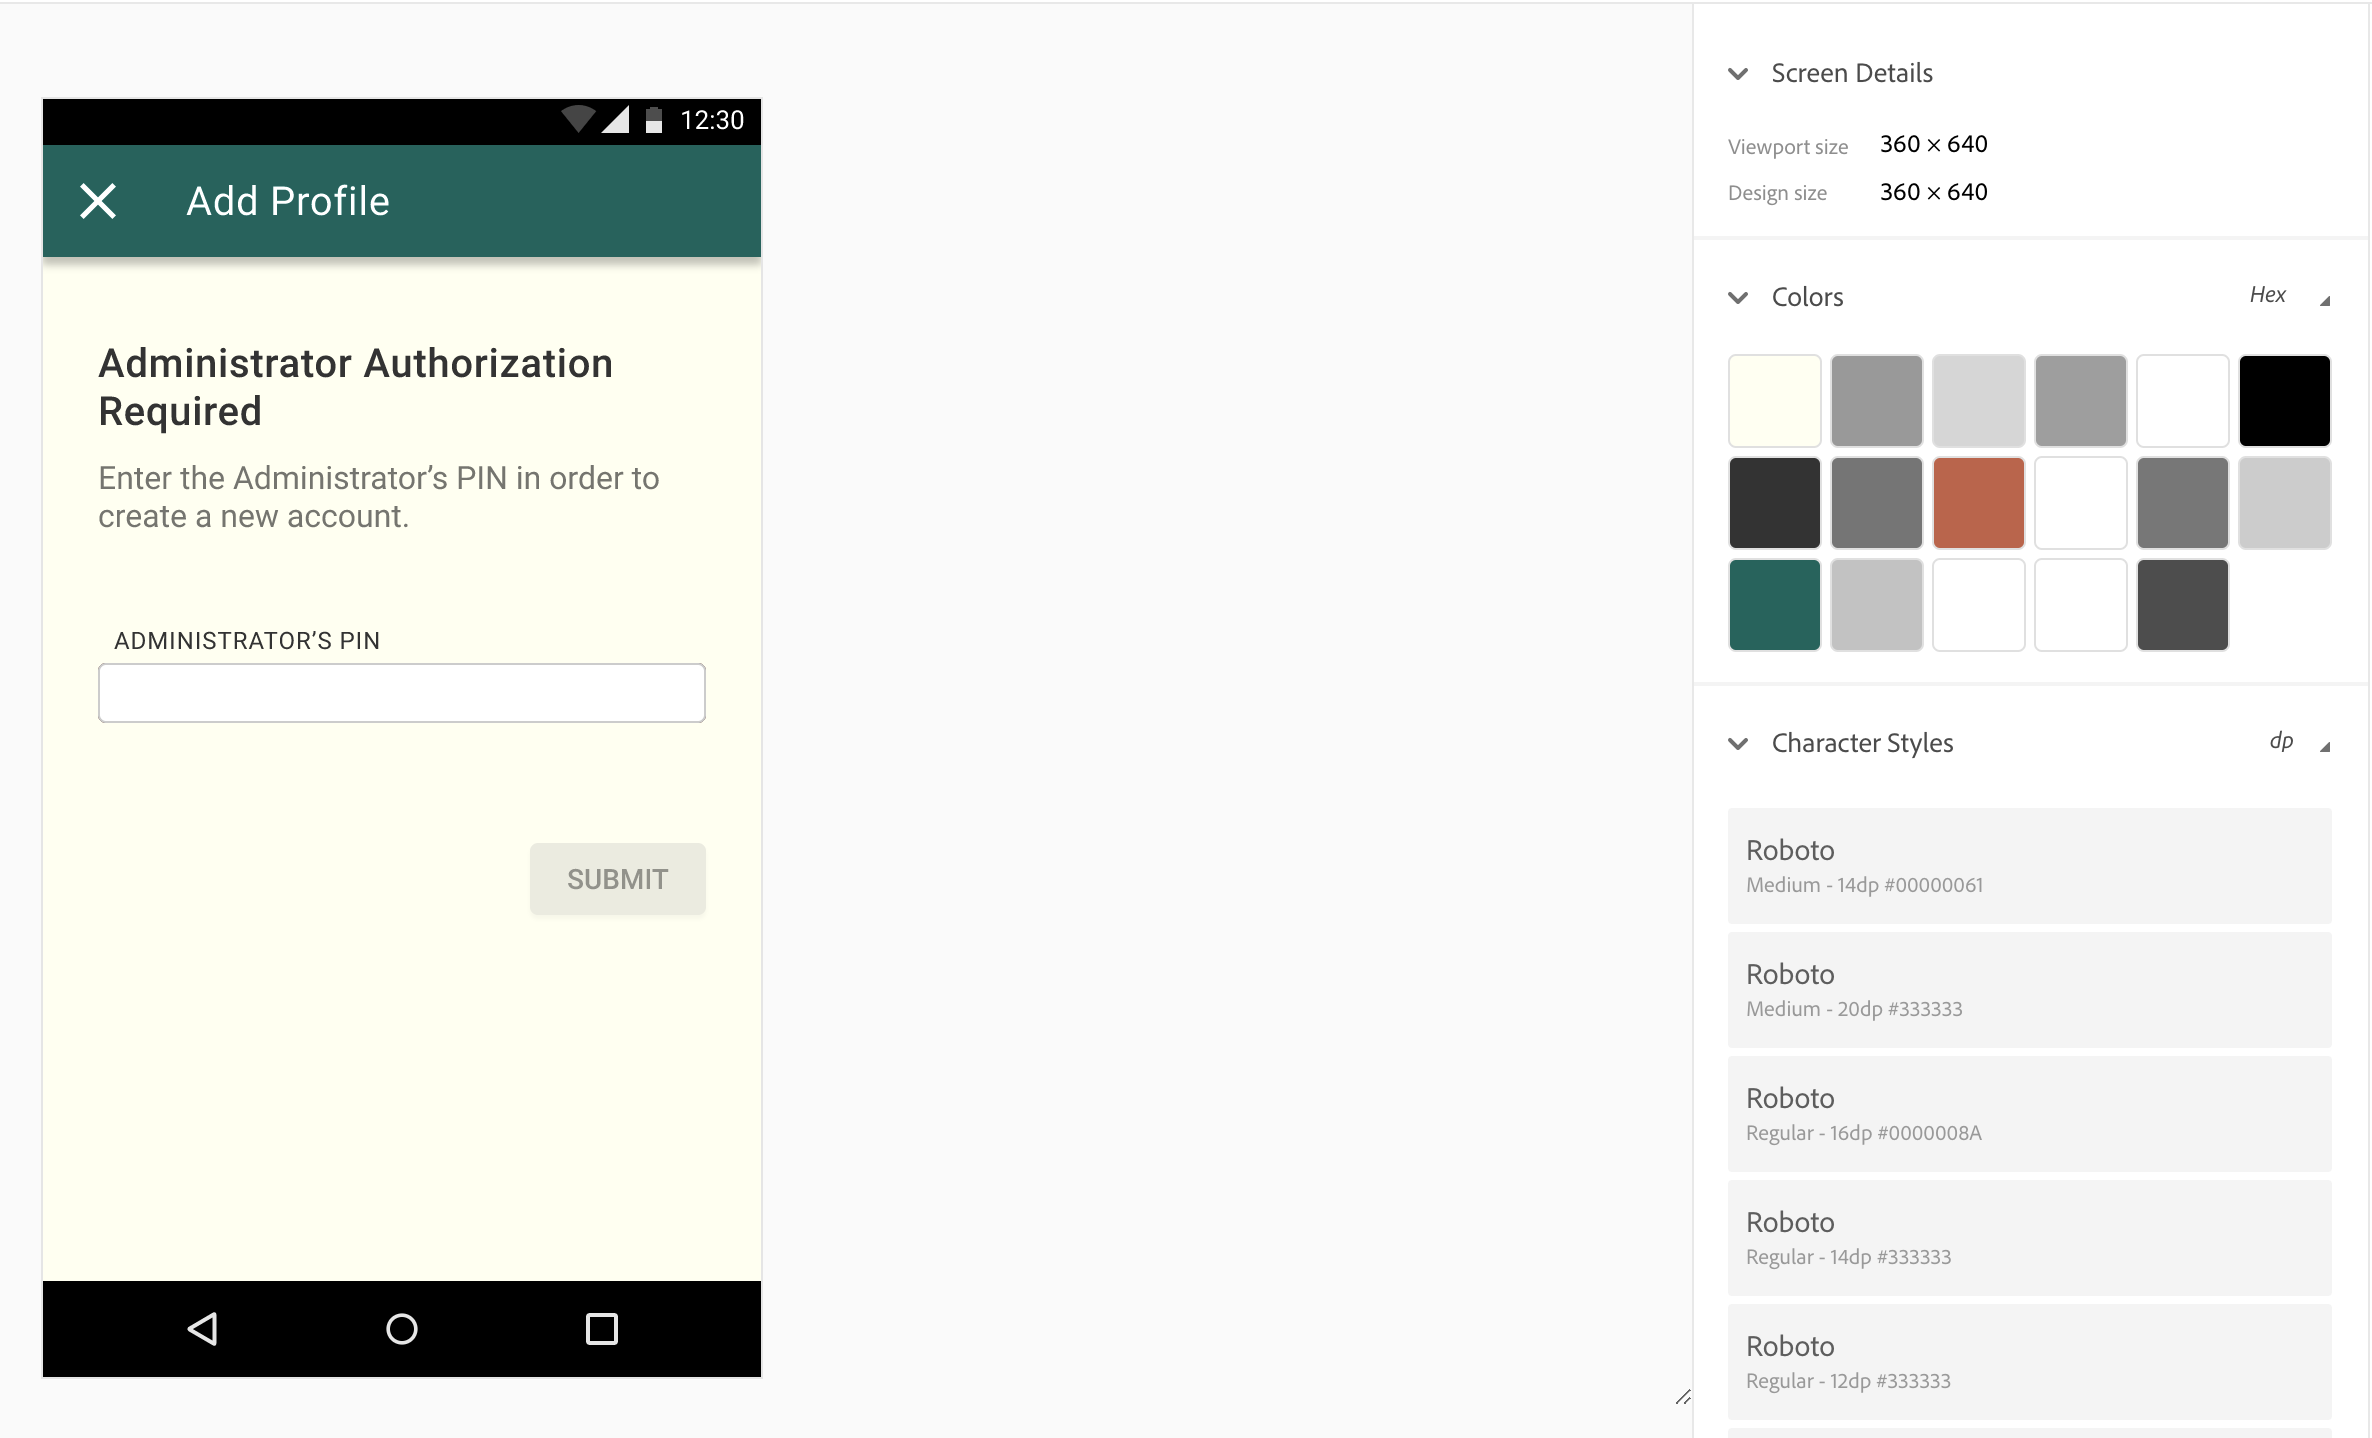
This menu contains details about the screen width, colors, fonts, etc. Also, please note that the screen width in the mocks is 360 px.
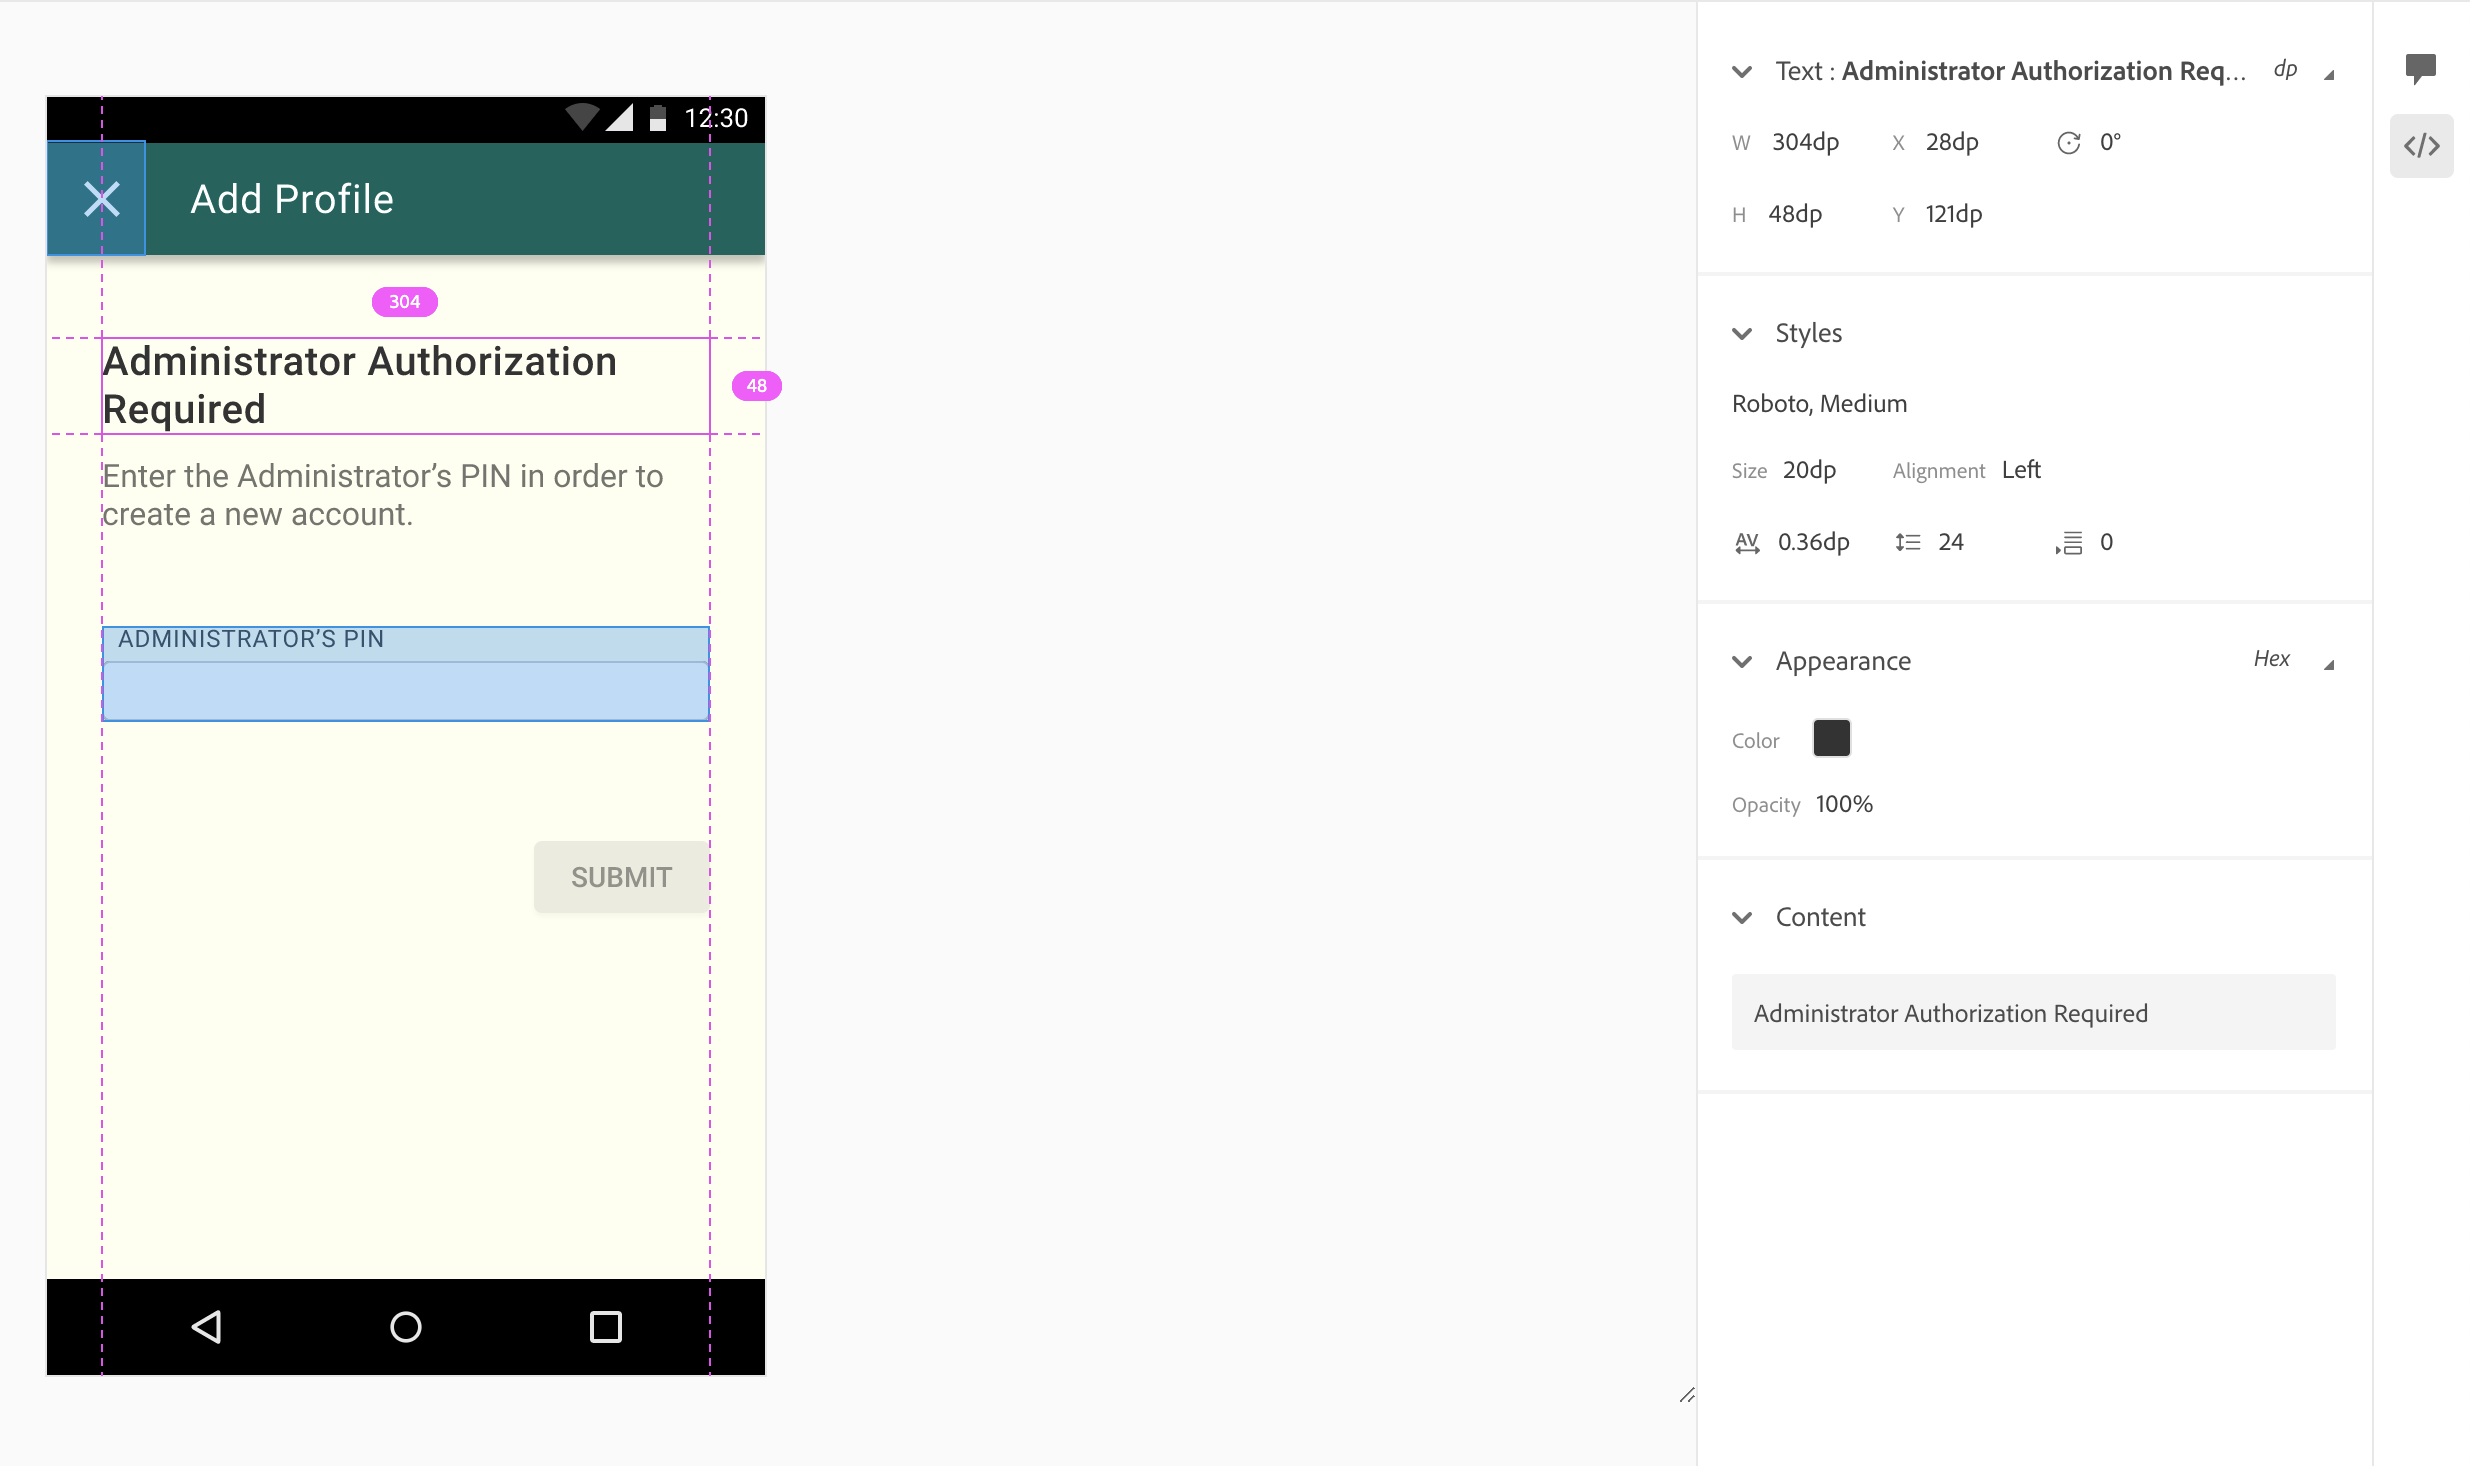
You can click on any item in mock to know more details about that view. For example, in image shown below you can see that as the Administrator Authorization Required text is selected, the right side menu displays properties of the textview like font, size, color, transparency, etc. Also, the pink color lines/values in mock displays the margin/padding of that item with respect to other items which helps to set margin/padding in android code.
Mocks uses Roboto fonts which are similar to sans-serif font in the android code. For example, if mock show font-style as Roboto, Medium, then android code for that would be android:fontFamily="sans-serif-medium"
Mocks might contain padding values like 32.5px or 15px but make sure that you use padding/margin and view dimensions in multiple of 4 in android. So 32.5px will get converted to 32dp and 15px will get converted to 16dp.
Before introducing any new color code in android check if that color code is already present in the colors.xml file or not. Also, 8-character hex code on mocks uses RGBA convention and 8-character hex code in android is written as ARGB where A means alpha/transparency and R, G, B stands for red, green, blue color respectively.
For example, if mock contains #33445566 then in this last two characters are for transparency and first siz are for RGB. So in android it will be written as #66334455.
Do not forget to check the opacity value in mocks. For example you find Opacity value 20% then in that case you can follow two approaches to use that in code:
- Use
android:alpha="0.2"which means 20% opacity in android. - Add two more characters at the start of color code of that view, for example if the item color code was
#999999with 20% opacity value then the color code for that will be#33999999. Check this link for converting percentage to hex value.
Currently, we are using blur effect only over the locked chapters of an exploration. So if the mock item does have a blur value then in that case optimise the android code in such a way that it does look almost like the mock without using the blur effect.
ImageView in android code uses aspect ratio of 4:3 or 16:9 mostly, though in some special cases it can be different. So based on the dimensions in mock, calculate the aspect ratio (we can calculate that by getting the width and height from UI and just calculate the ratio which becomes the aspect ratio) and use it accordingly in the code.
Almost in all scrollable screens there is bottom margin, make sure that your mock includes that as per mock.
In all textviews, make sure that proper android:maxLines and android:ellipsize values are introduced.
For UI testing you can do the following things:
For this, you can turn on the Show Layout Bounds in your mobile Settings/Developer Mode. This helps mainly in identifying the boundaries of items and to check if there is any overlapping between the items.
Accessibility Scanner can help you identify opportunities to improve your app for users.
Accessibility Scanner scans your screen and provides suggestions to improve the accessibility of your app, based on the following:
- Content labels
- Touch target size
- Clickable items
- Text and image contrast
You can know more about Accessibility in Oppia-Android here