Release testing instructions for WC Payments 4.1.0
A new payment method ( Stripe Link, this link might not be available for everyone but it's not necessary to follow the testing instructions below ) is added.
In admin panel, WooCommerce Payments -> Express checkout we need to add an option to enable Stripe Link Payment method.

Testing instructions
- go to
WooCommerce Payments - If
Enable the new WooCommerce Payments checkout experienceandEnable in your storebutton shows on, enable one of the additional payment method. - check Credit card payment method -> Link payment method should be shown under express checkout section
- uncheck Credit card payment method -> Link payment method should NOT be shown under express checkout section
- enable Link payment method
- create an order, go to checkout page and complete all checkout fields. Select also 1click payment under credit card fields
- finish the order
- create another order, go to checkout page and complete the email
- a pop-up should be shown to type the pin ( 0 0 0 0 0 0 for tests )
- all checkout billing fields should be completed
- the order should be completed without errors
- check transaction list and transaction details page. The Link icon should be displayed as payment method.

Note: The link payment method type only supports USD currency.
Some merchants need an invoice for the processing fees we charge them for using our platform, even if we don’t collect taxes on them. Stripe doesn’t offer these invoices for express accounts, so we want to enable merchants to download such invoices without our manual intervention.
To do so, we have added a new Documents page in WooCommerce Payments — which allows merchants to be notified of and access platform-generated documents —, and the actual VAT invoices — which include the merchant's tax-related data, and the fee data based on the transactions they processed.
Both of these features are only enabled for merchants from Austria, Belgium, Switzerland, Germany, Spain, France, the UK, Ireland, Italy, Netherlands, Poland, and Portugal.
Before running the tests outlined here:
- Make sure you are using an account from one of the countries listed above
- Reach out to @shendz and request an invoice to be created for your account. Please include your Stripe account ID in the request
- Check that a new "Documents" link is available under the "Payments" menu
- If using an account from a country other than the listed above, make sure the menu is not displayed and switch to an account from a supported country
- Click on that link and make sure the Documents page is loaded
- If your invoice hasn't been created yet, you should see a "No data to display" notice
- If your invoice has already been created, you should see it listed in this page
- Check that its type is "VAT Invoice" and its description is "VAT invoice for May 1, 2022 to May 31, 2022"
- Select the "Advanced filters" option under the "Show" dropdown
- Make sure the "Date" and "Type" filters are working correctly
- Once your invoice is created, go to the "Documents" page
- Click on the "Download" link next to the invoice
- Make sure a "VAT details" modal opens up with a form
- Click on the "I’m registered for a VAT number" checkbox and check that a new input shows up with the country prefix already filled
- Provide an invalid VAT number, like 1234567890, and click on "Continue"
- Make sure the "The provided VAT number failed validation" error message is displayed
- Update the VAT number to a valid one and click on "Continue"
- Here's some valid VAT numbers for some countries:
- GB: 177596254 (VIRGIN GALACTIC LTD)
- IE: 6388047V (GOOGLE IRELAND LIMITED)
- CH: 116.281.710 MWST (Groupe TVA, Nestlé S.A.)
- FR: 92542014428 (SAS NESTLE FRANCE)
- Here's some valid VAT numbers for some countries:
- Check that the first step of the form was completed, and the second step has "Business name" and "Address" pre-filled with the information from the VAT number provided
- Some countries, like Switzerland, do not provide the company name and address as part of the VAT check. In such cases the fields on the second step should be blank
- Provide a "Business name" and "Address" and click on "Confirm"
- If the form had some pre-filled values, feel free to edit or keep them
- Once this form is submitted, all invoices will be generated with the values provided here. It's not possible to resubmit the VAT details for an account
- Make sure the modal closes after the form is submitted, and a new tab opens with the invoice
- Check that the invoice tab automatically opens the print dialog
- Save the invoice as PDF and check that it matches the example below
- Depending on the browser, the invoice may have a header or footer, which can usually be disabled on the print dialog before saving the file
- If no transactions have been processed for your account, you should see a "No transactions were processed during this period" message in the invoice instead of the values in the example
- If transactions have been settled in multiple currencies, the invoice should list one line item and total per currency
- Make sure that the information provided in the "VAT details" form is used in the invoice under "Provided to"
Example invoice

- After going through the previous steps, close the invoice tab
- Click on the "Download" button for the invoice and make sure it opens without asking for the VAT details
- Close the invoice tab again, and refresh the "Documents" page
- Click on the "Download" button for the invoice and make sure it opens without asking for the VAT details
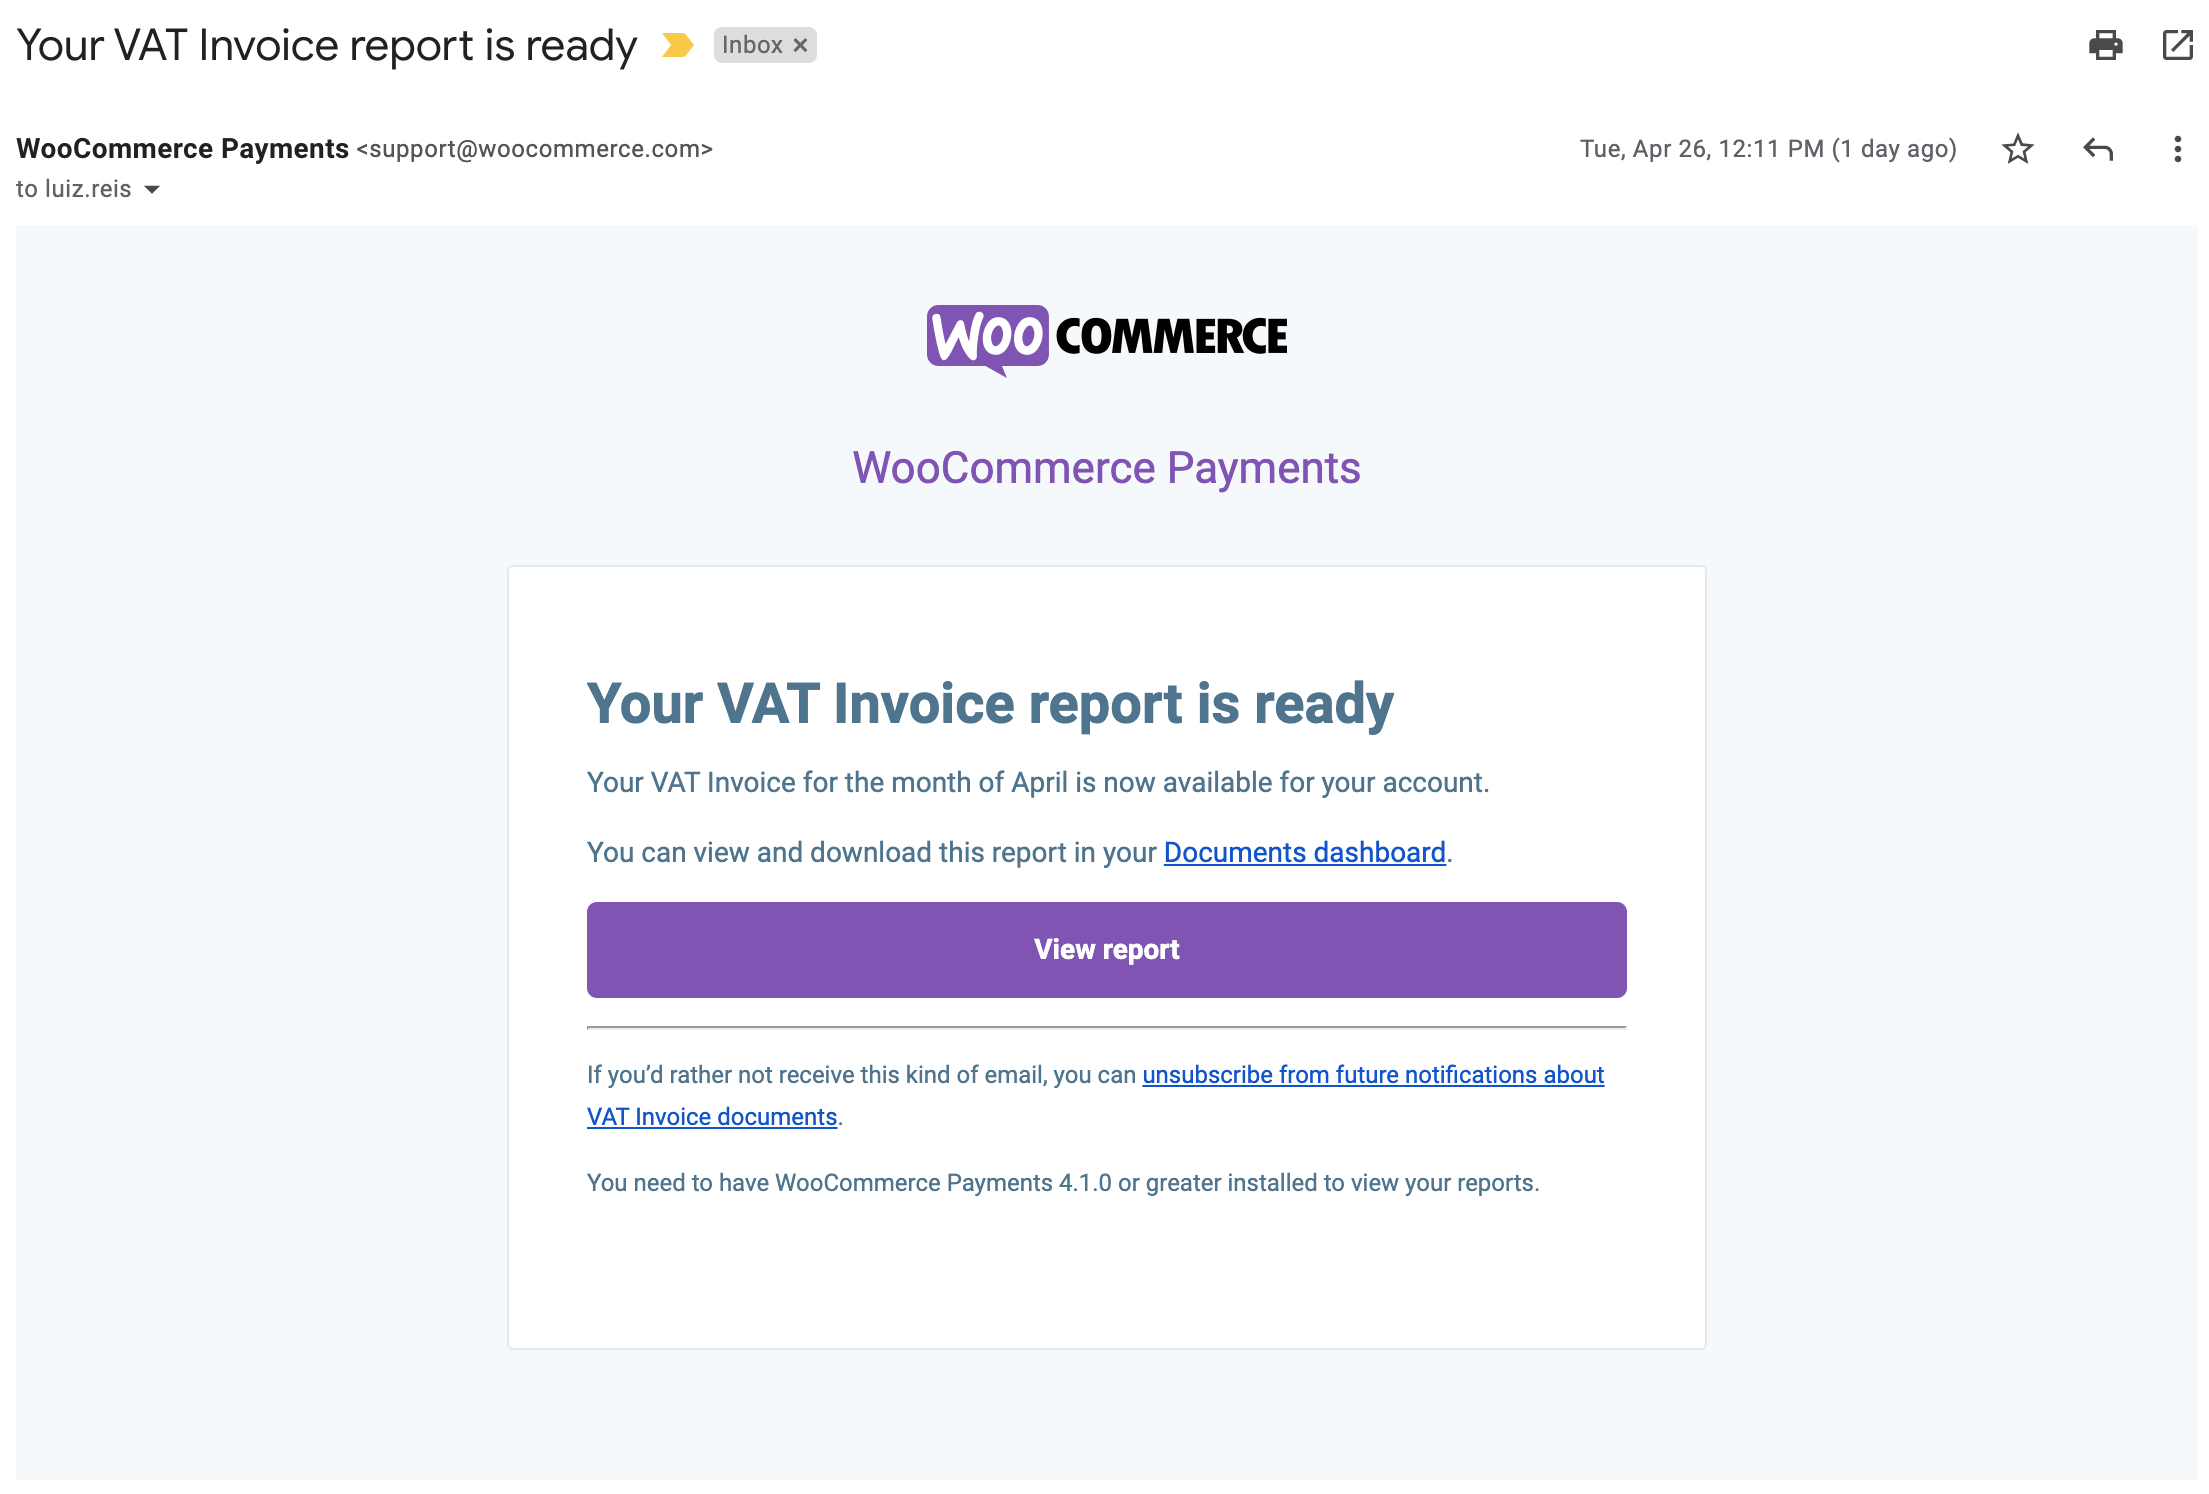
- Once your invoice has been created, you should receive an email notifying you about it
- Open that email and check that it matches the template and copy provided below
- Click on the "Documents dashboard" link from the email and make sure it takes you to the "Document" page
- Click on the "View report" button and make sure the invoice is generated
- Click on the "unsubscribe from future notifications about VAT Invoice documents" link and make sure you've been unsubscribed successfully
- After unsubscribing, ask @shendz to create another invoice for your account and make sure you receive no emails about it
- Check that the new invoice shows up in the "Documents" page
Example notification
- Enable UPE checkout using Dev Tools.
- Add any product to cart and go to Classic Checkout.
- Confirm that fonts & input element styles on the checkout page matches the UPE payment form. (Refer screenshots section below)
- Try changing the theme to a different one and confirm that the new styles are added to the UPE payment form. (Refer screenshots section below)
- Enable UPE checkout using Dev Tools.
- Install
WooCommerce Blocksand setup a page for Block Checkout. - Add any product to cart and go to Block Checkout.
- Confirm that fonts & input element styles on the block checkout page matches the UPE payment form. (Refer screenshots section below)
- Try changing the theme to a different one and confirm that the new styles are added to the block checkout UPE payment form. (Refer screenshots section below)
We are removing Stripe specific branding options from the Card Readers page.
- Go to Payments > Card Readers > Receipt Details
- Check that the icon upload and color picker controllers are no longer present
- Check that the text below Branding section is updated.
- Check that settings can be updated/saved without errors
