Release testing instructions for WC Payments 5.4.0
Fix TOS acceptance can prevent saving settings or accessing the account dashboard PR #5414
Currently, if the merchant leaves the Stripe KYC immediately (before entering their phone number and 2FA, selecting country), they are not able to get back to the payments connect page, save their settings and complete the onboarding by generating a new link using the Update WooCommerce Payments business details task. See screenshots and steps to reproduce here.
This PR is aimed at allowing our merchants to finish the Stripe KYC if they have left it immediately (before entering their phone number and 2FA, selecting country). This is done by treating those customers as new and navigating them to the connect page if they have left the onboarding immediately.
- Navigate to the payments connect page (WP Admin > Payments). Verify it can be opened and click Finish Setup.
- Right after Stripe KYC starts, write down / memorize the stripe account id (we'll need it to compare during the next steps). Leave the onboarding immediately by clicking "Back" in the browser (and refresh the page).
- You should get back to the payments connect page again. Click Finish Setup and verify that it's the same Stripe account.
- Now enter your phone, pass 2FA and select a country. Click continue and leave the onboarding.
- Verify you are able to open the payments overview page.
- Verify you can generate a login link by clicking Update near the
Update WooCommerce Payments business detailstask. The Stripe Express dashboard should open. - Verify you can save account settings in WP Admin > Payments > Settings (after setting up the customer bank statement).
- Update all the details in Stripe Express and verify that account can accept payments and support deposits (account status is complete).
- Check happy path without leaving the Stripe KYC: onboard one more Stripe account, but now don't leave the Stripe KYC, fill it out successfully, and check that the account status is complete.
- Enable
Allow SwitchingandEarly Renewalin WooCommerce Subscriptions settings. - Create three simple subscriptions: free, $100, and $200 USD.
- Create a grouped product and include these three products under
Linked products > grouped products. This allows switching between the subscriptions.
- Place an order in USD for the free subscription.
- Go to My account → Subscription, open your new subscription, and click on
Upgrade or Downgrade. This will take you to the grouped product page where you can select a new plan. - On the plan selection page, choose a paid subscription.
- Complete the checkout.
- It should work without any issue.
- Place an order in USD for the $100 subscription.
- Go to My account → Subscription, open your new subscription, and click on
Upgrade or Downgrade. This will take you to the grouped product page where you can select a new plan. - On the plan selection page, choose the $200 subscription.
- Complete the checkout.
- It should work without any issue.
- Place an order in INR for the $200 USD subscription using card
4000003560000123. - Wait a minute for the mandate to be active.
- Go to WooCommerce → Status → Scheduled Actions → Pending and filter by
woocommerce_scheduled_subscription_payment. - Run the hook where subscription_id matches the subscription you have just created.
- Wait patiently for Stripe webhook 🕙 (~10 min).
- The renewal order notes should match:

- On a new store which doesn't have a WC Payments account yet, ensure that dev mode is enabled.
- Start the onboarding by clicking
Paymentson the WC Admin menu, thenFinish Setup. - You should be redirected to Stripe. Create a new US account using test data. When prompted for the address, enter the following value into the address fields (make sure to use the exact values, or this won't work):
Line 1: address_no_match
Line 2:
City: New York
State: New York
ZIP: 10001
- Finish the account setup. After it is done, you will be redirected back to WCPay.
- Go to
Payments > Settingsand change the "Customer Bank Statement" field (it doesn't matter what you change it to), then clickSave Changes. - Go to
Payments > Overview, and you should see a task item similar to the following:
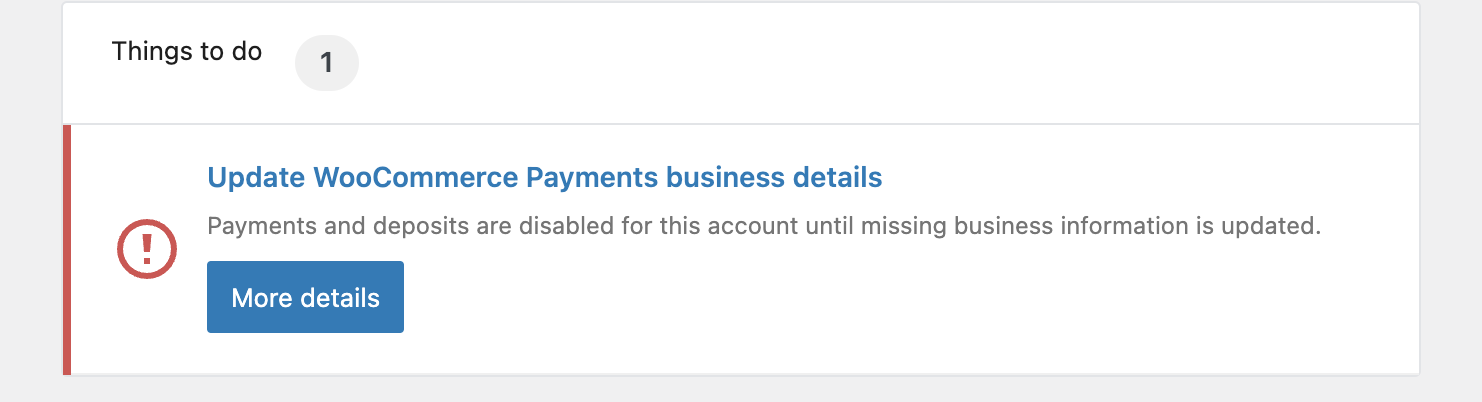
- Clicking `More Details will open a modal that looks like this:
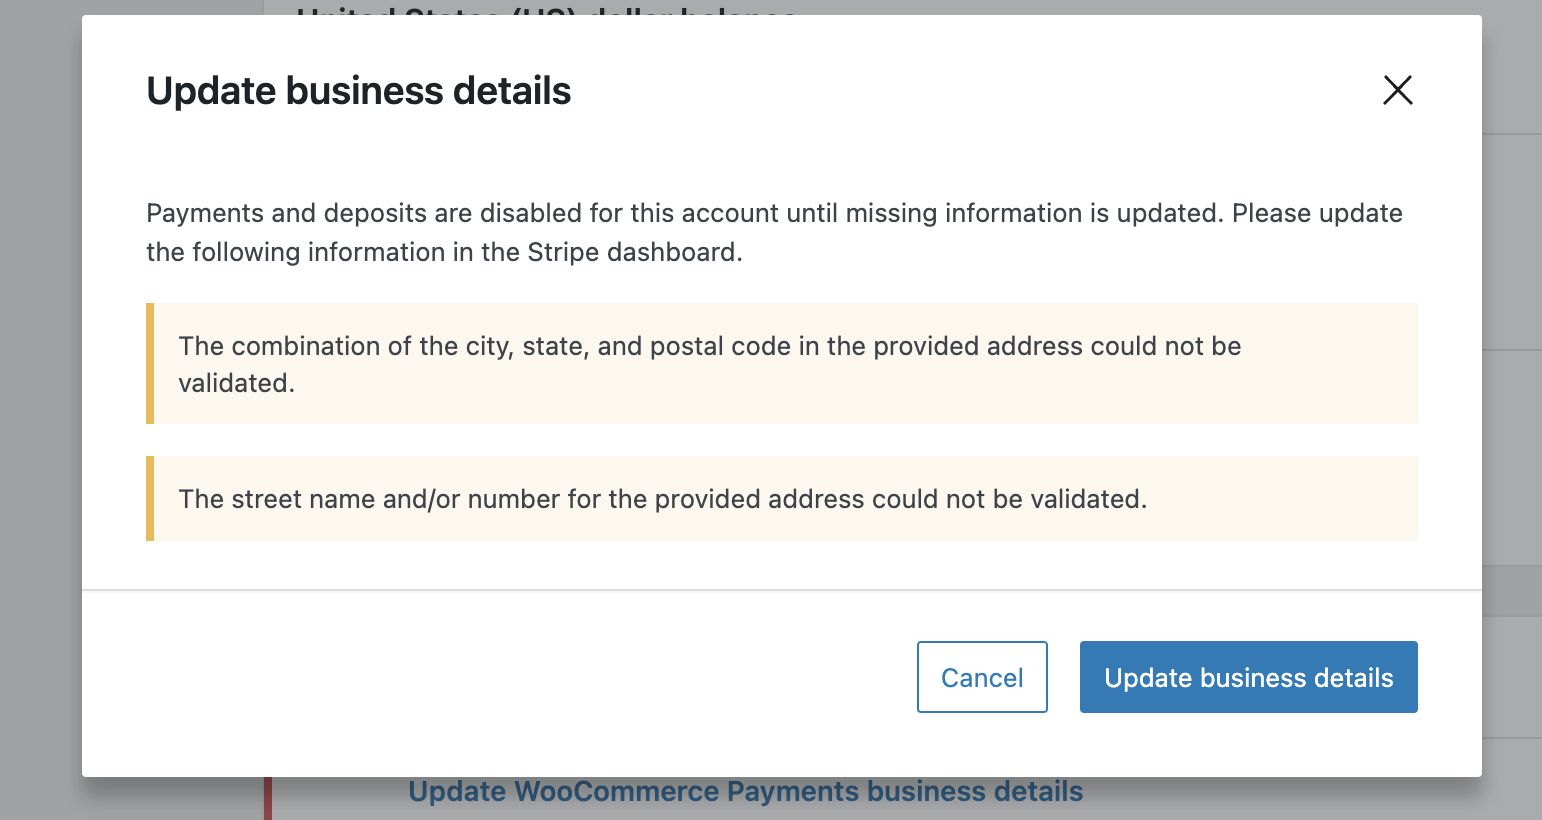
- Clicking
Update business detailswill take you to the Stripe Express dashboard.
The goal of this change is to add order notes and logging when subscriptions are suspended. We've had reports of subscriptions being suspended unexpectedly. The order note is visible to administrators on the subscription page.
- Ensure WC Subscriptions is not active.
- Ensure WCPay Subscriptions (built-in feature) is active and enabled.
- Set up a simple subscription product.
- For detailed info on enabling WCPay Subscriptions and creating a product, refer to critical flows.
- Purchase a subscription.
- Go to
WooCommerce > Subscriptionsand find the subscription just purchased above. -
Hover over the subscription
Statuscolumn and click theSuspendbutton.
- Click the subscription ID number in the
Subscriptioncolumn. - You should now be viewing the subscription edit/detail page.
- Scroll down and view the
Subscription notesbox on the right. - There should be an order note with message
Suspended WCPay Subscription because subscription status changed to on-hold.

- Navigate to
WooCommerce > Status. - Click
Logstab. - Review the most recent recent log file (you can select different log files with the dropdown menu on right).
- The log should contain a message
Suspended WCPay Subscription because subscription status changed to on-hold.with more details.

